Cómo coser un patrón de costura de cinturón para falda de cola
Saltar a instrucciones
Descripción general
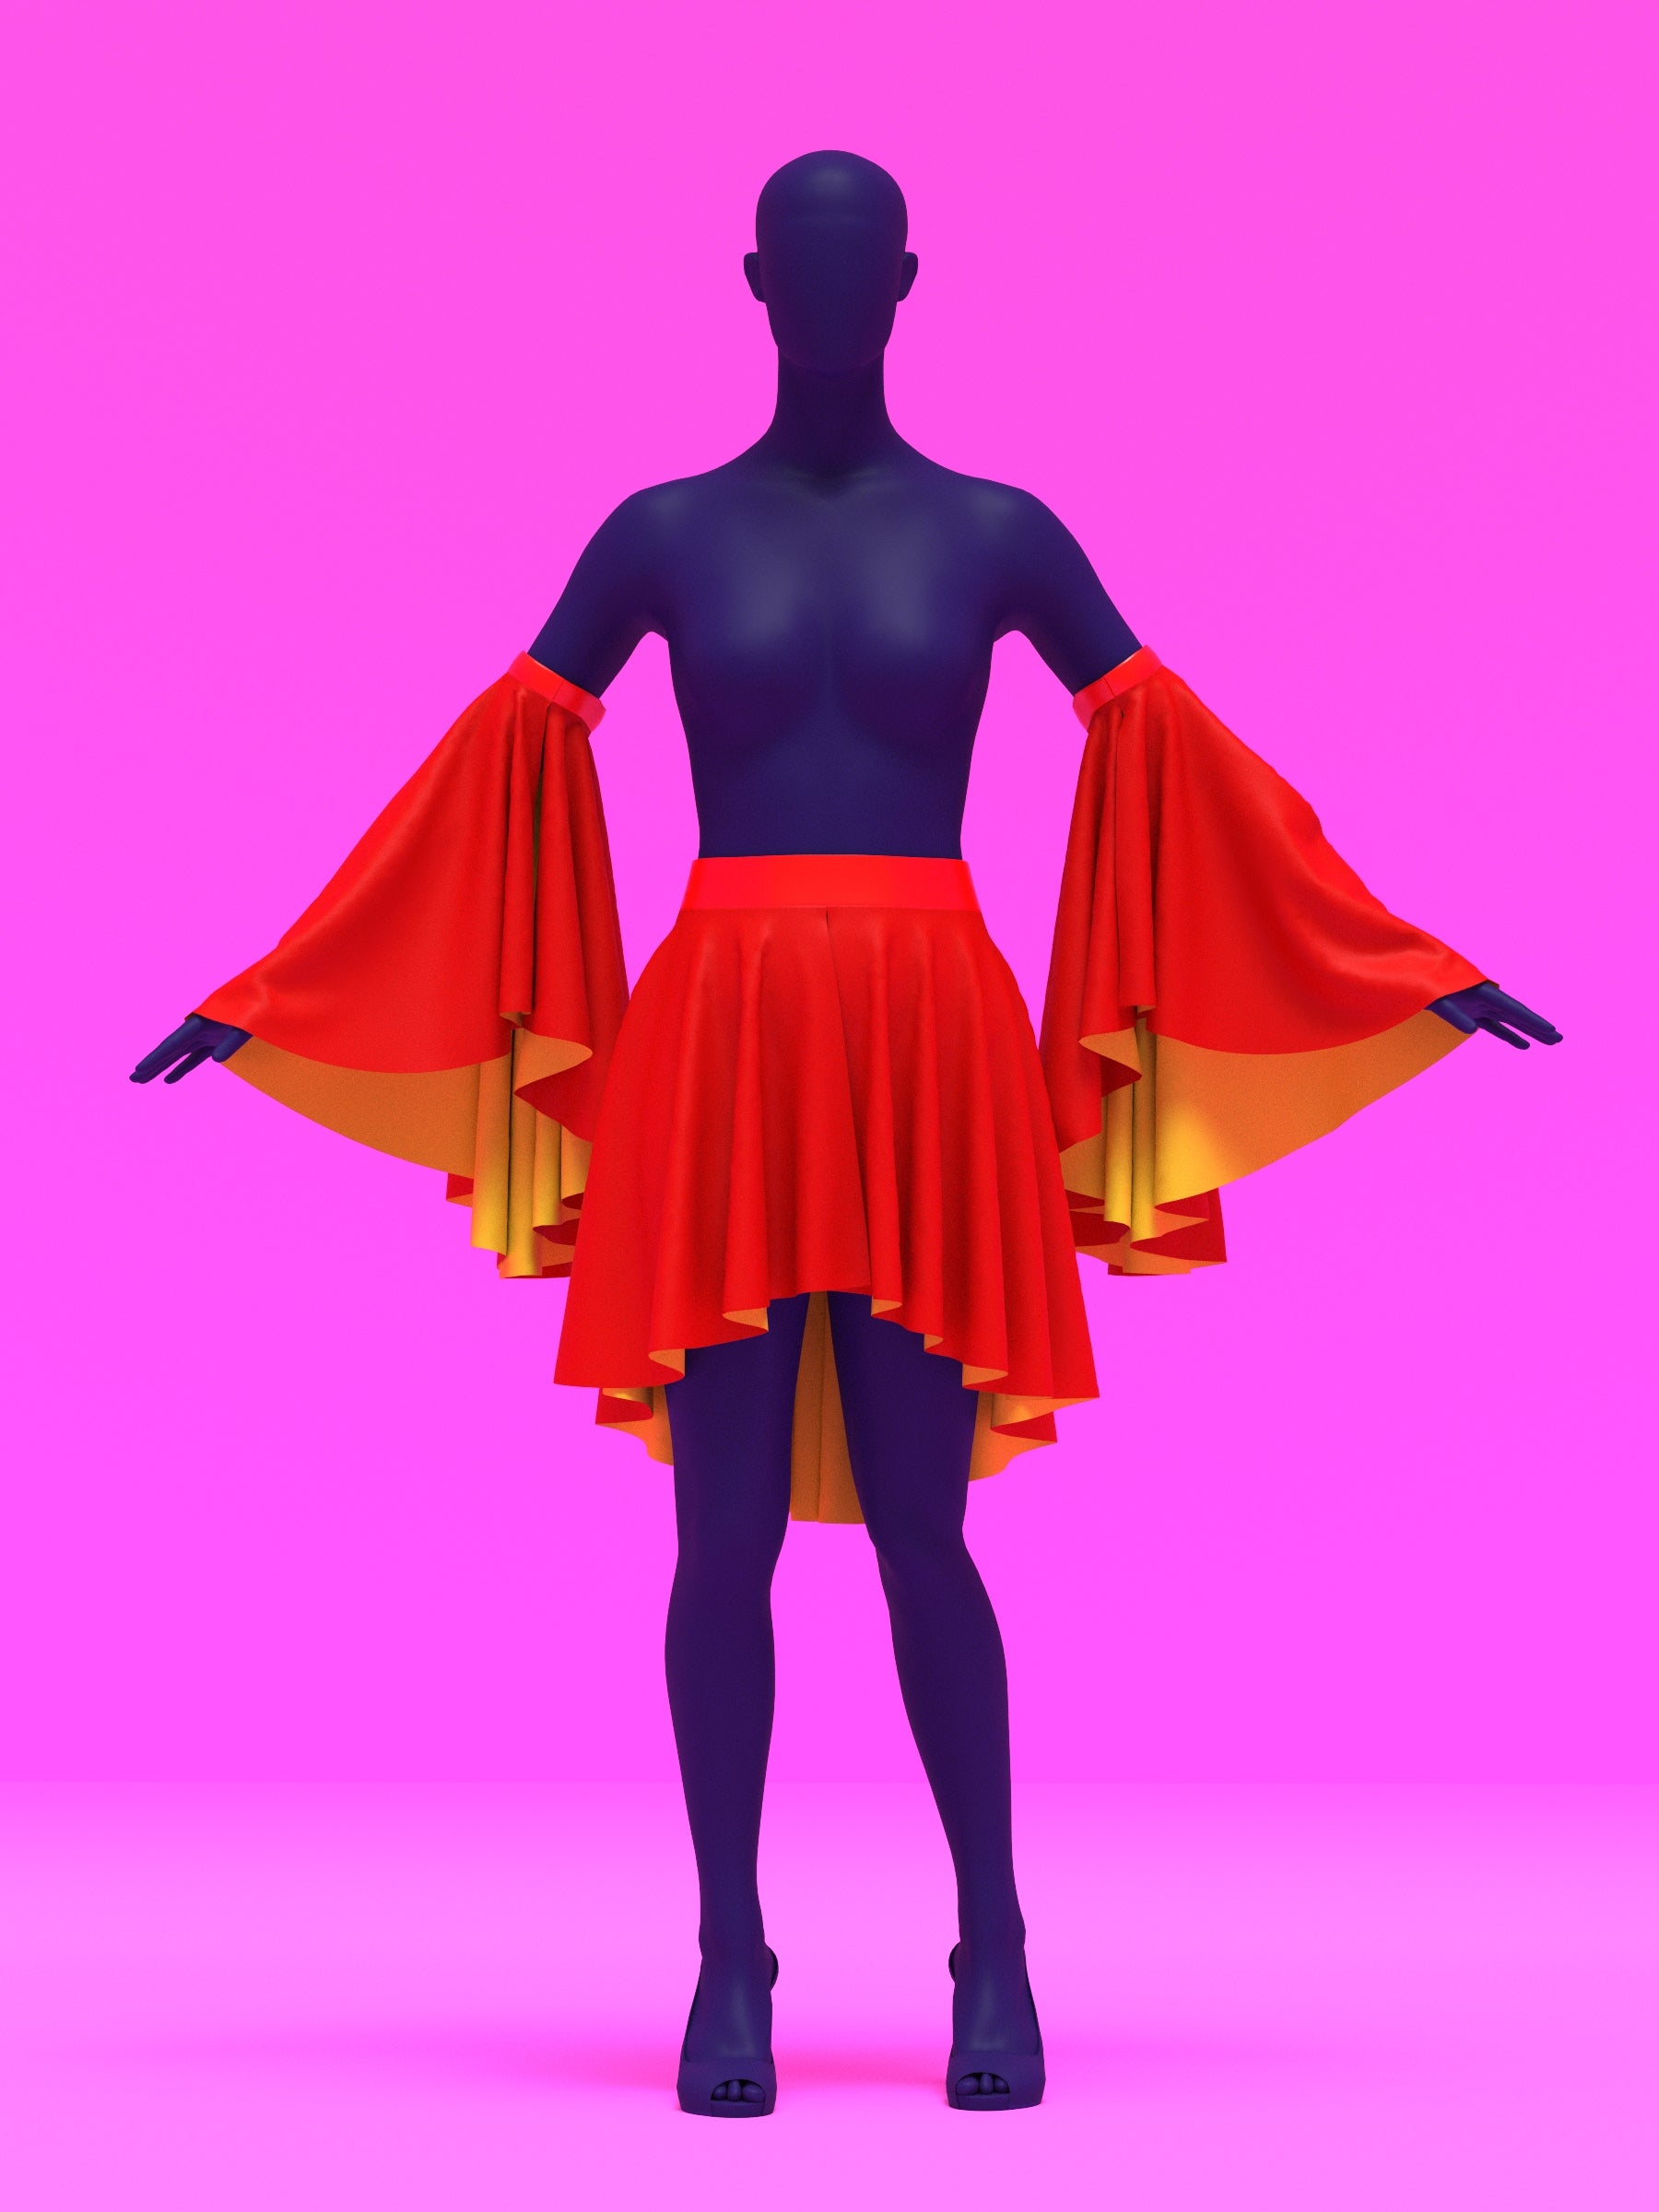
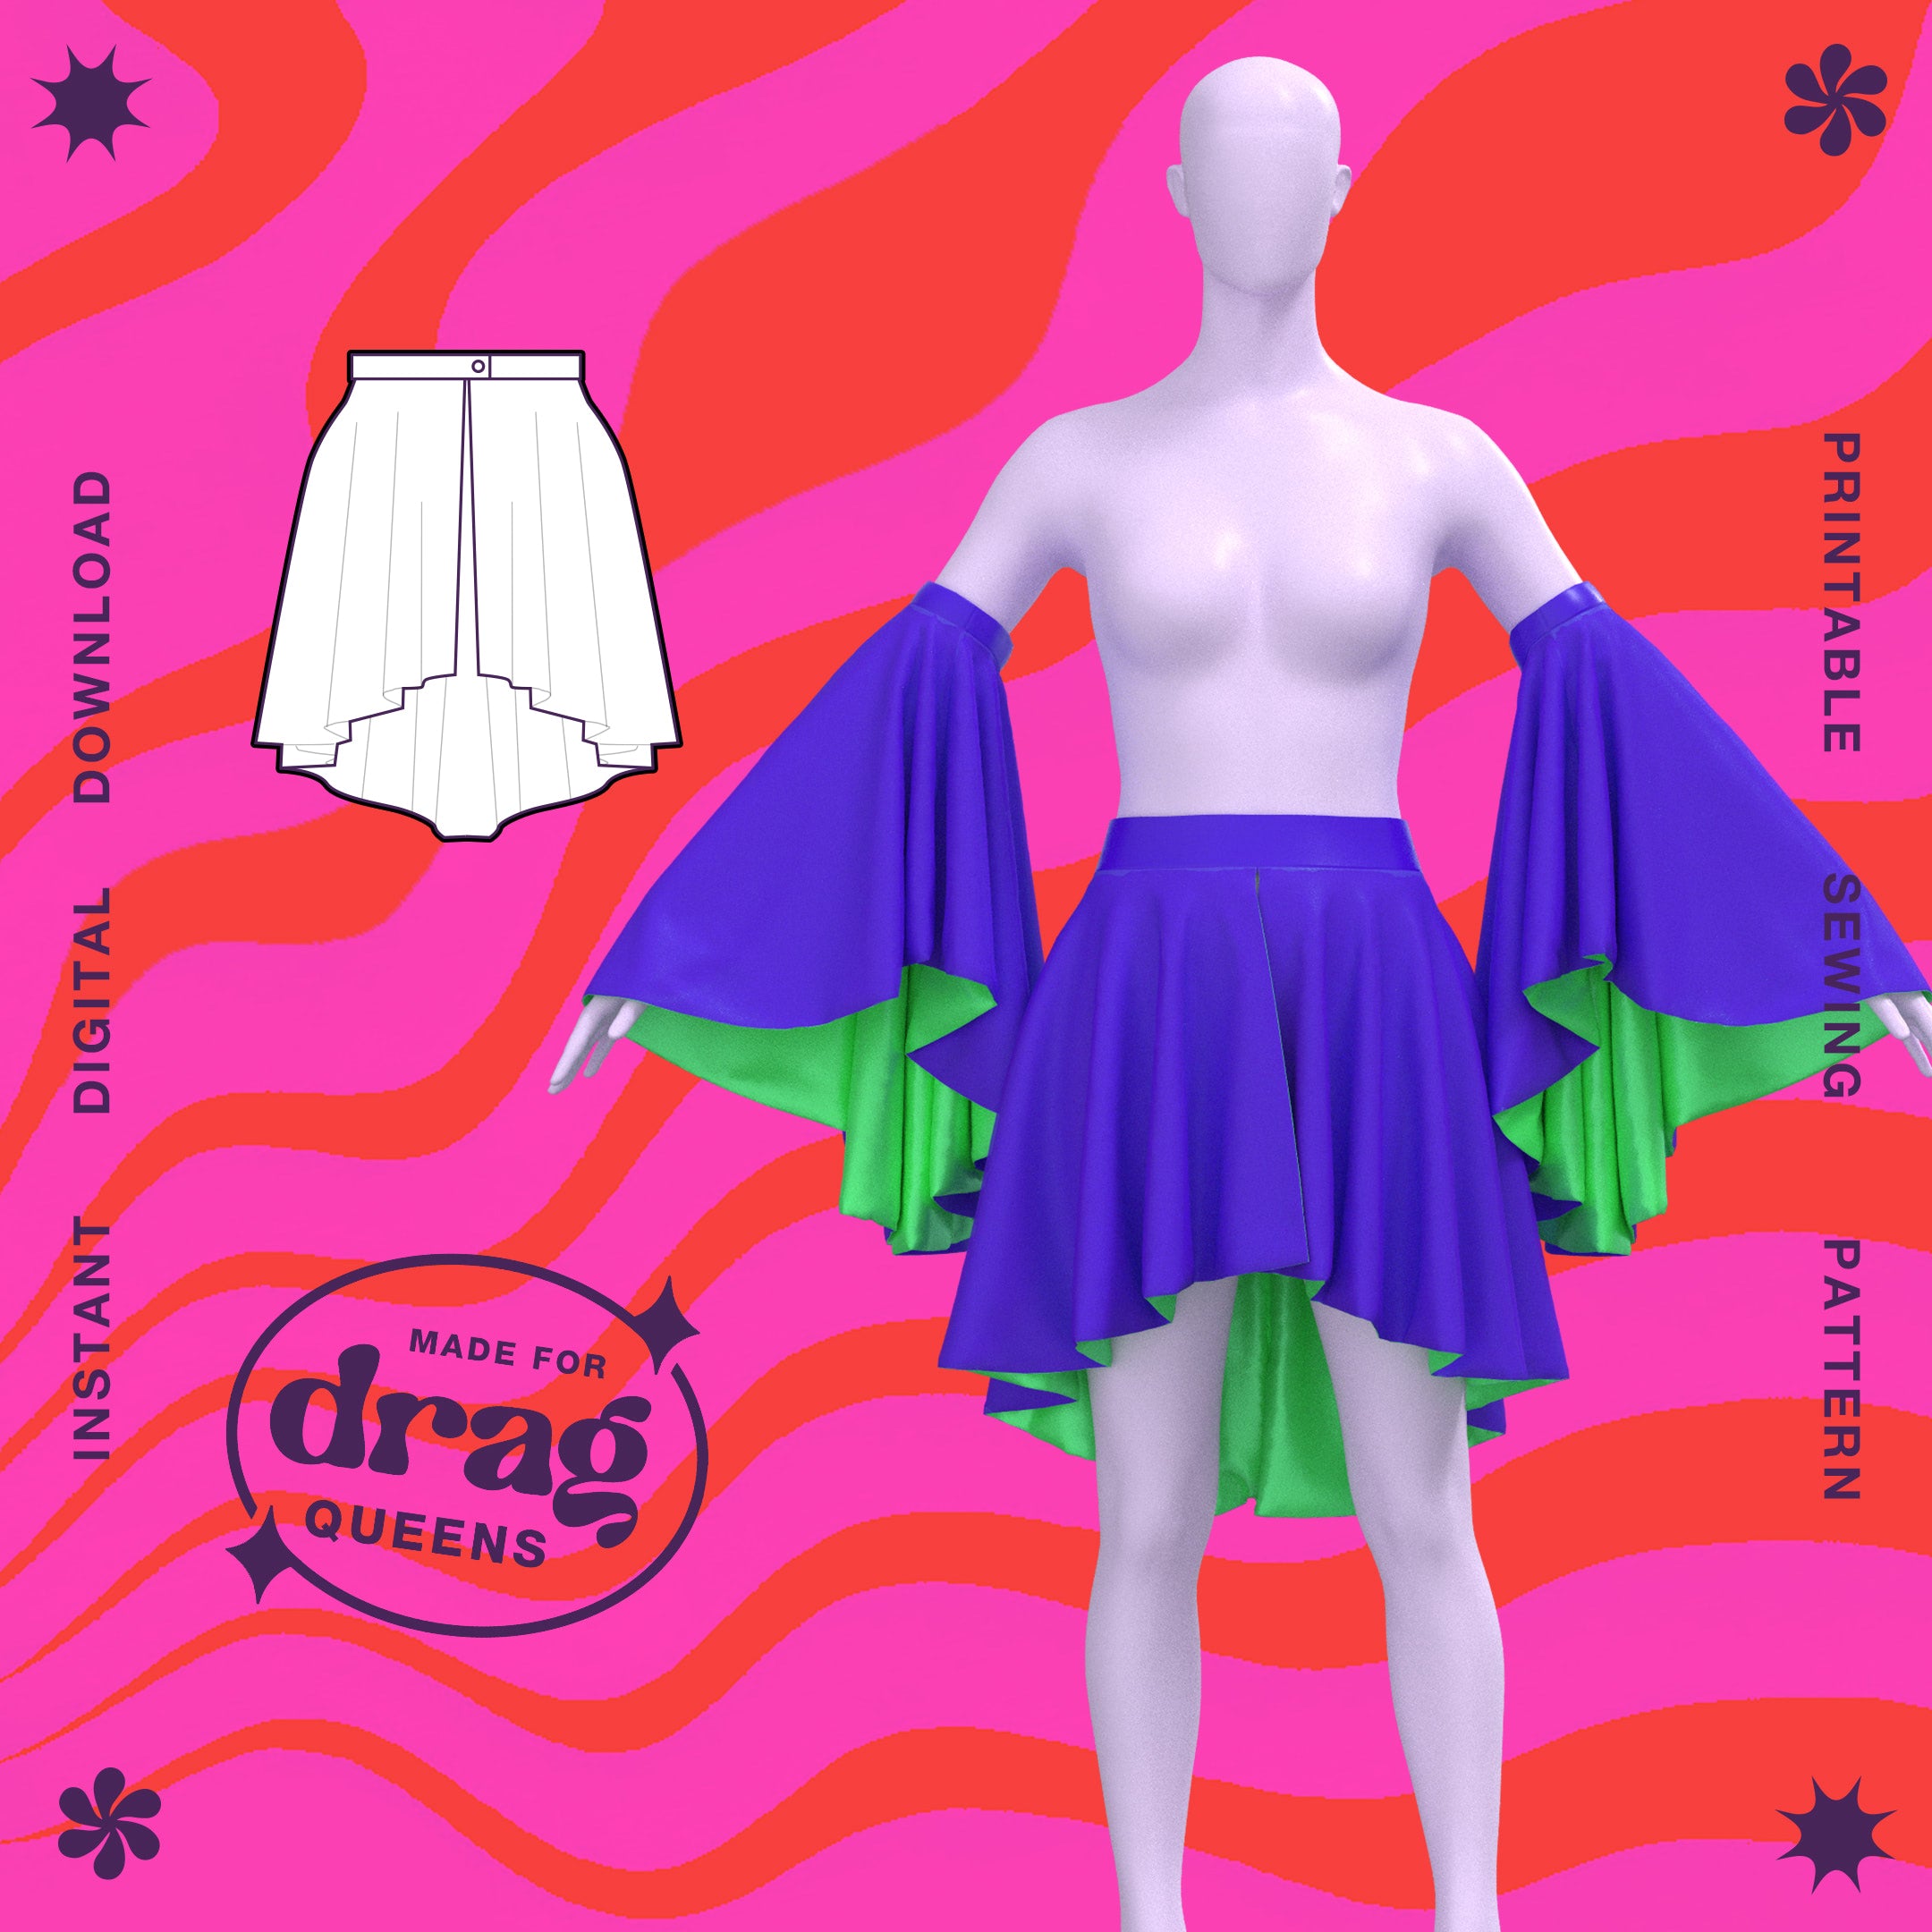
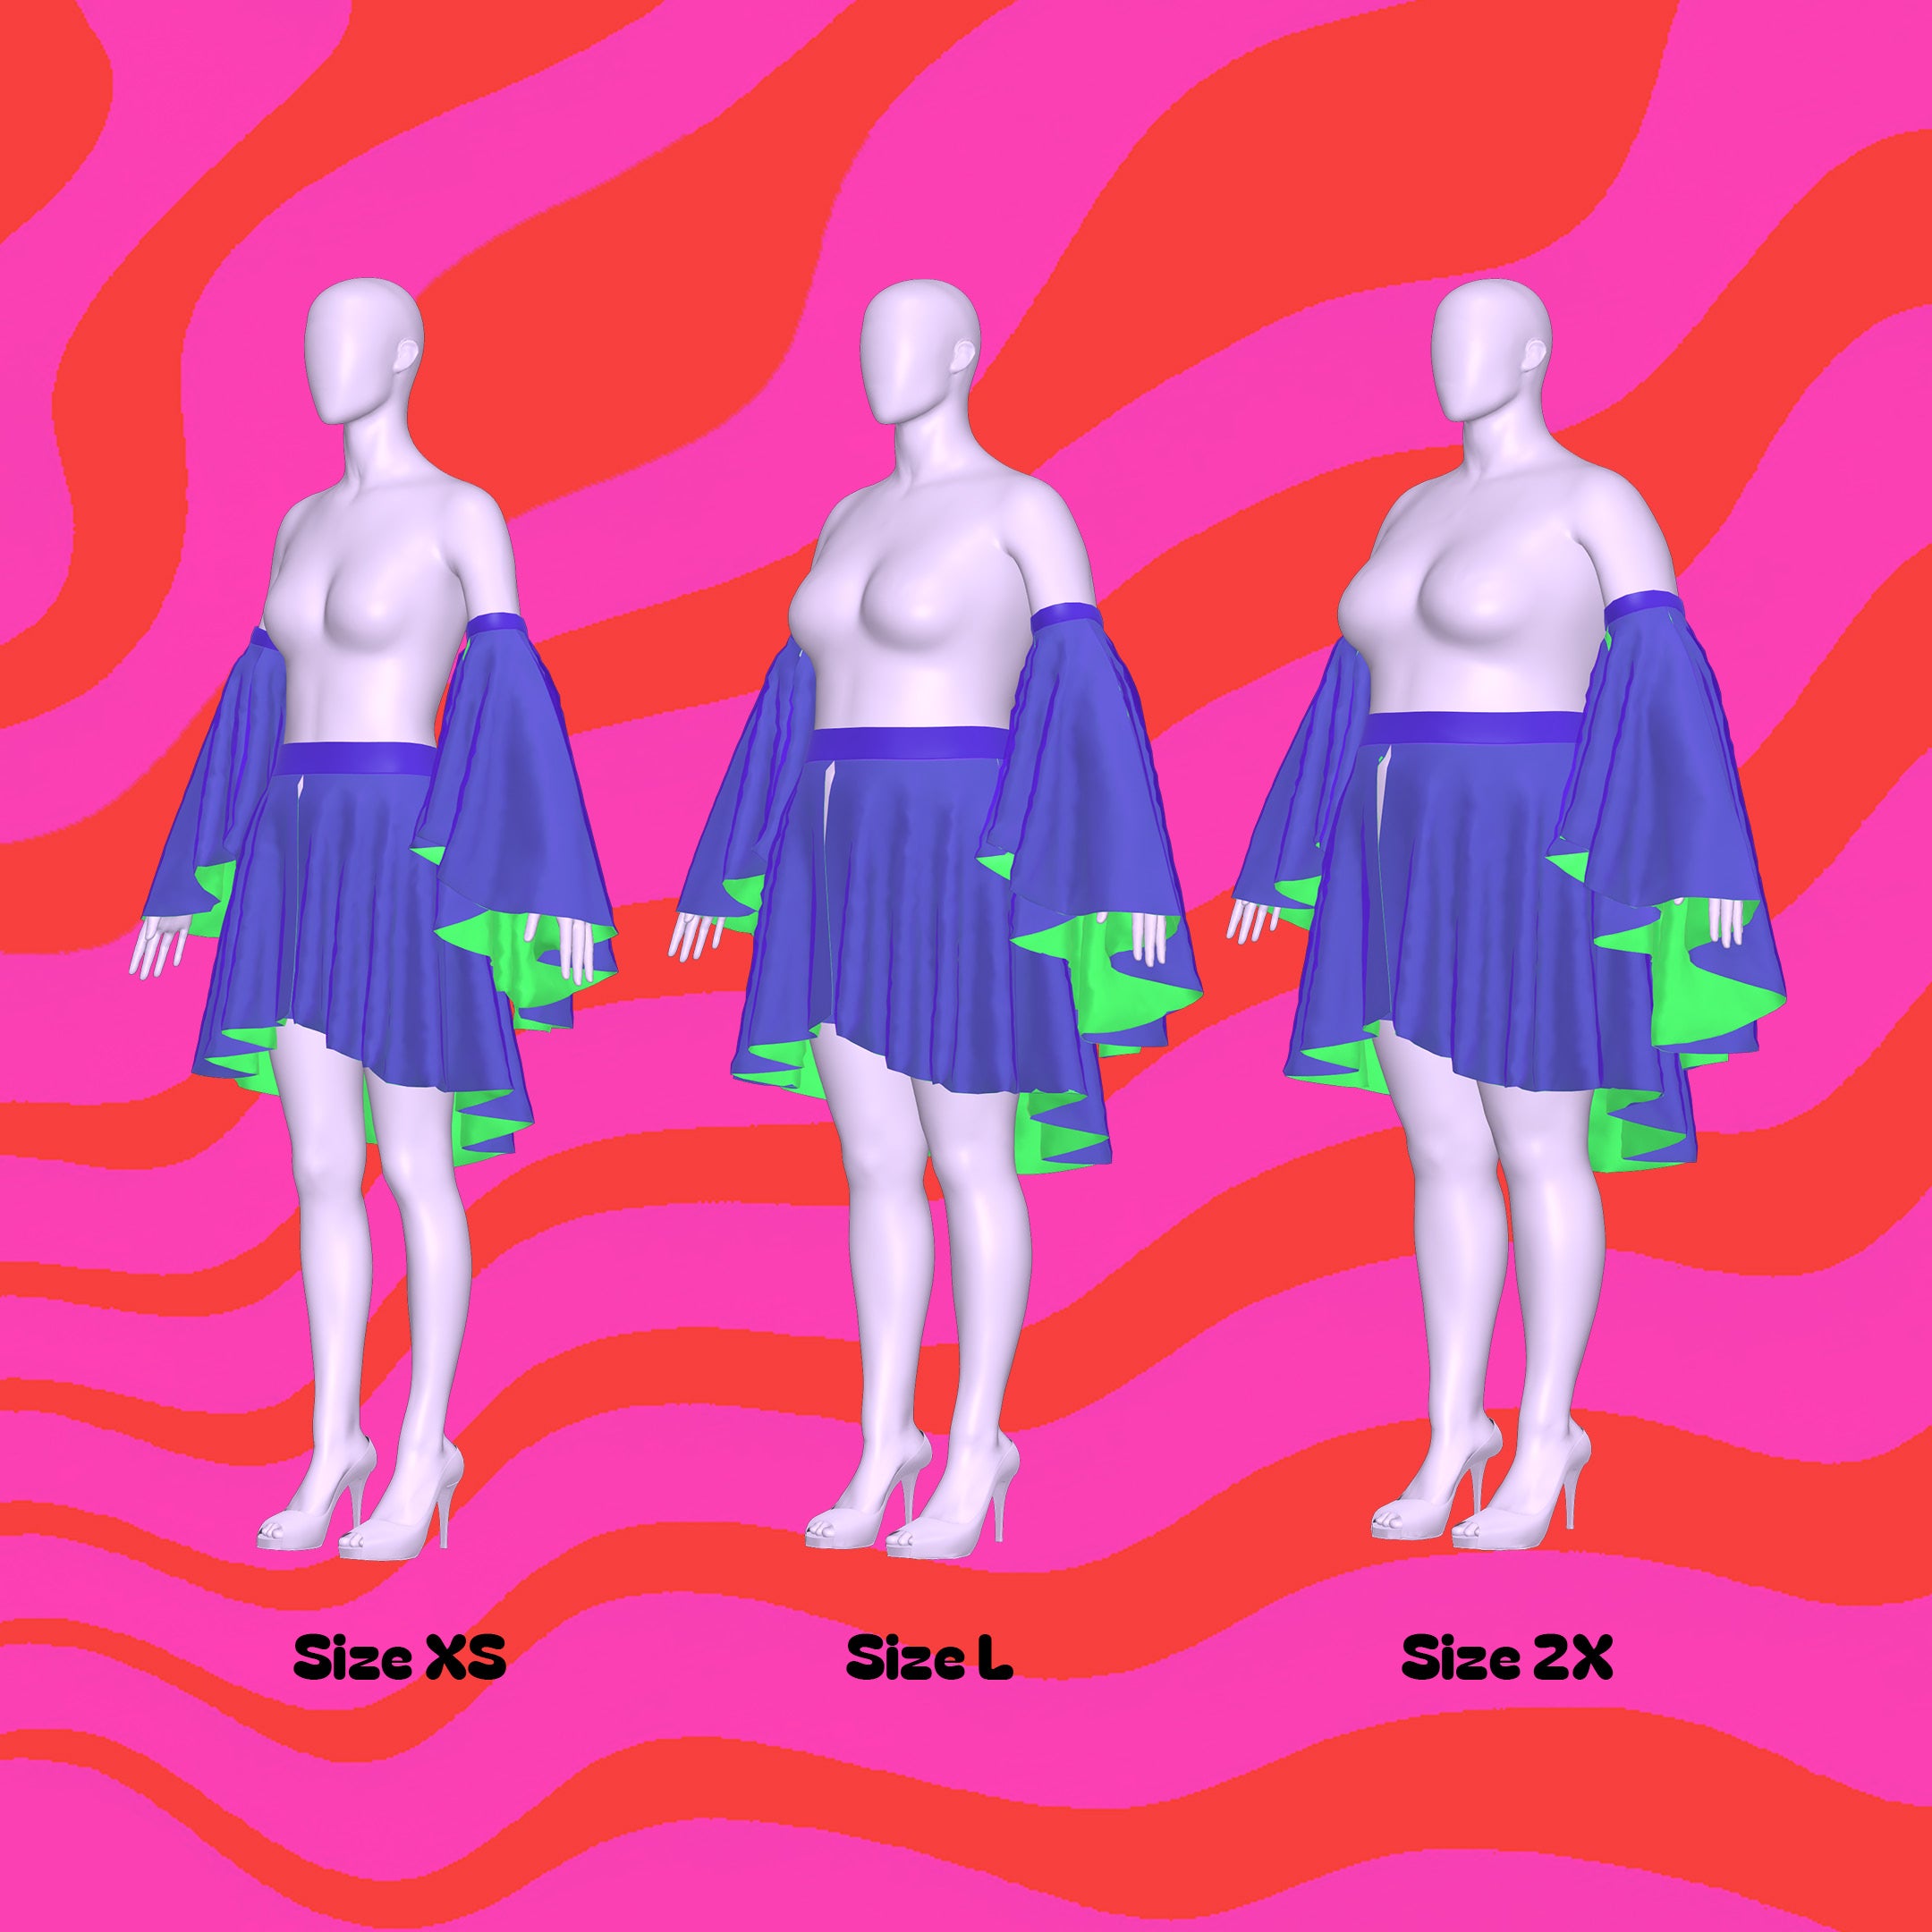
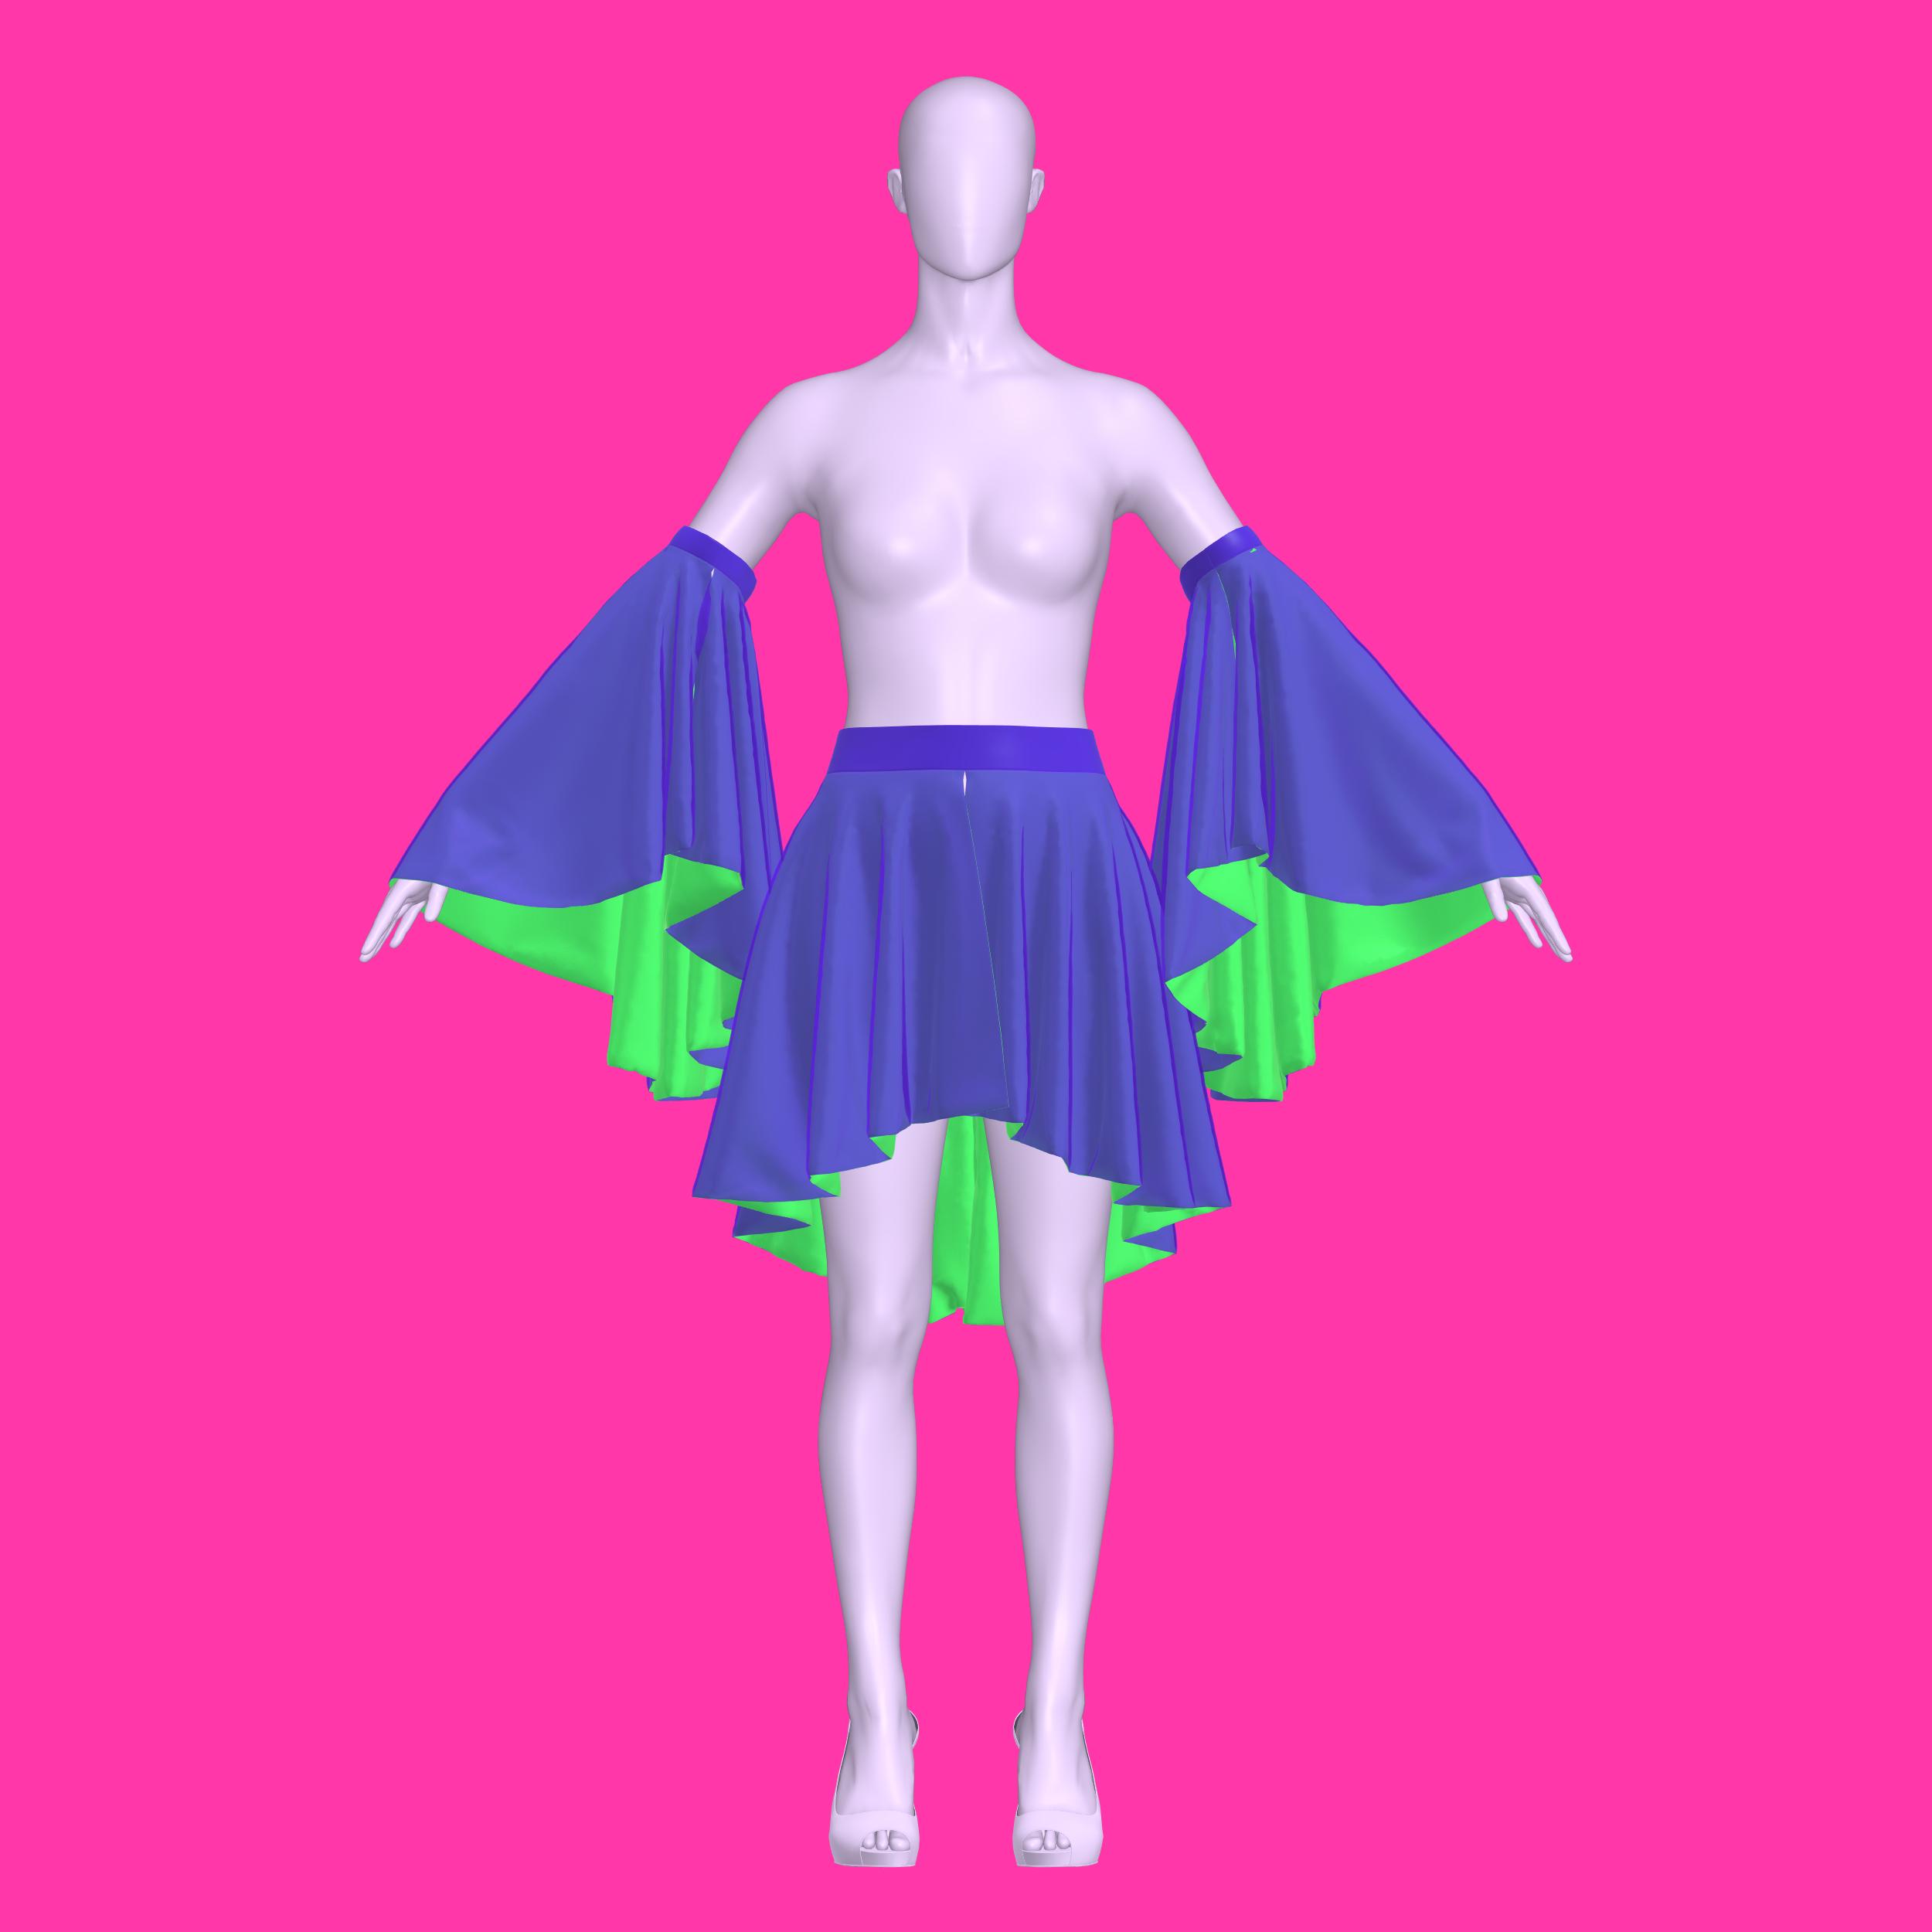
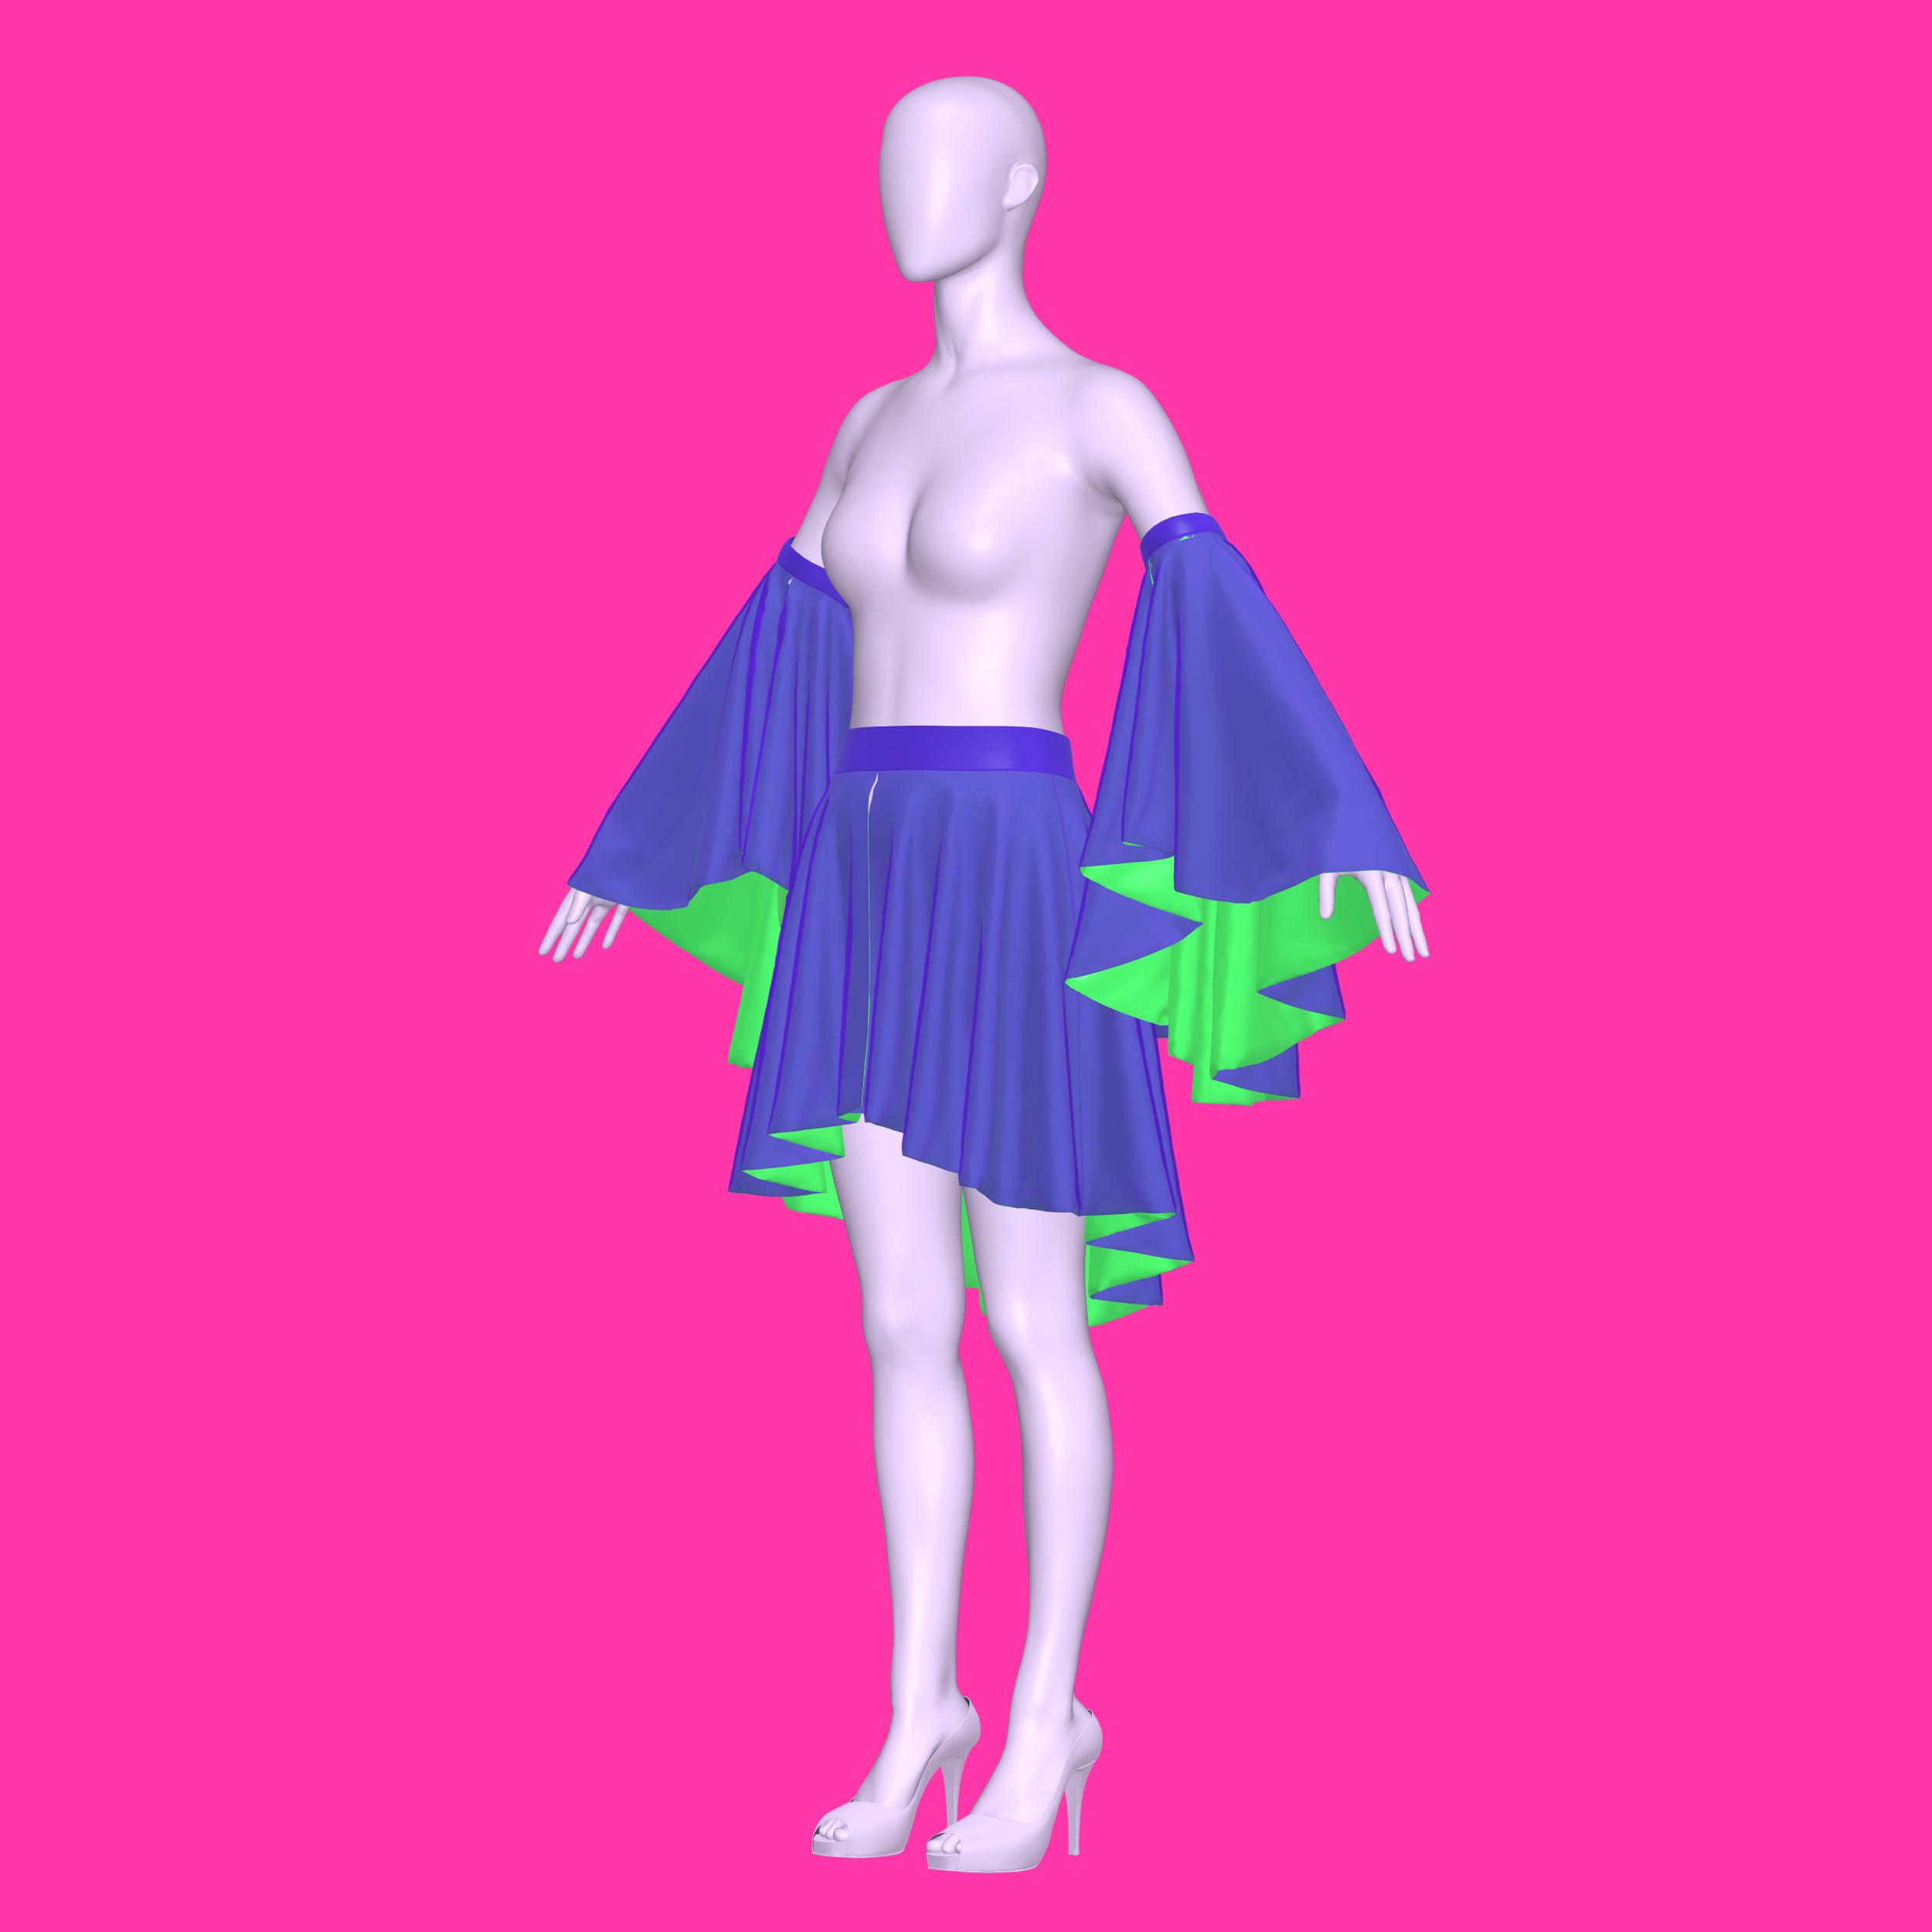
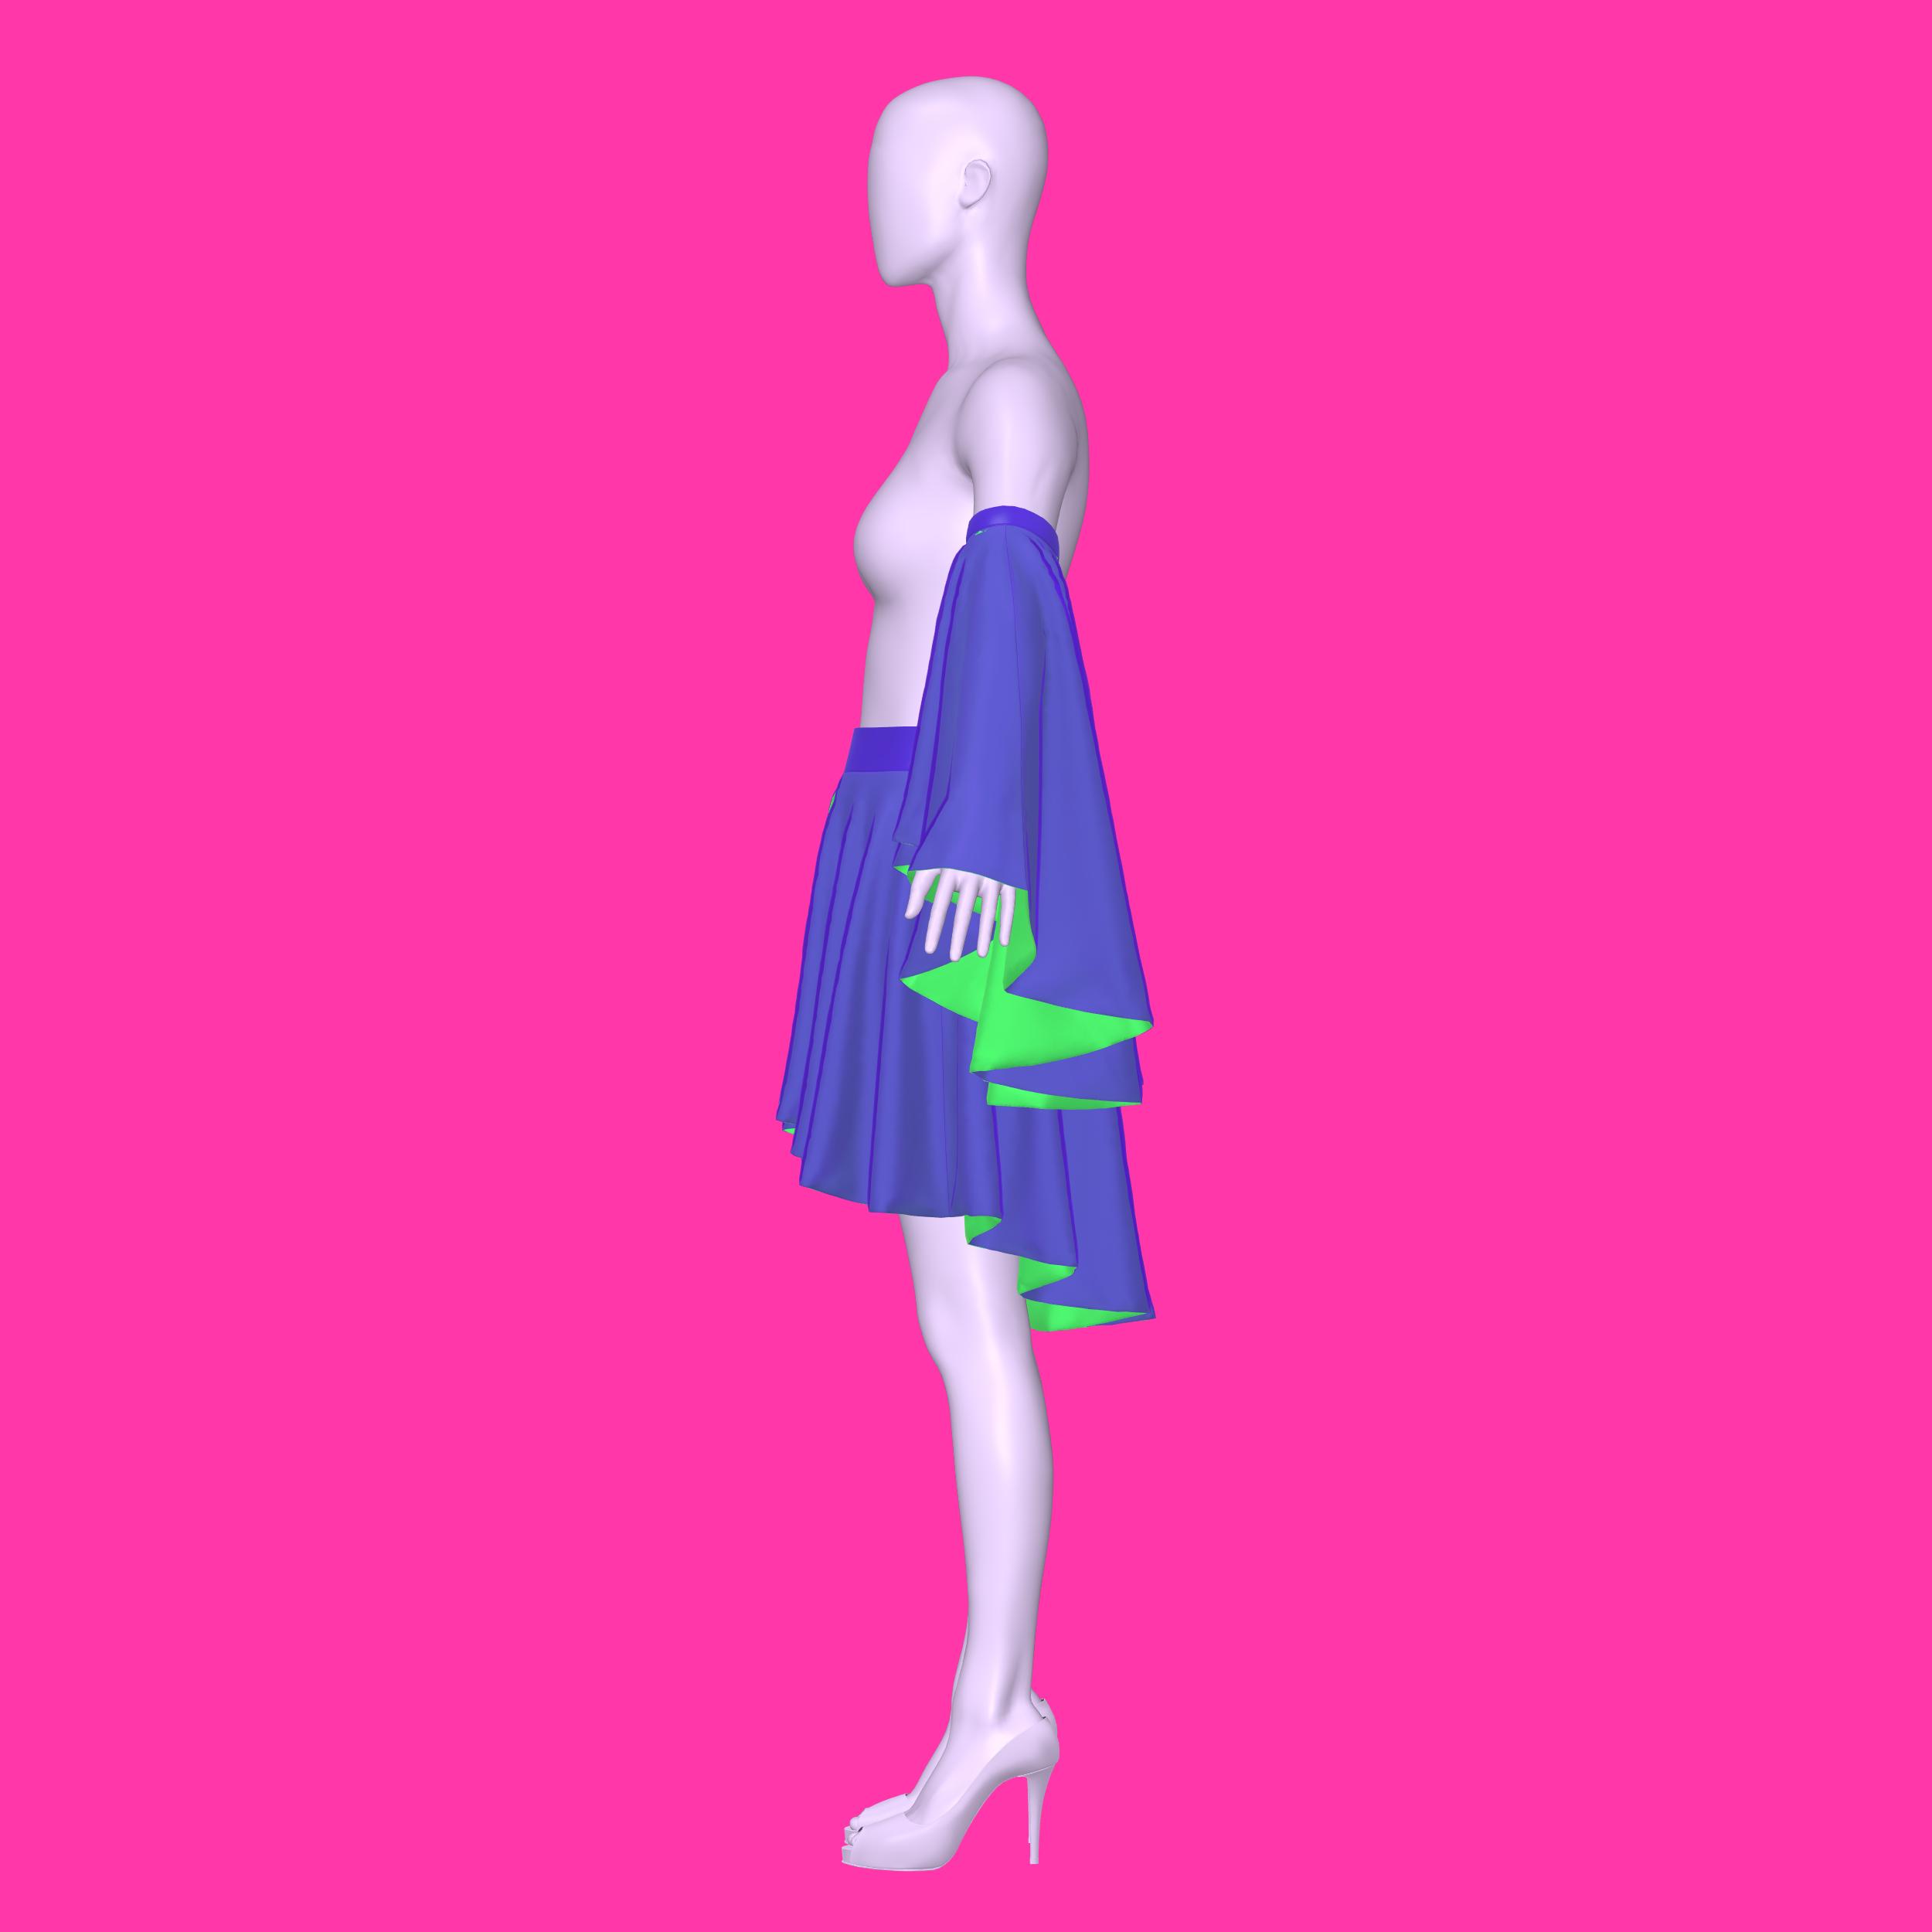
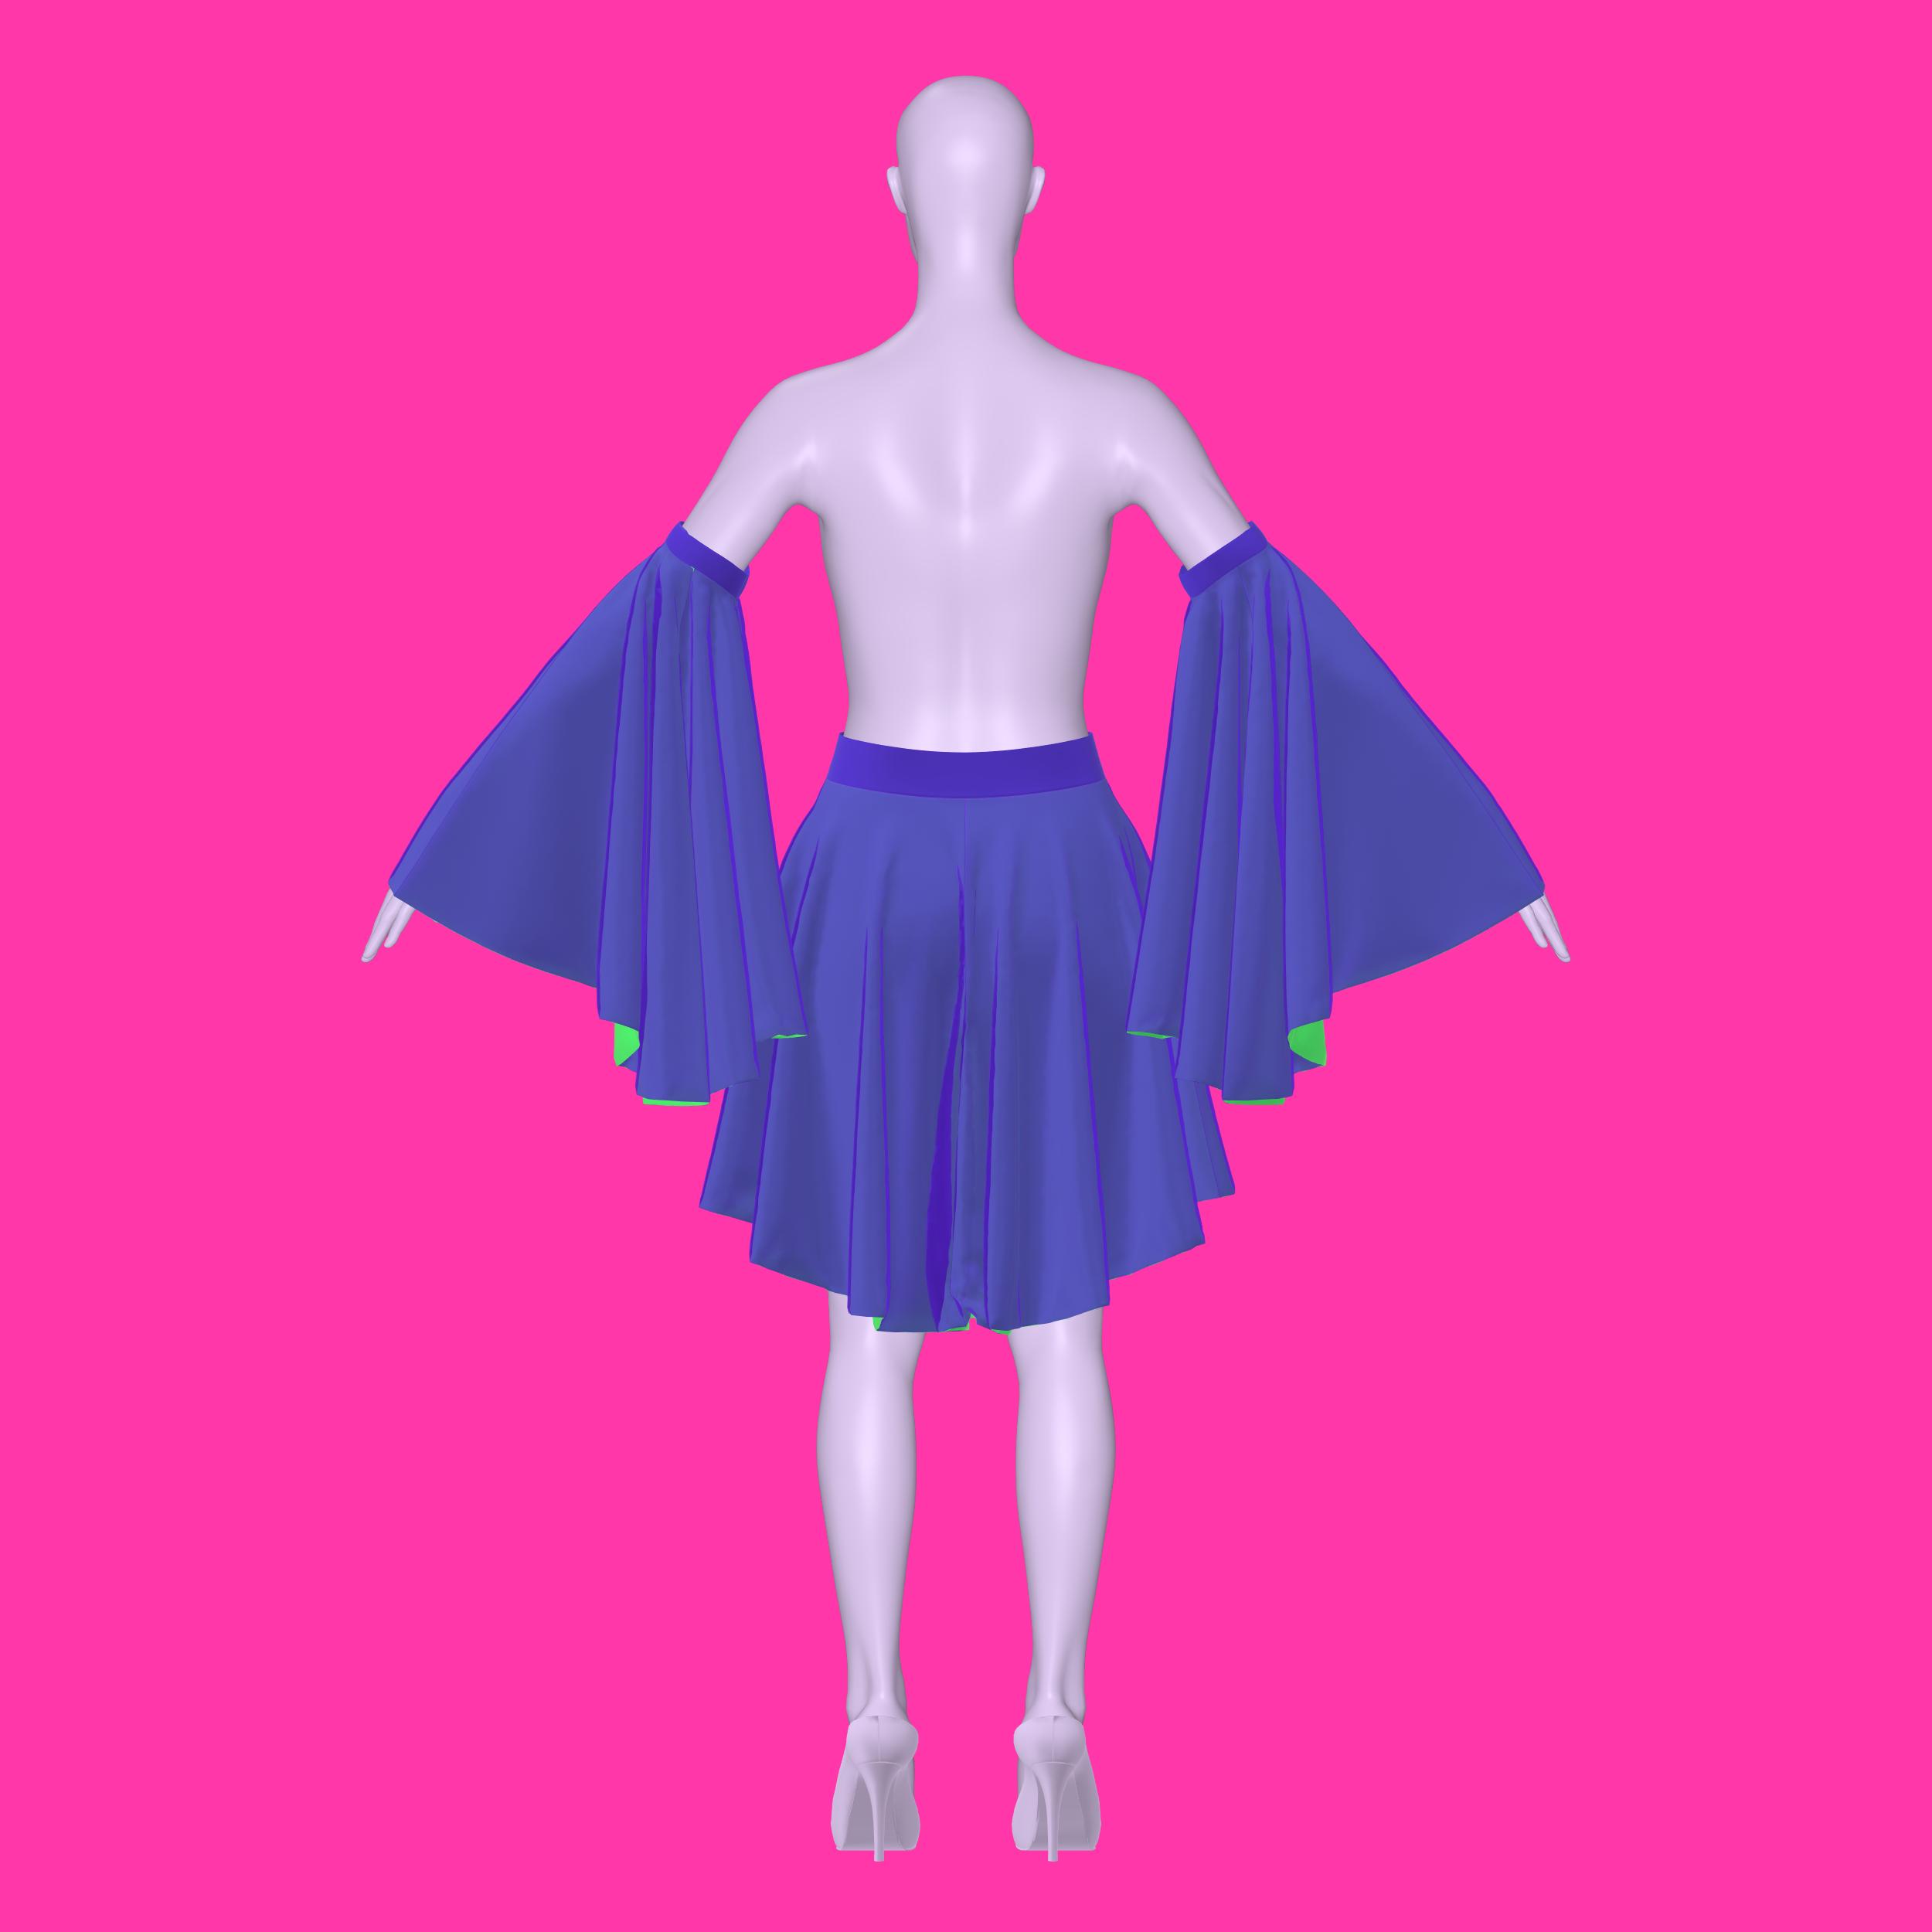
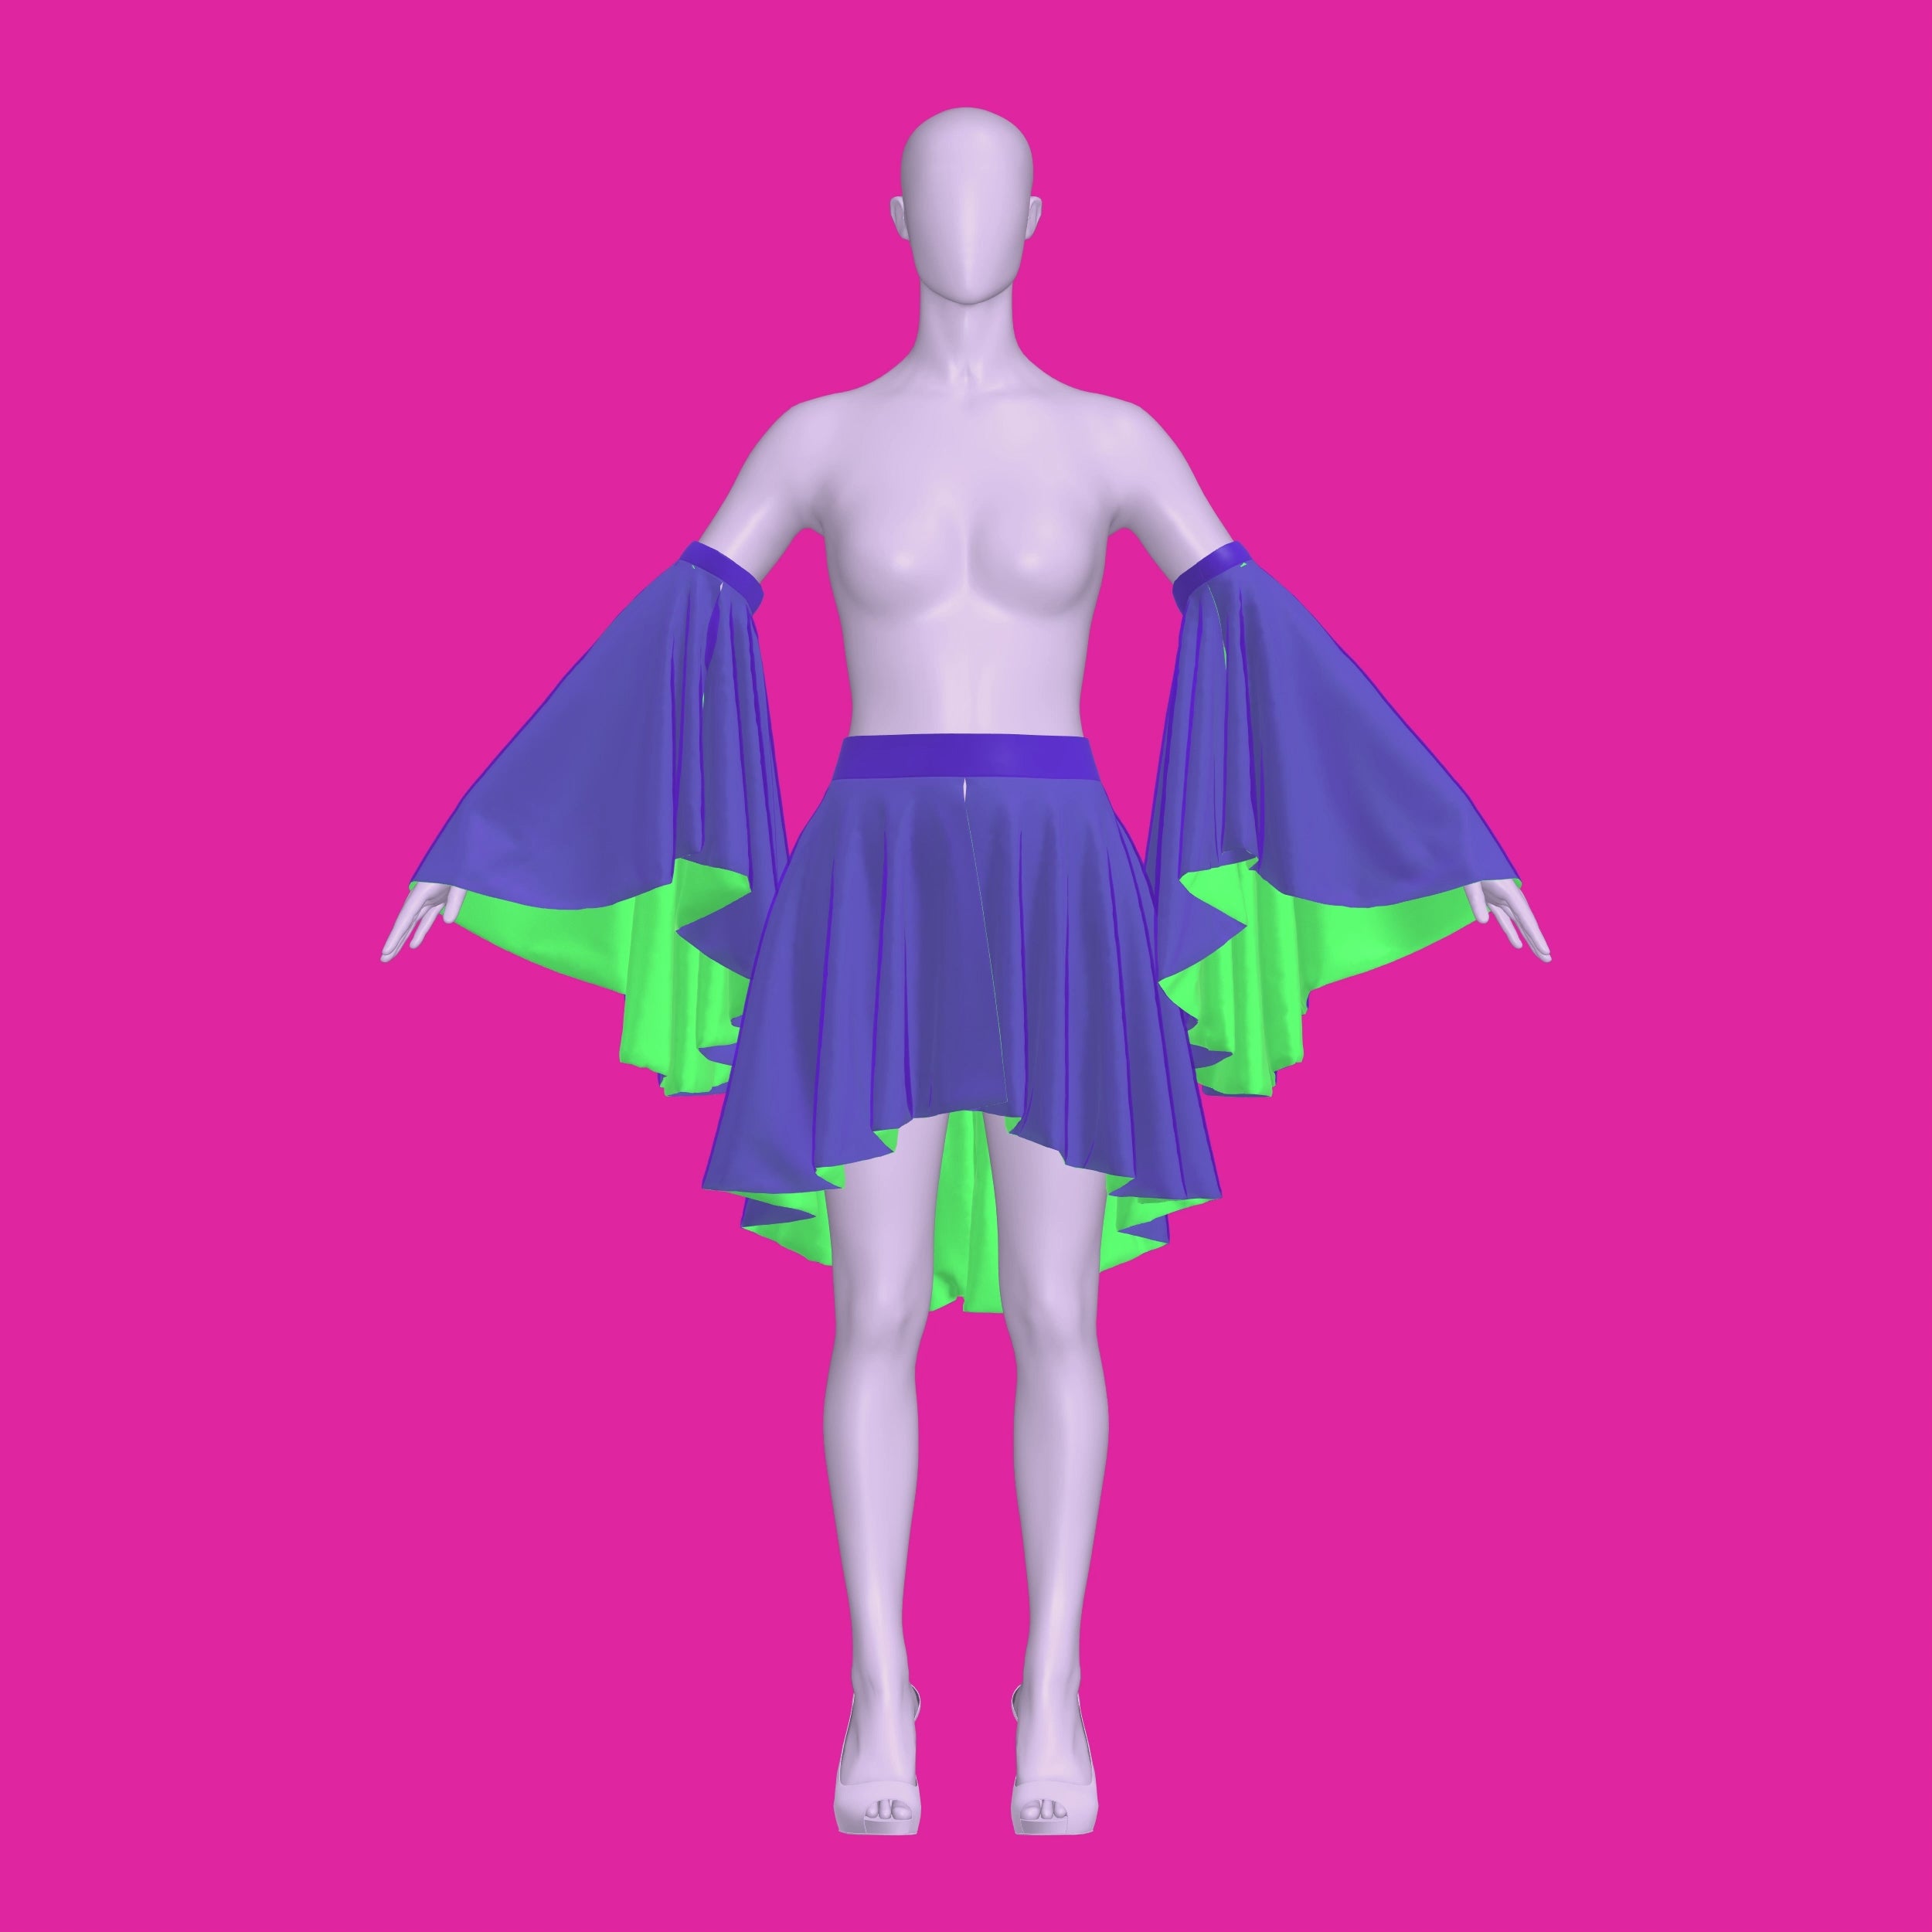
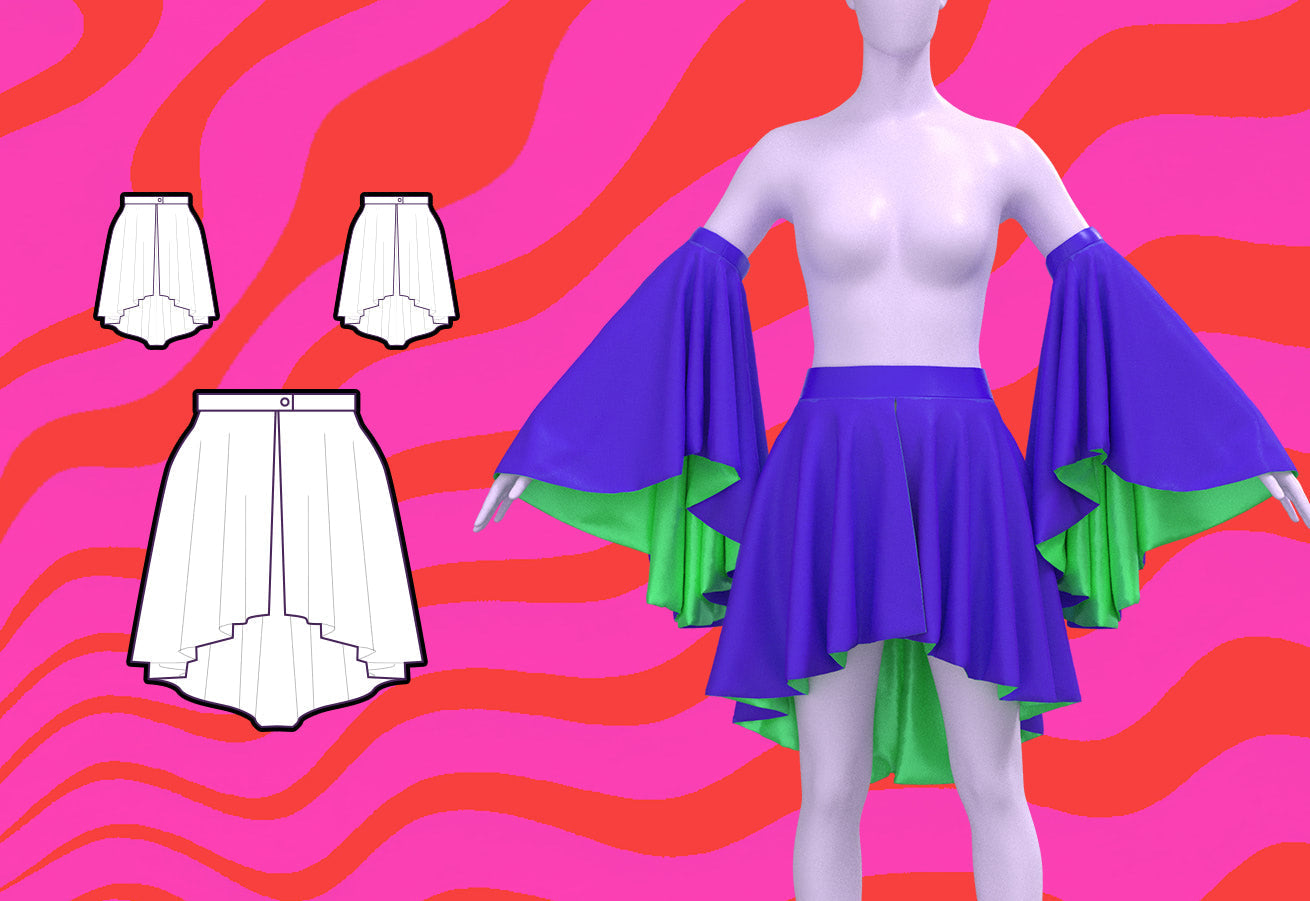
Presentamos nuestro patrón de costura de falda con cola adjunta, diseñado para drag queens que quieren deslumbrar al público con revelaciones dramáticas. Este diseño único presenta una cautivadora falda con cola unida a un cinturón con abertura frontal, perfecto para revelar atuendos debajo durante las presentaciones. Además, el patrón incluye colas con volantes unidas a los puños de los bíceps para mayor movimiento. Personaliza tu look con forro de tela opcional y fija fácilmente el cinturón y los puños de la falda con broches o velcro para un uso sin costuras. Adecuado para telas livianas no elásticas y elásticas, este patrón es ideal para looks de drag modernos, presentaciones, raves, fantasía y eventos de cosplay. Eleva tu presencia en el escenario y da rienda suelta a tu creatividad con este patrón de costura de drag queen.
Dificultad del patrón: Para principiantes
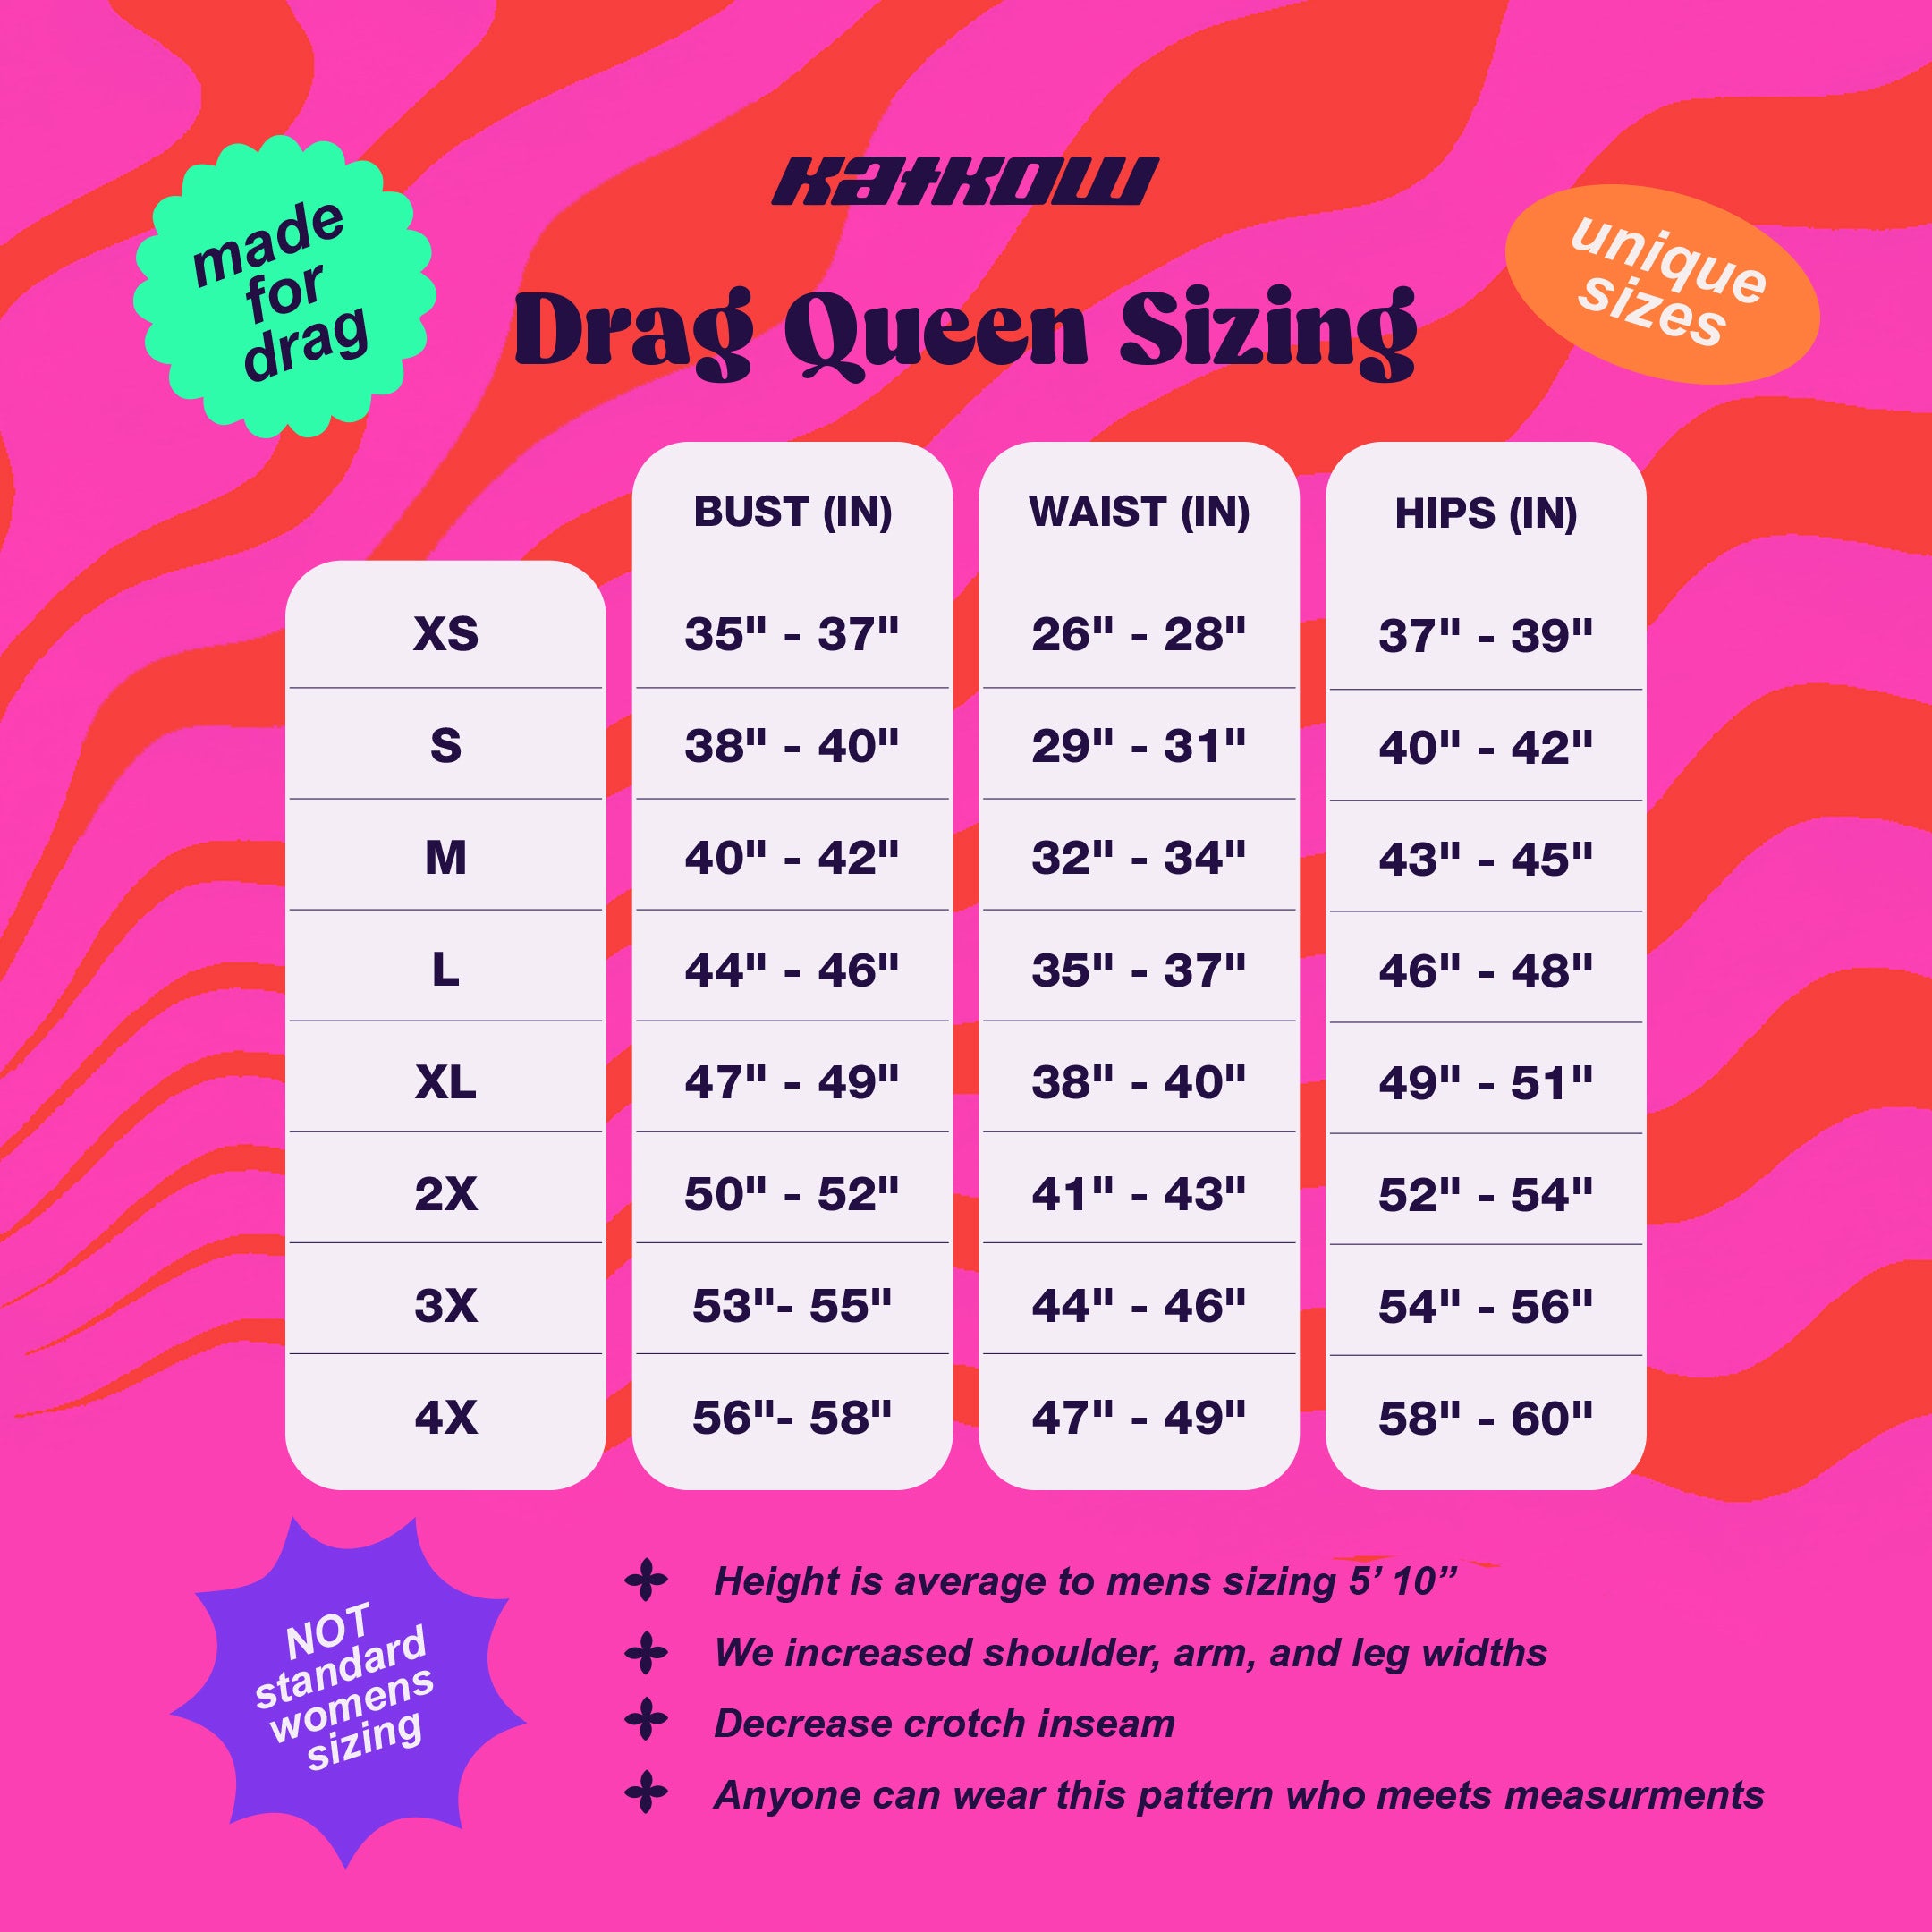
Detalles de tallas
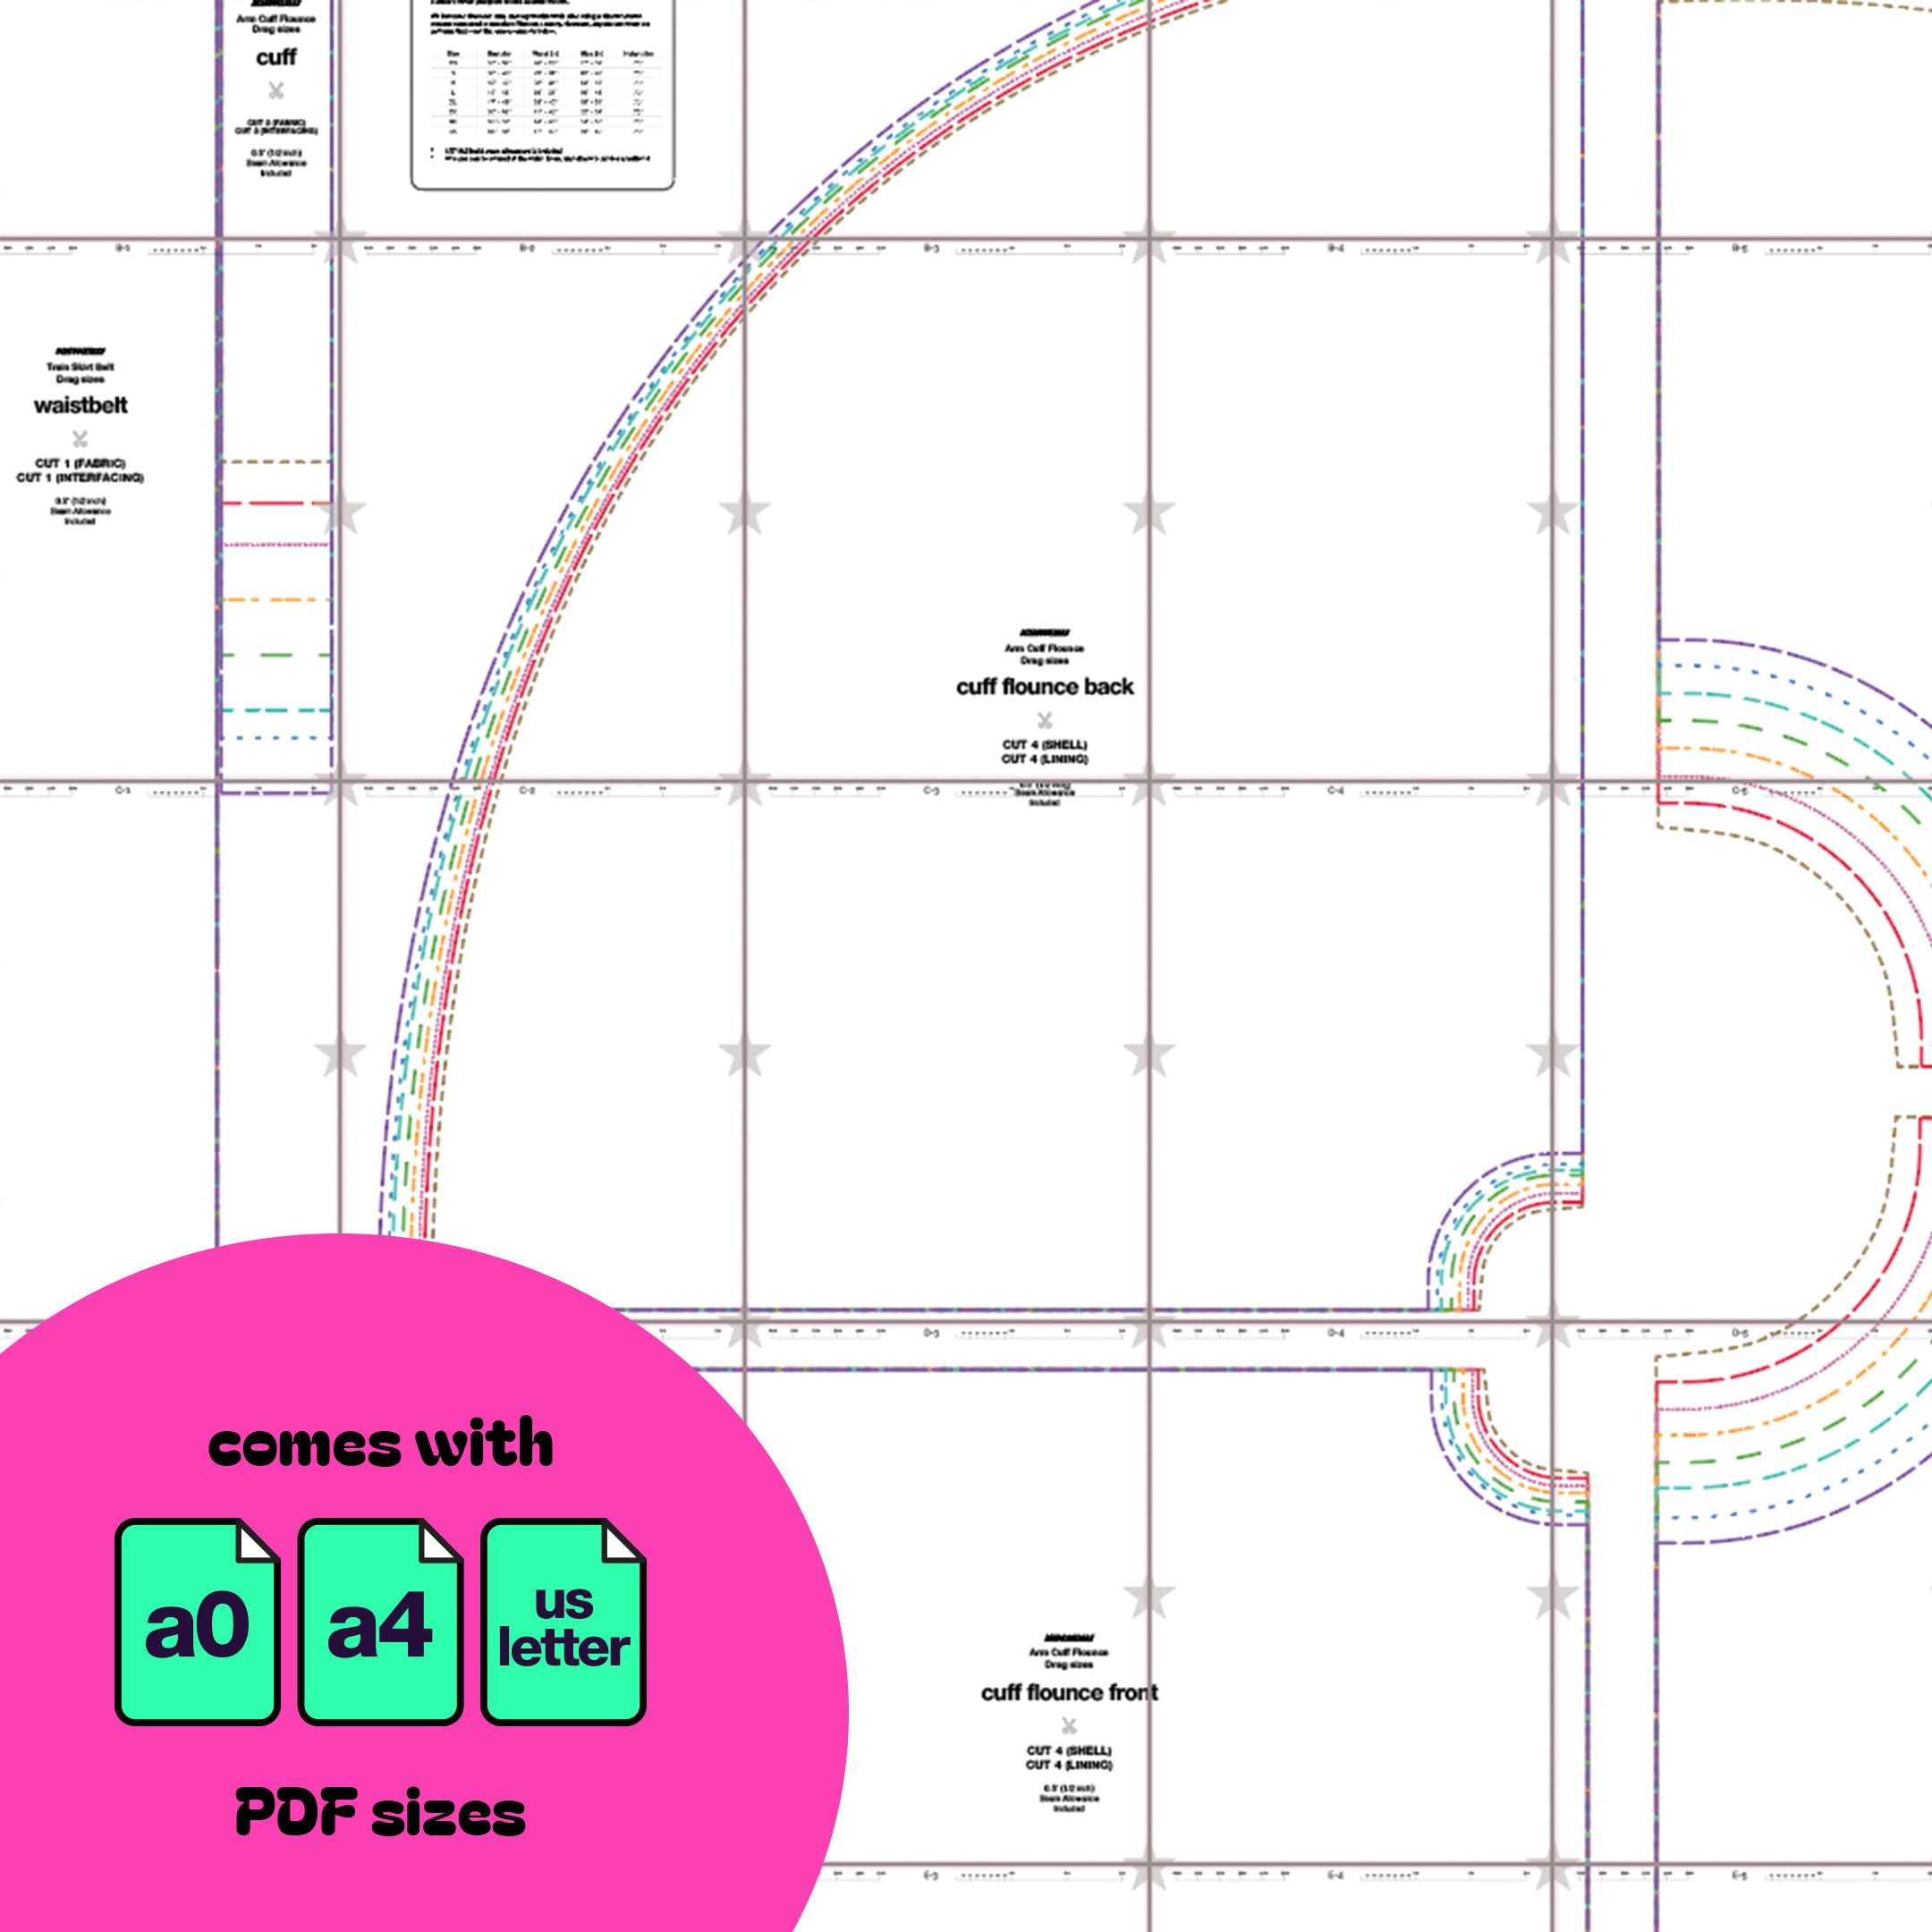
Este patrón está disponible en nuestros exclusivos talles Drag Queen (XS-4X). Consulta nuestra guía de talles para obtener más información sobre nuestras medidas de talle.
Telas y artículos de mercería
Adecuado para tejidos ligeros:
- Tejidos de punto
- Algodón
- Estatina
- Cordón
- Organdí
- Gasa
- Georgette
- gasa
- Charmeuse
- Entretela termoadhesiva de firmeza media a firme
- Broches o velcro para cierres
Yardas de tela
Este patrón requiere el uso de tela liviana. Puedes optar por agregarle forro, pero deberás duplicar las yardas que se indican a continuación. Encuentra las yardas necesarias para cada tamaño a continuación. Los anchos de tela que se indican a continuación son para 58" yardas.
| Tamaño | Falda y puños | Solo falda | Solo esposas para brazos |
|---|---|---|---|
| XS | 3 | 1.25 | 1,75 |
| S | 3.25 | 1.25 | 2 |
| METRO | 3.5 | 1.5 | 2.25 |
| yo | 3,75 | 1.5 | 2.5 |
| SG | 4 | 1.5 | 2,75 |
| 2X | 4.25 | 1,75 | 3 |
| 3 veces | 4.5 | 2 | 3 |
| 4 veces | 4.5 | 2 | 3.25 |
Para obtener información sobre la conversión de pulgadas a metros, consulte nuestra guía de conversión.
Instrucciones de costura

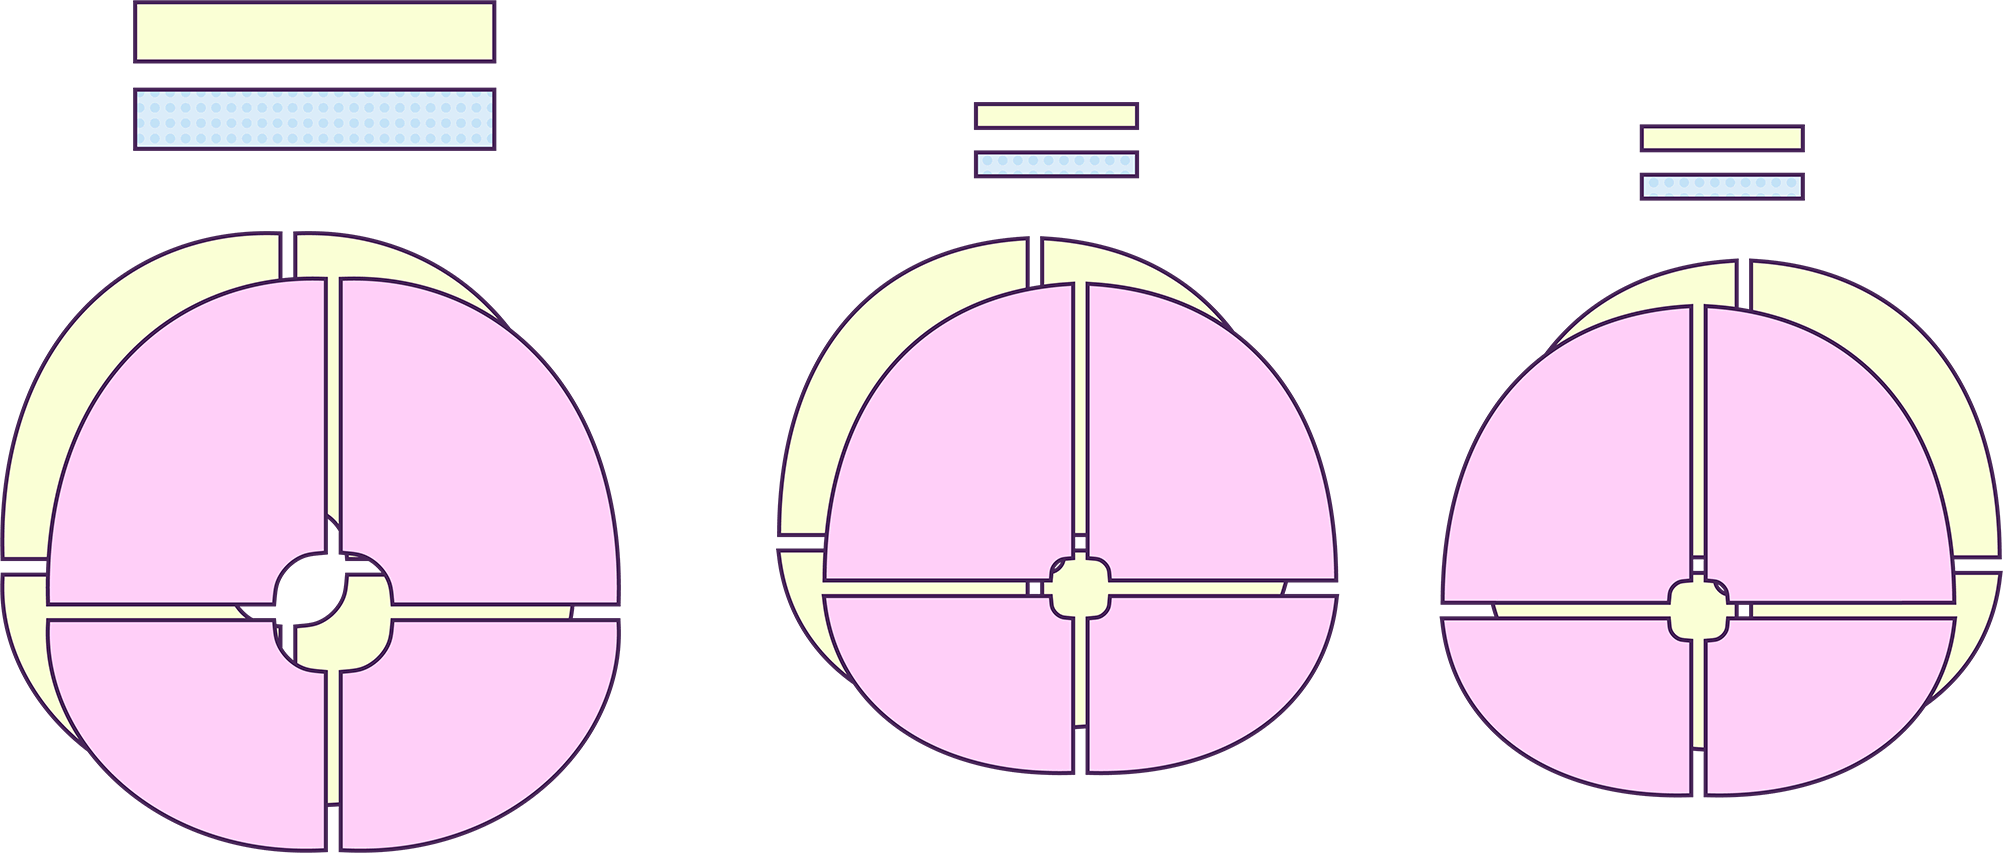
Fabric Pieces
After cutting your fabric, you should have the following pieces: one waist belt, one waist belt interfacing, two skirt back pieces, and two skirt front pieces. Repeated if you use lining.
For the arm cuffs: two cuffs, two cuff interfacings, four cuff back pieces, and four cuff front pieces. Repeated if you use lining.
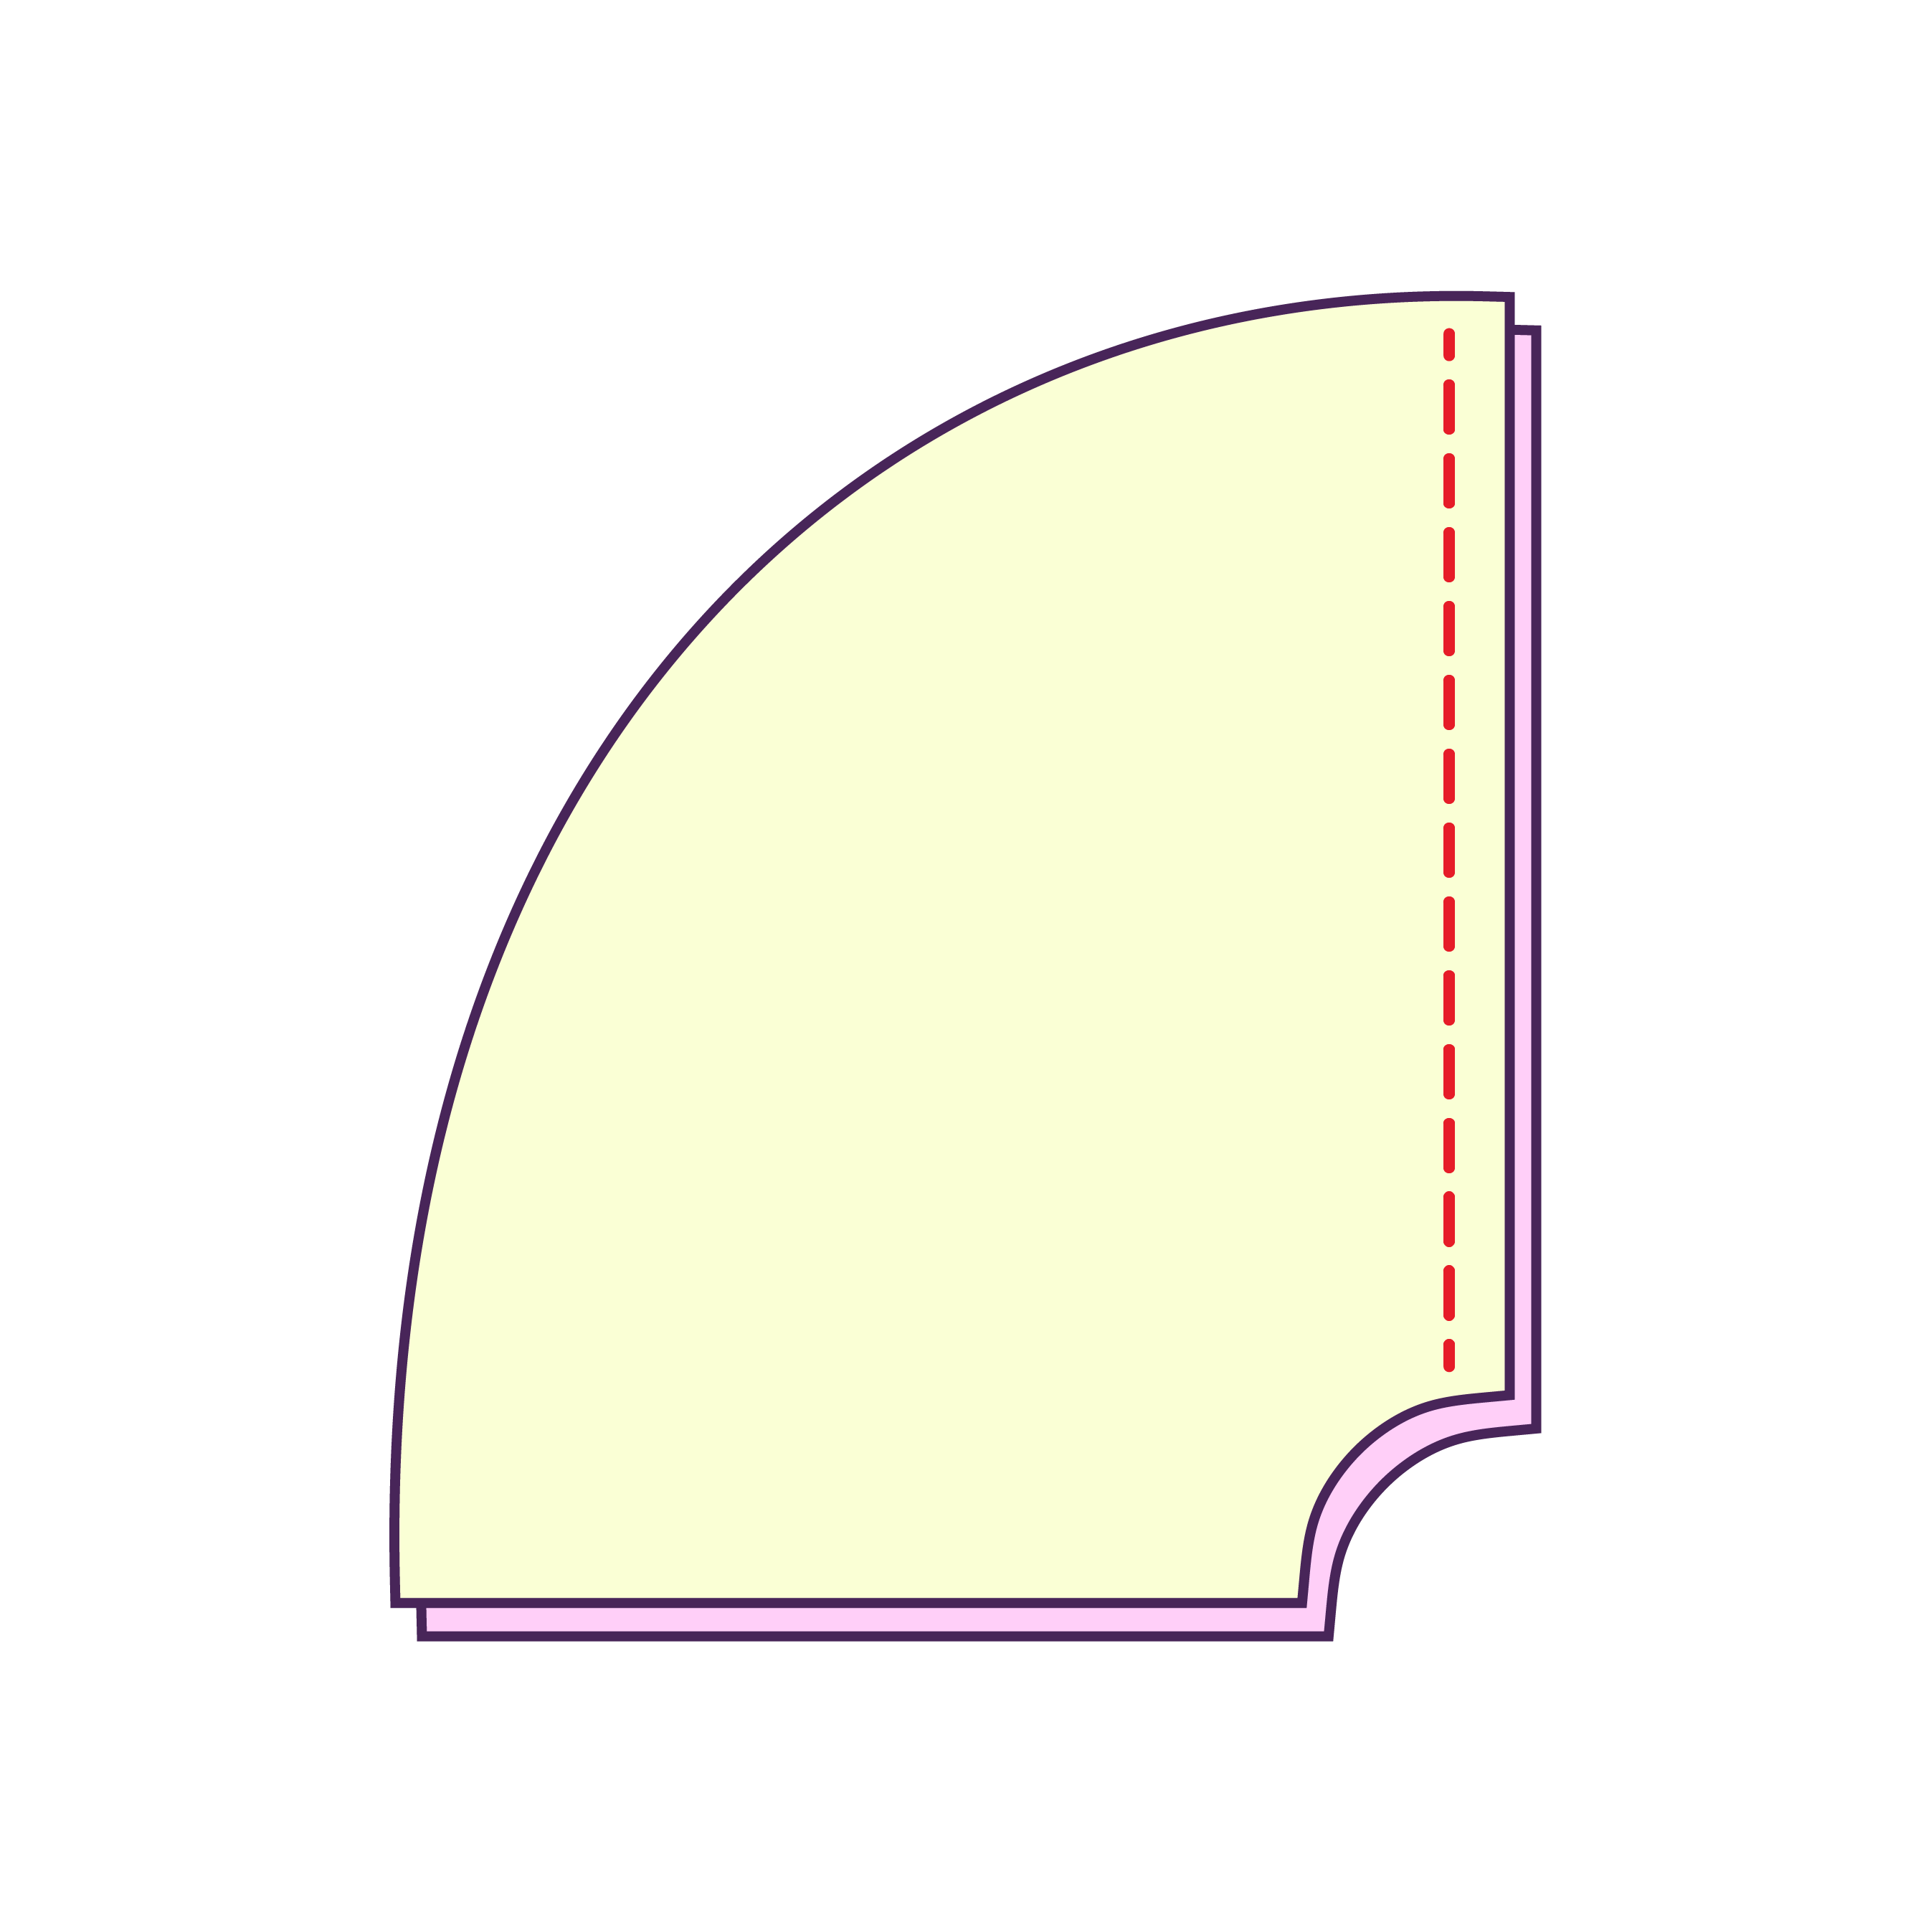
STEP 1
Stack the two skirt back pieces, right sides facing each other, and sew them together along the longest seam.
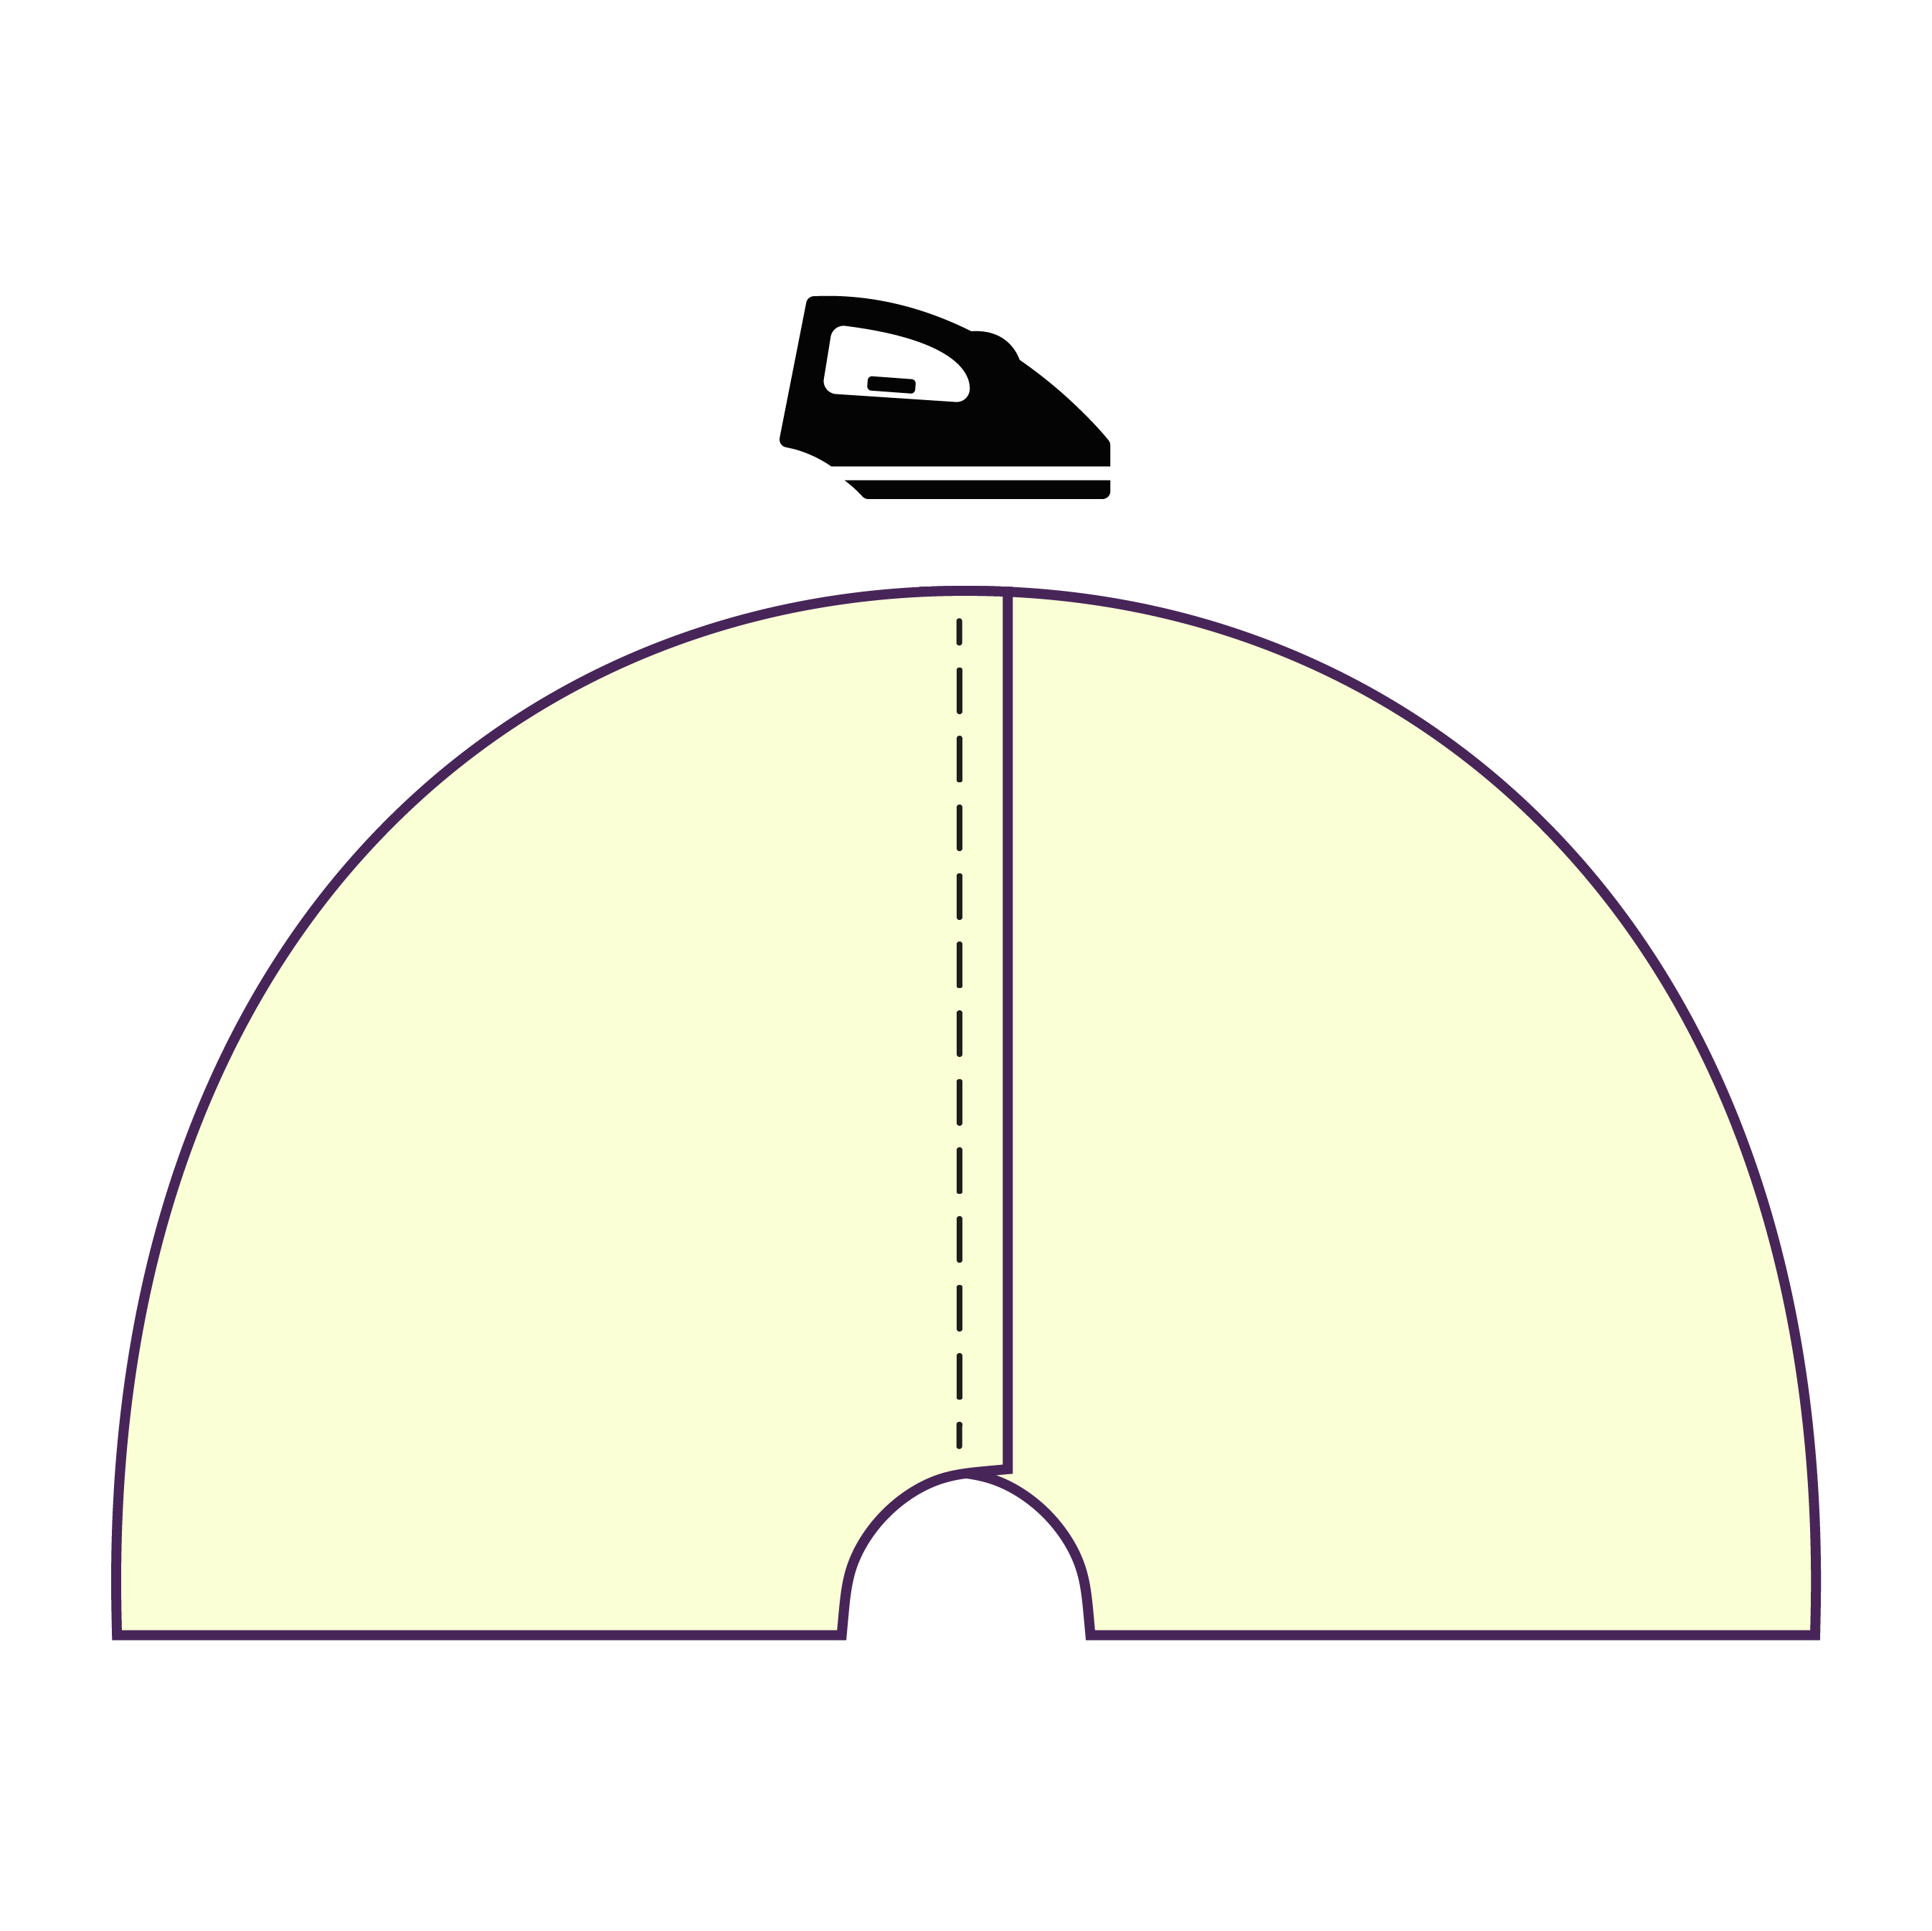
STEP 2
Layout the sewn back pieces and press the seam.
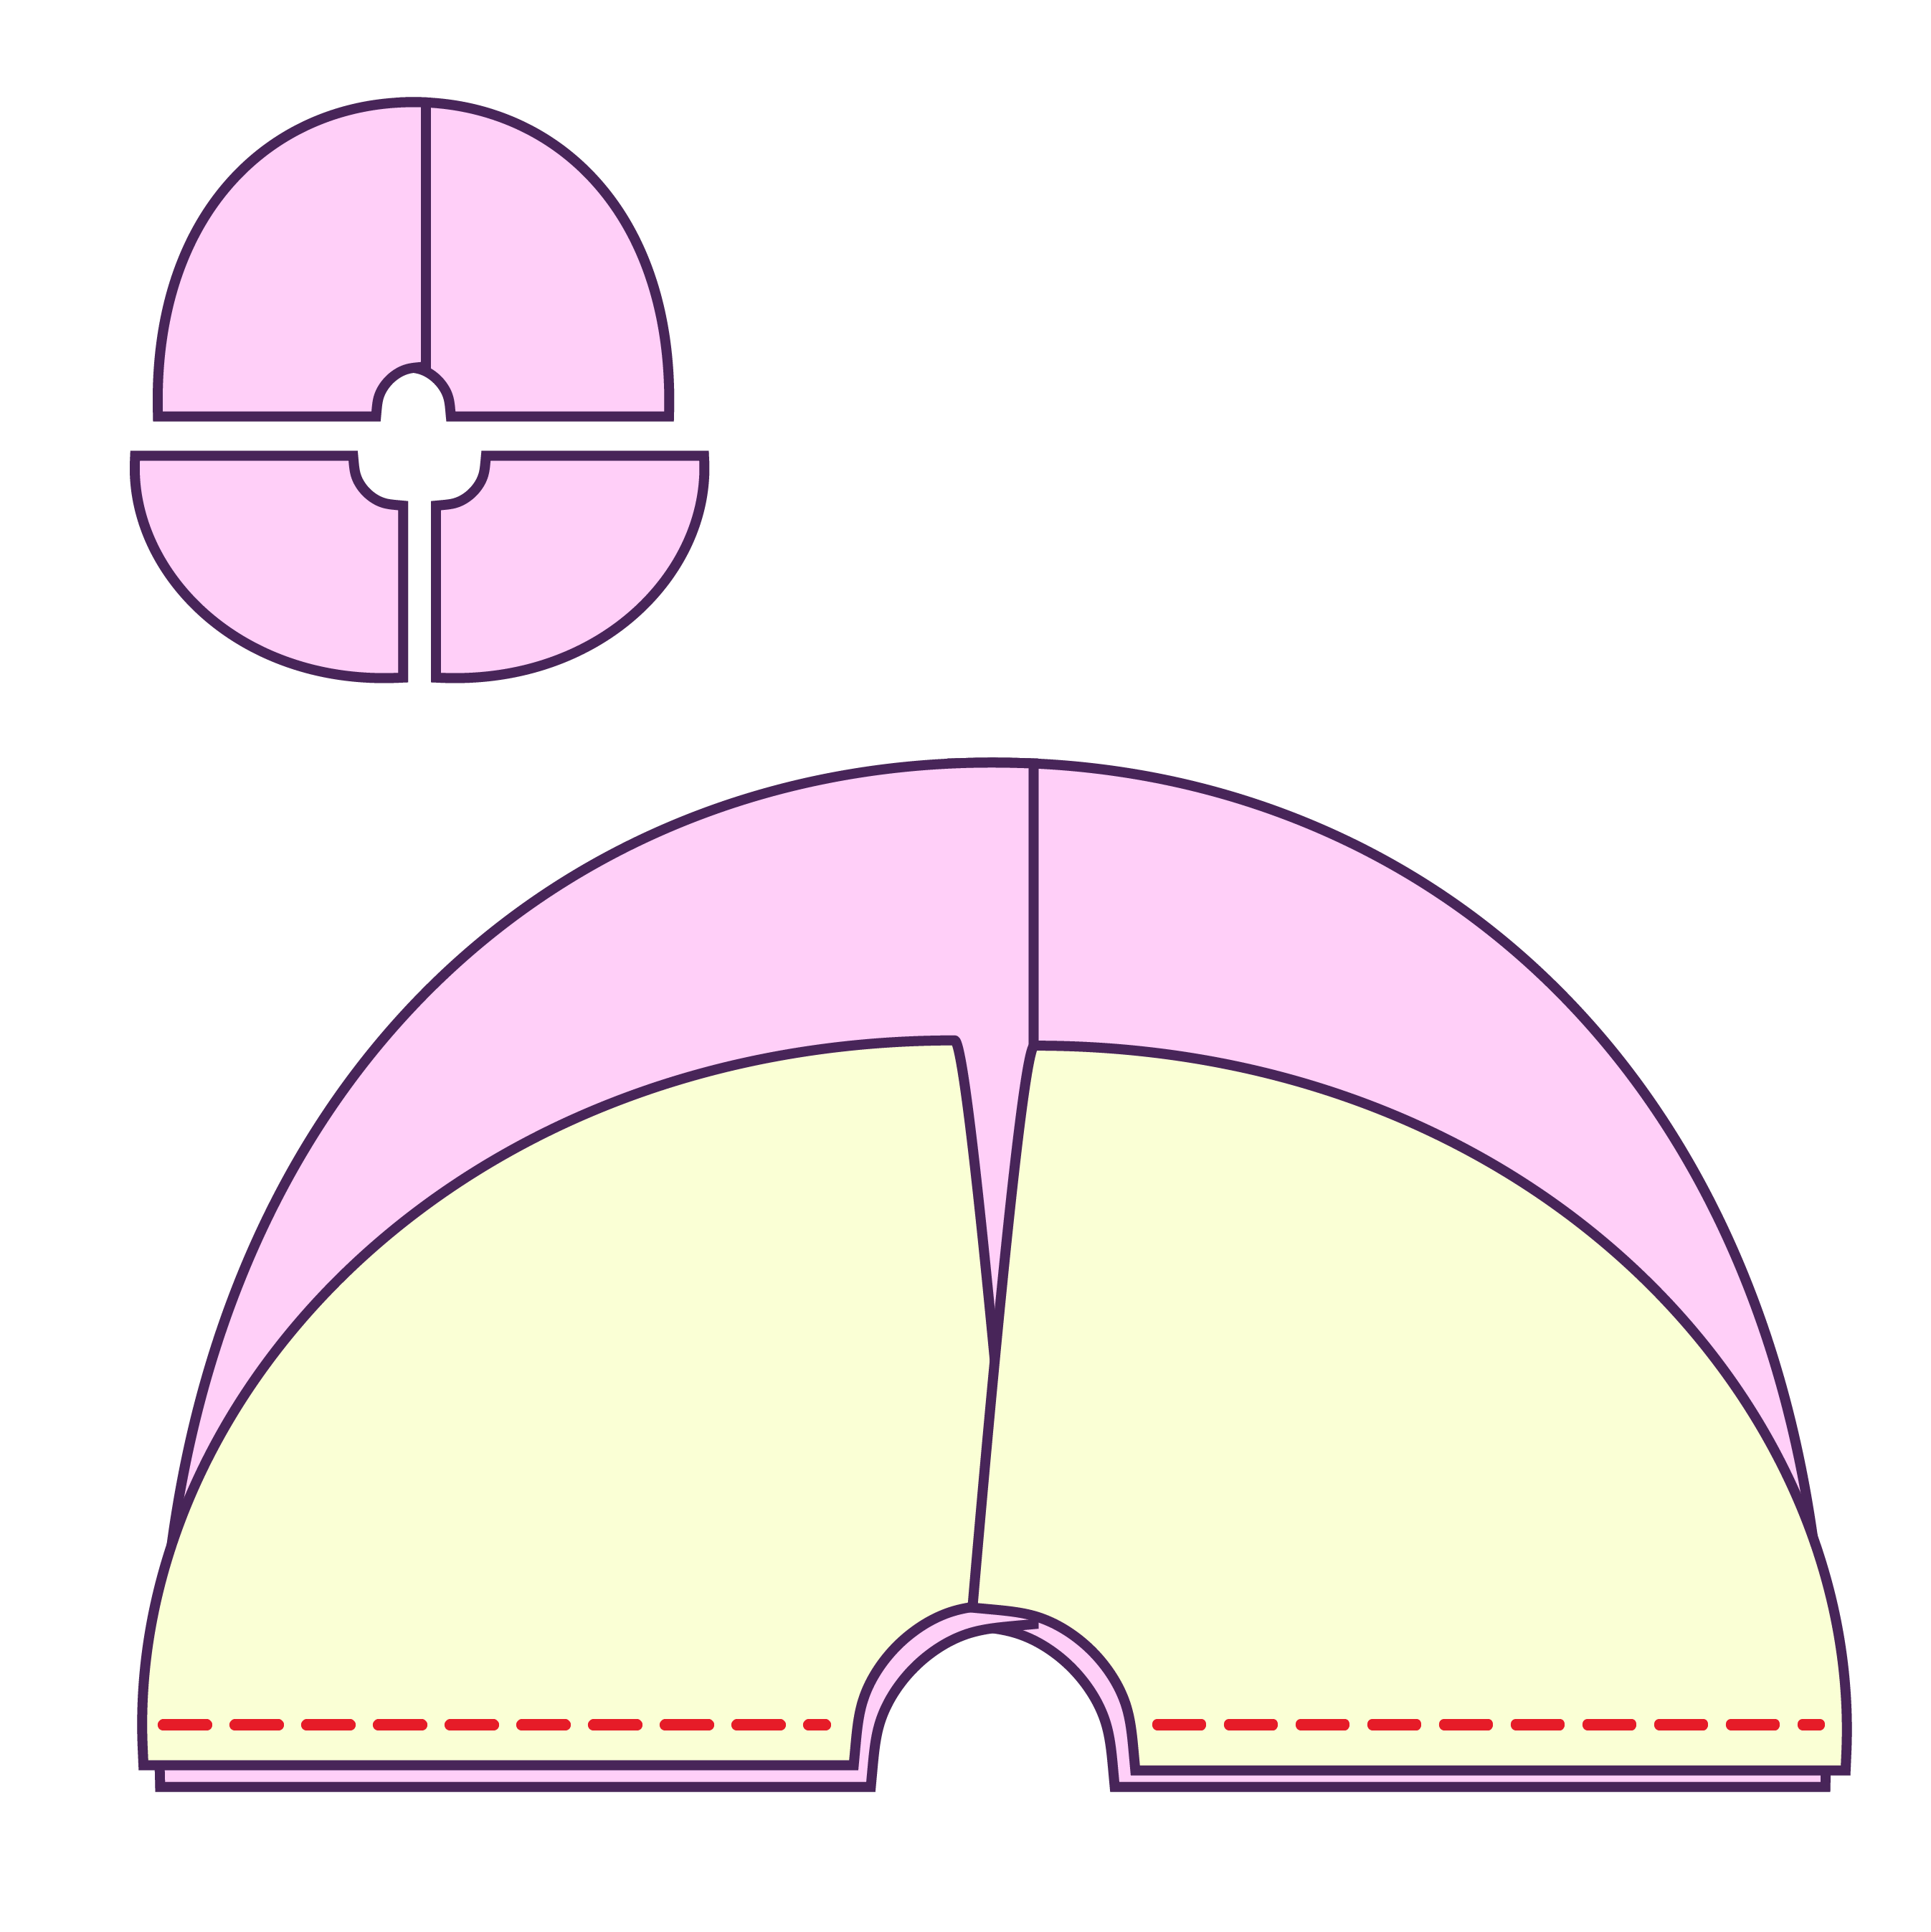
STEP 3
Gather your two skirt front pieces and stack them over the skirt back, right sides facing each other. Sew them along the longest seam.
STEP 4
Layout the pieces and press all seams. Leave the front seam, the shortest seam, unsewn.
STEP 5
Repeat steps for lining fabric.
STEP 6
Stack the shell and lining fabric, right sides facing each other, and sew all around the skirt starting from the open front edges.
STEP 7
Flip the skirt right side out and topstitch around all edges; this is optional depending on your fabric type.
STEP 8
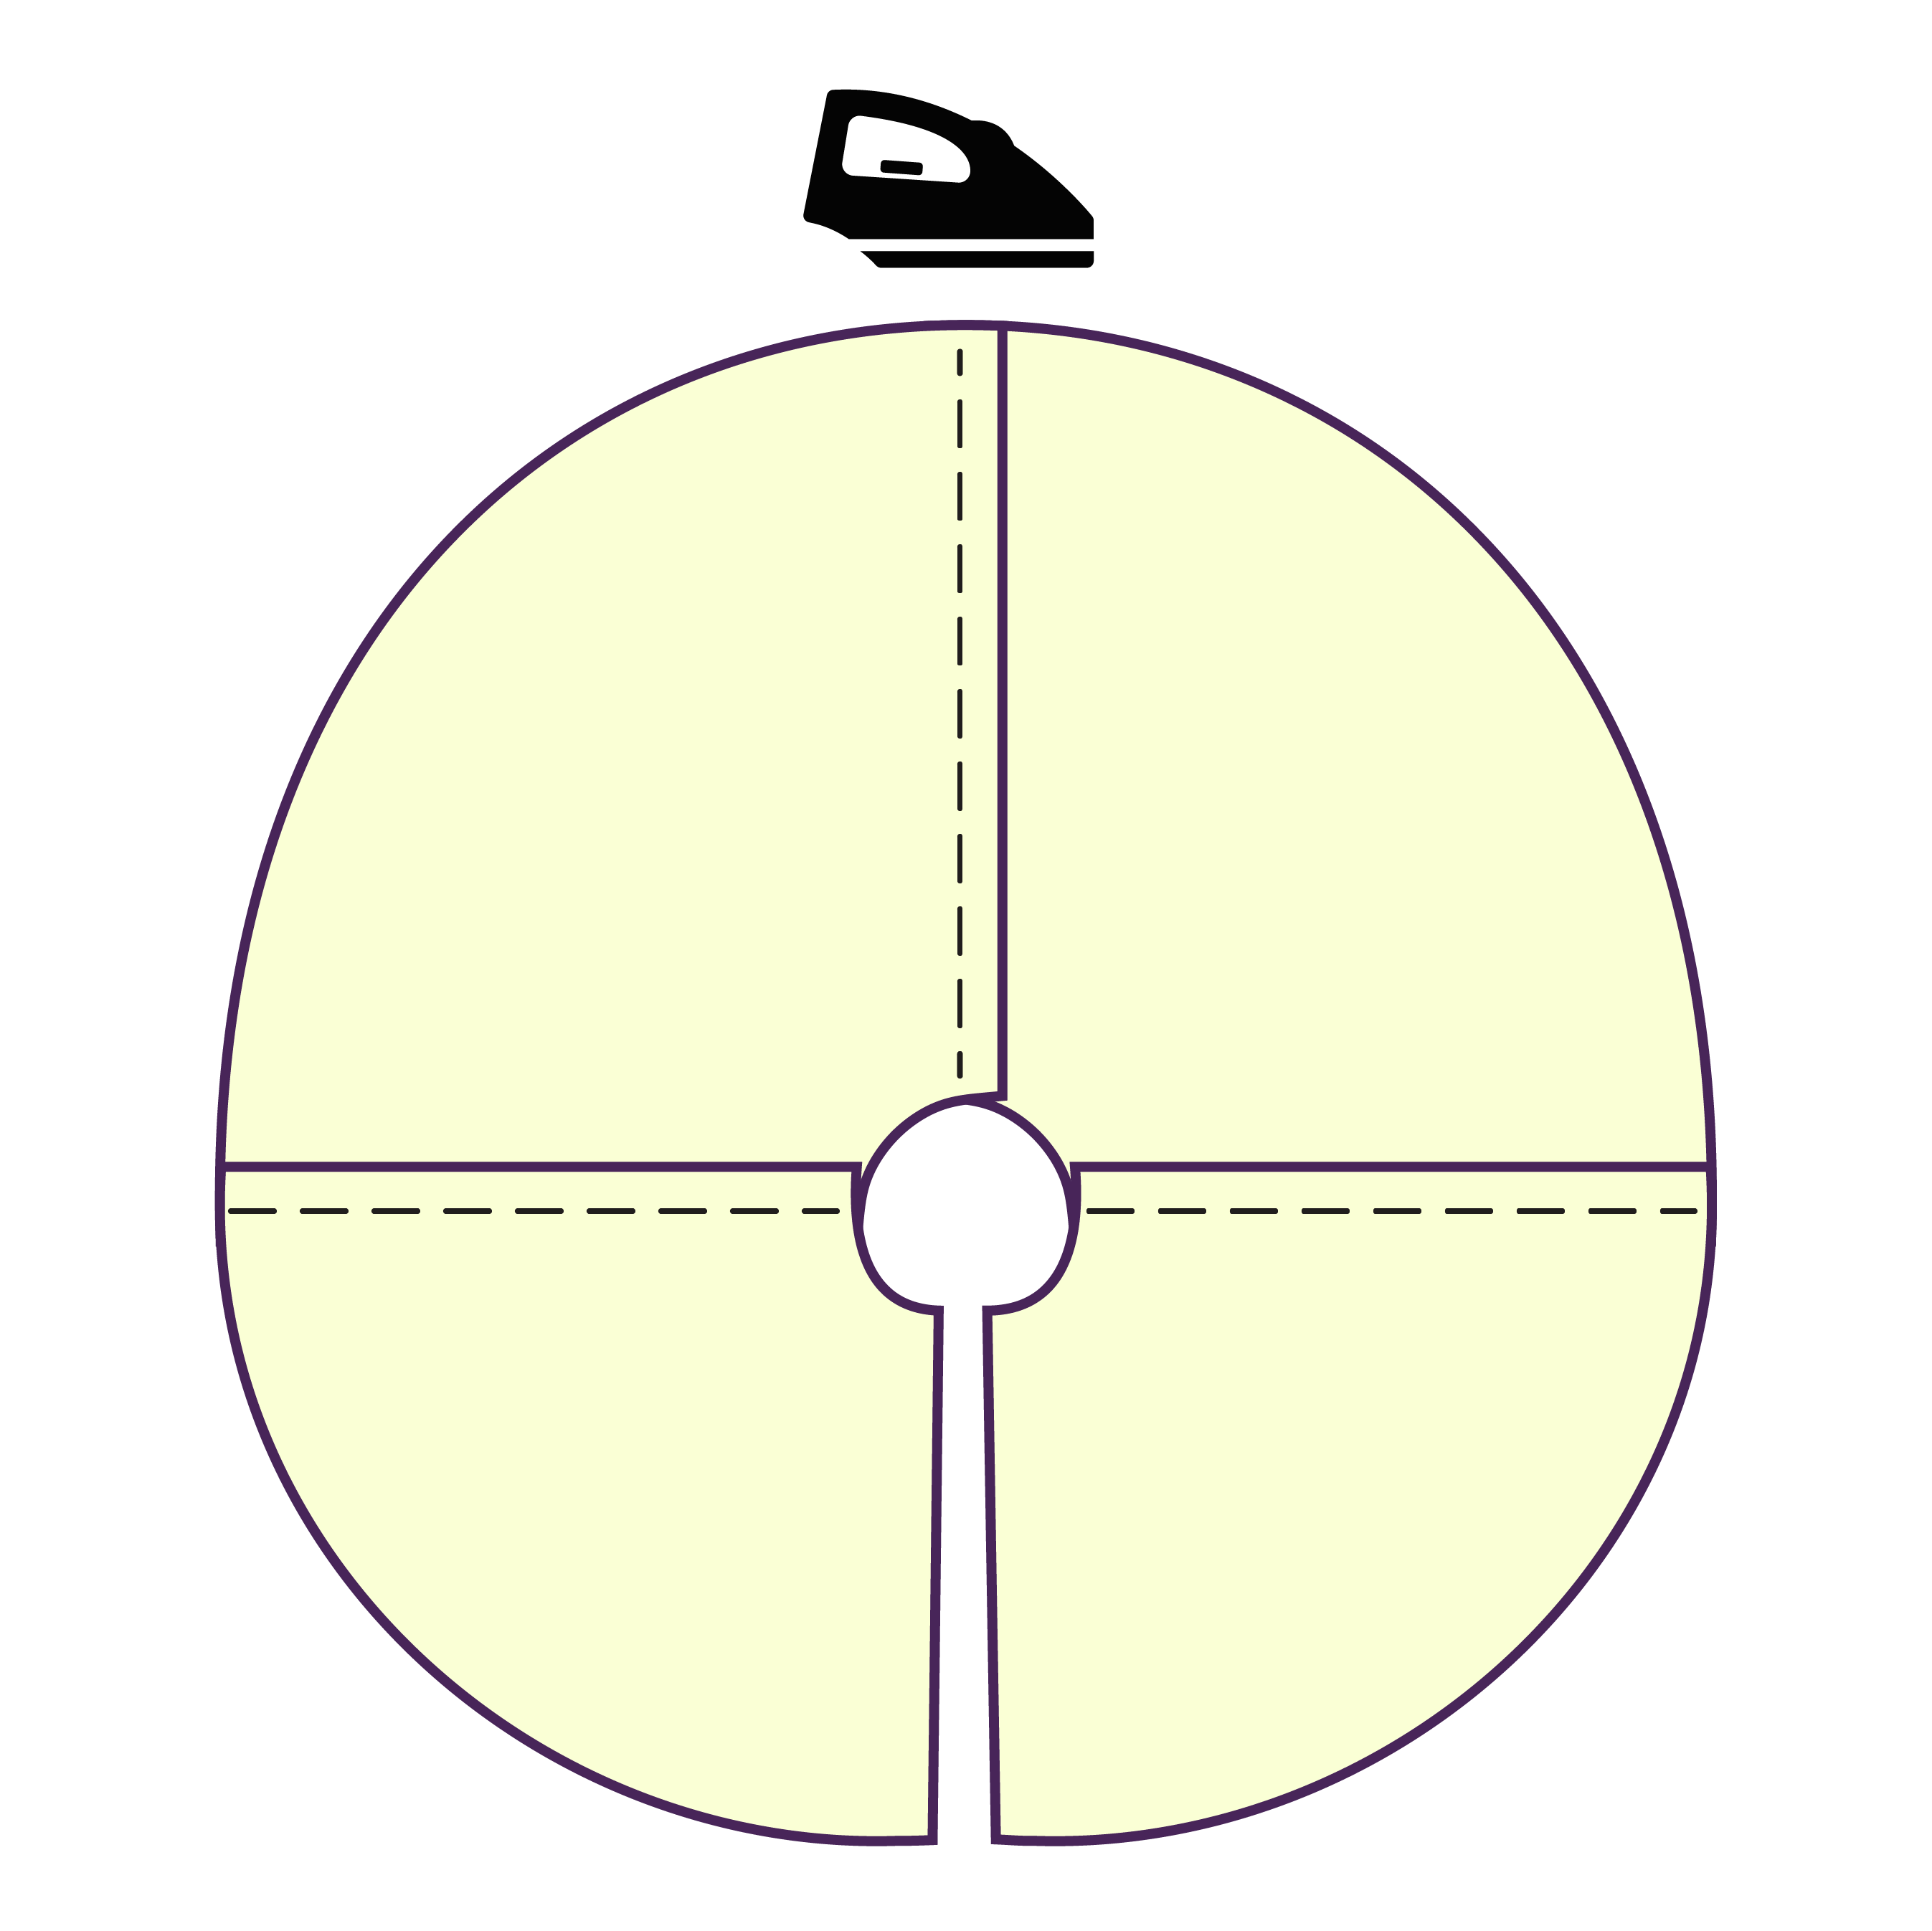
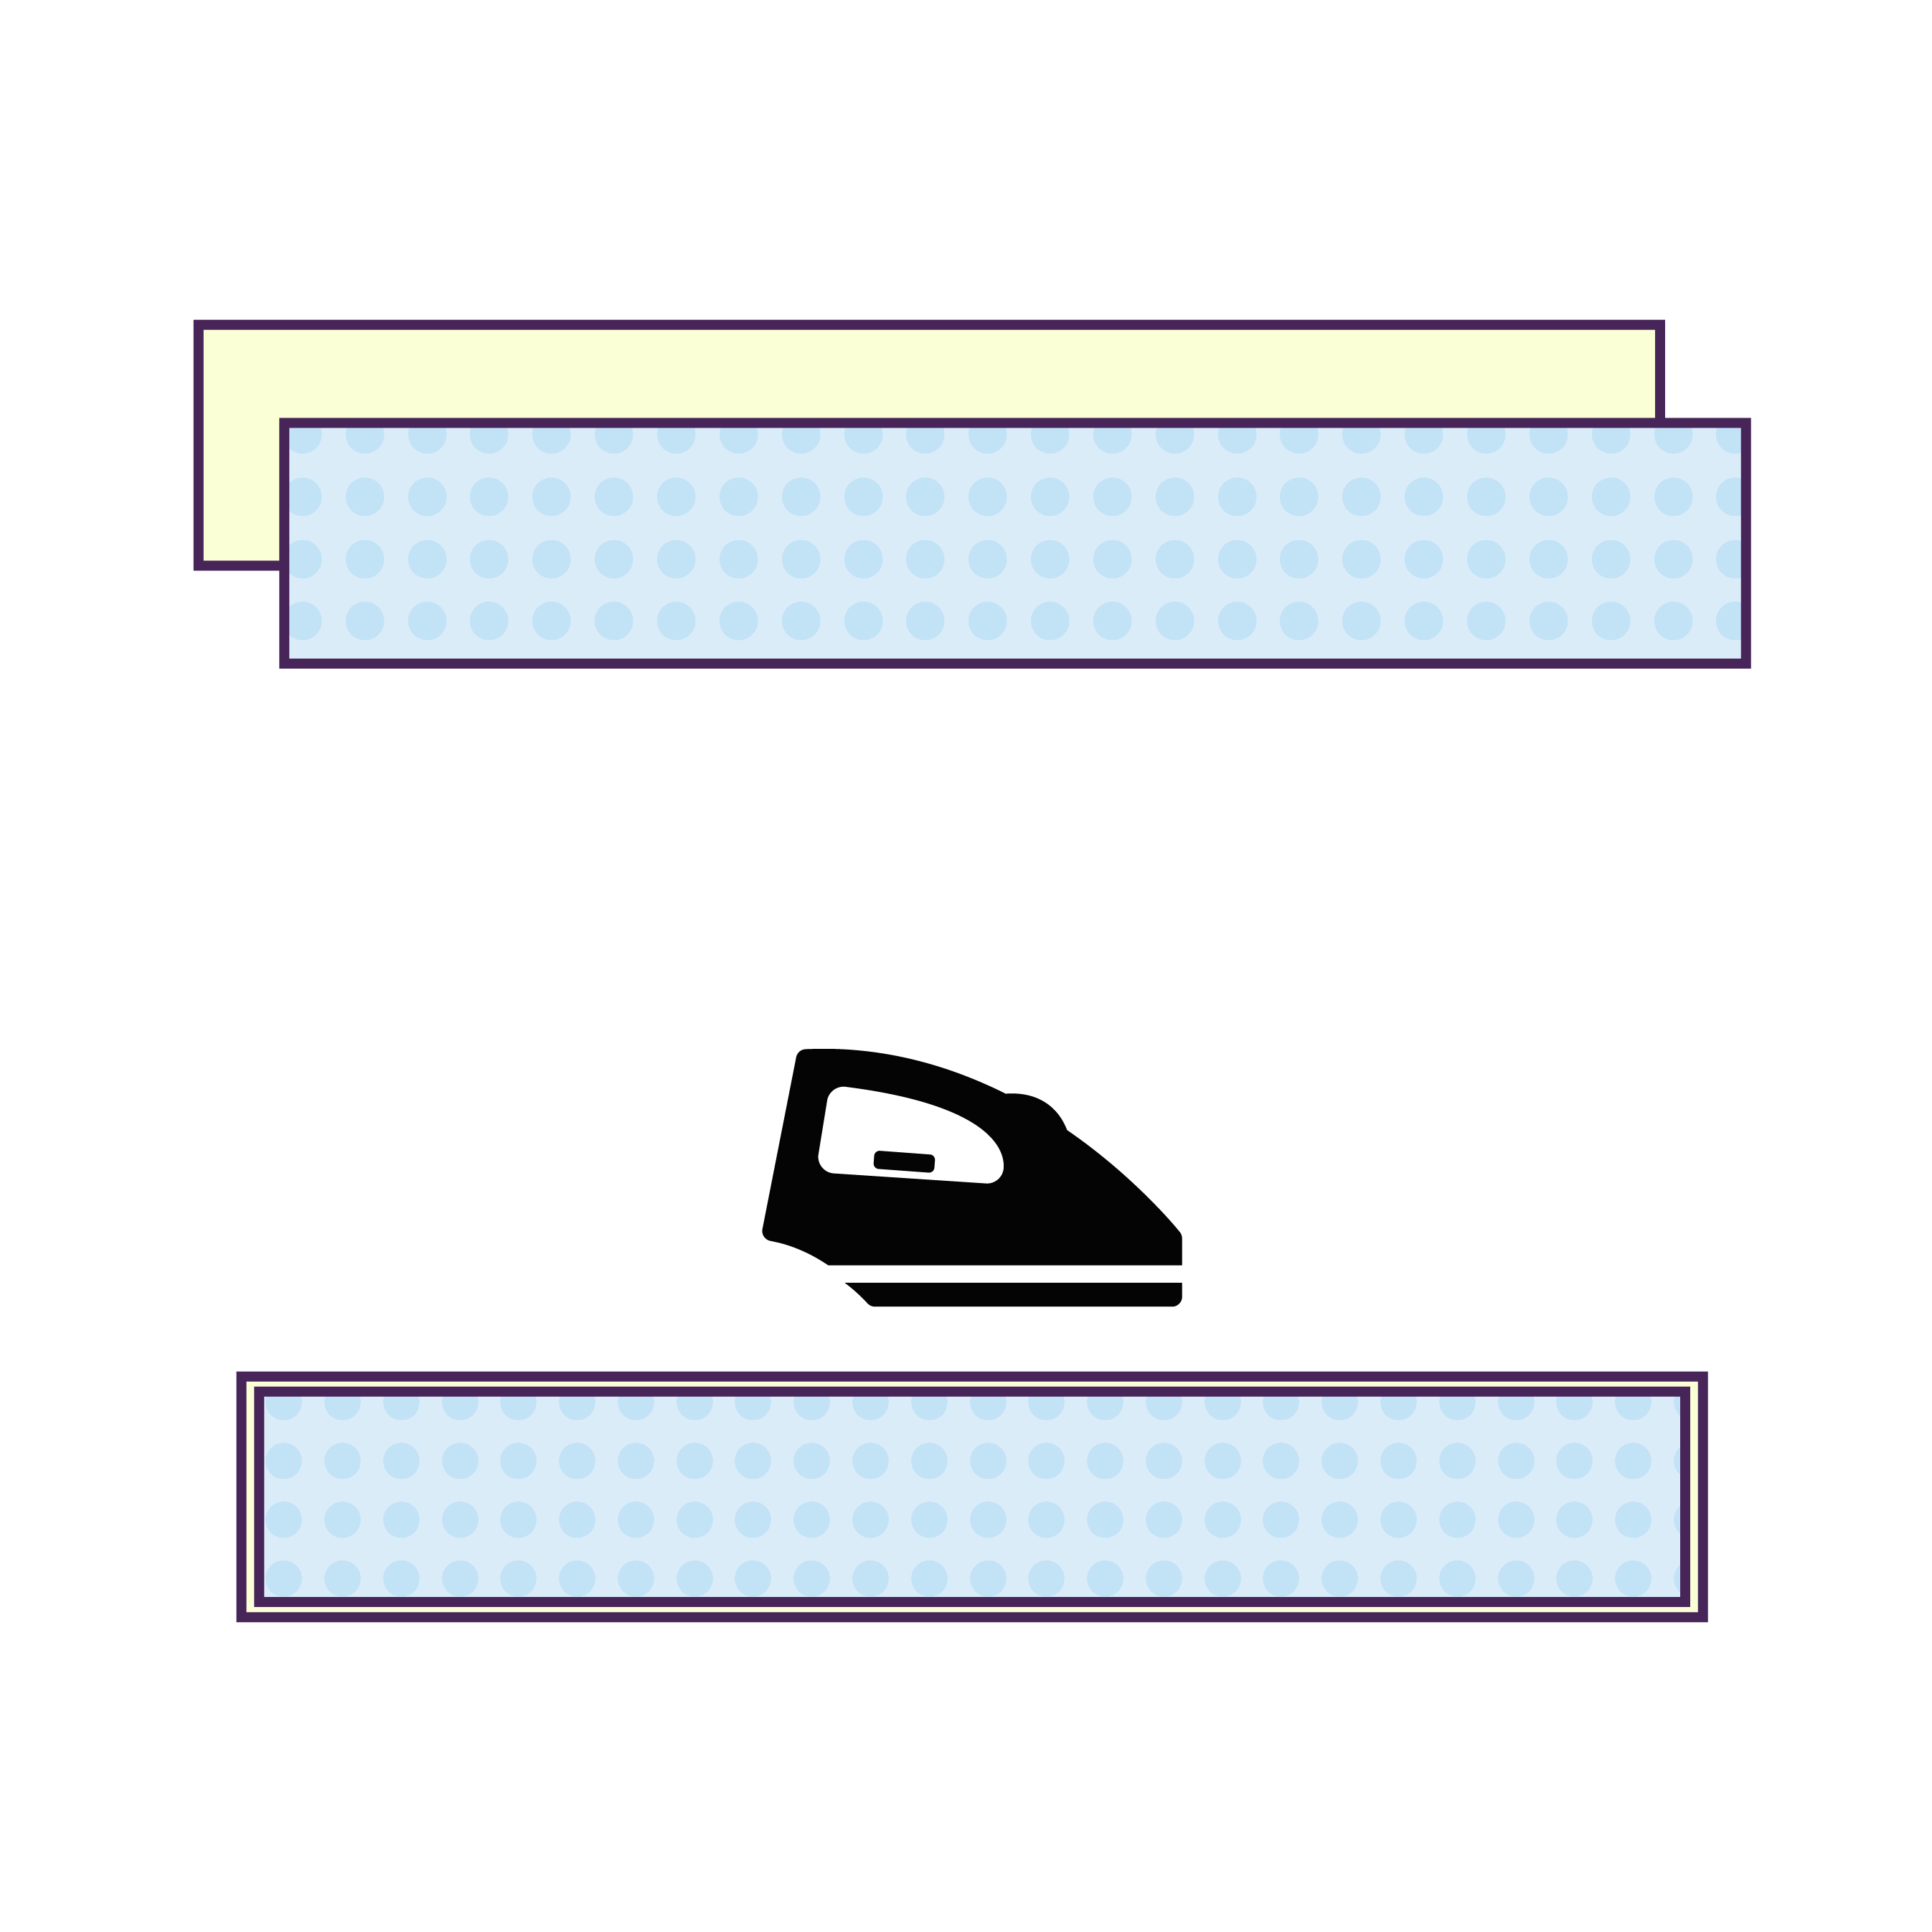
Gather your waist belt and interfacing. Press and fuse the interfacing to the wrong side of the waist belt fabric.
STEP 9
Now fold the waist belt horizontally in half so the right side is facing out, then press the fold.
STEP 10
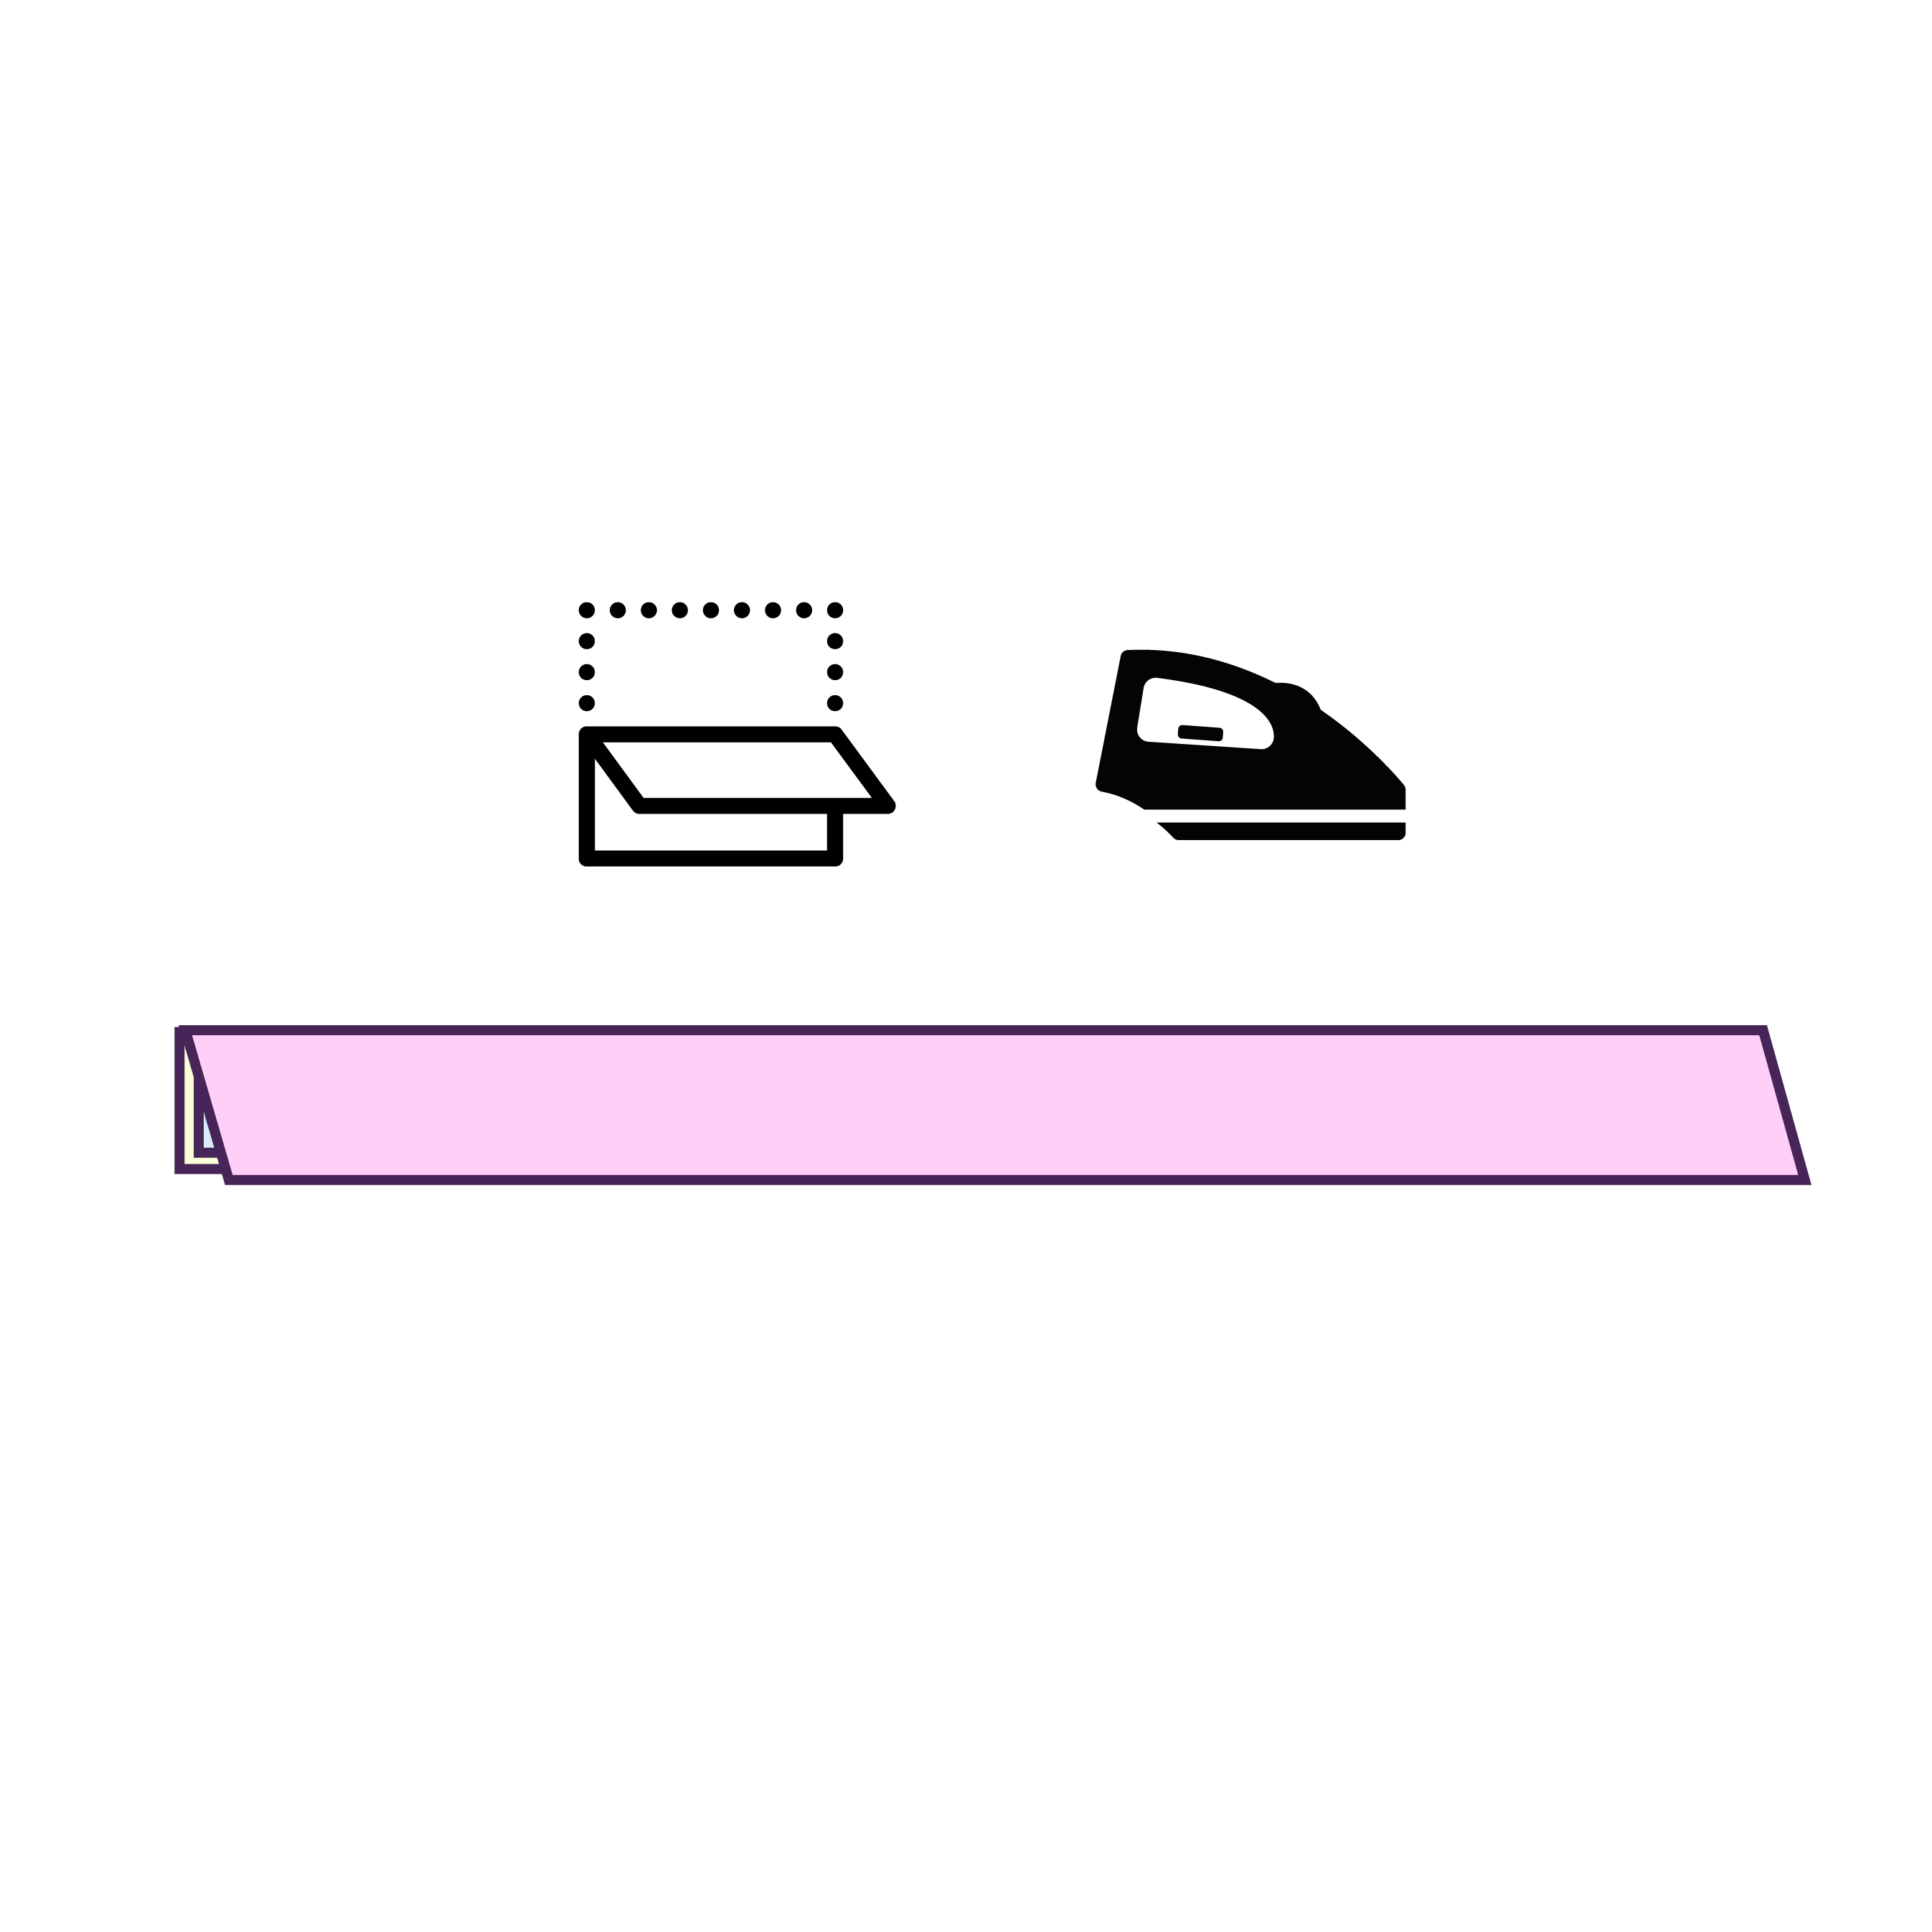
Unfold, then fold in all edges 0.5 inches and press all edges. Then unfold again this time all folds.
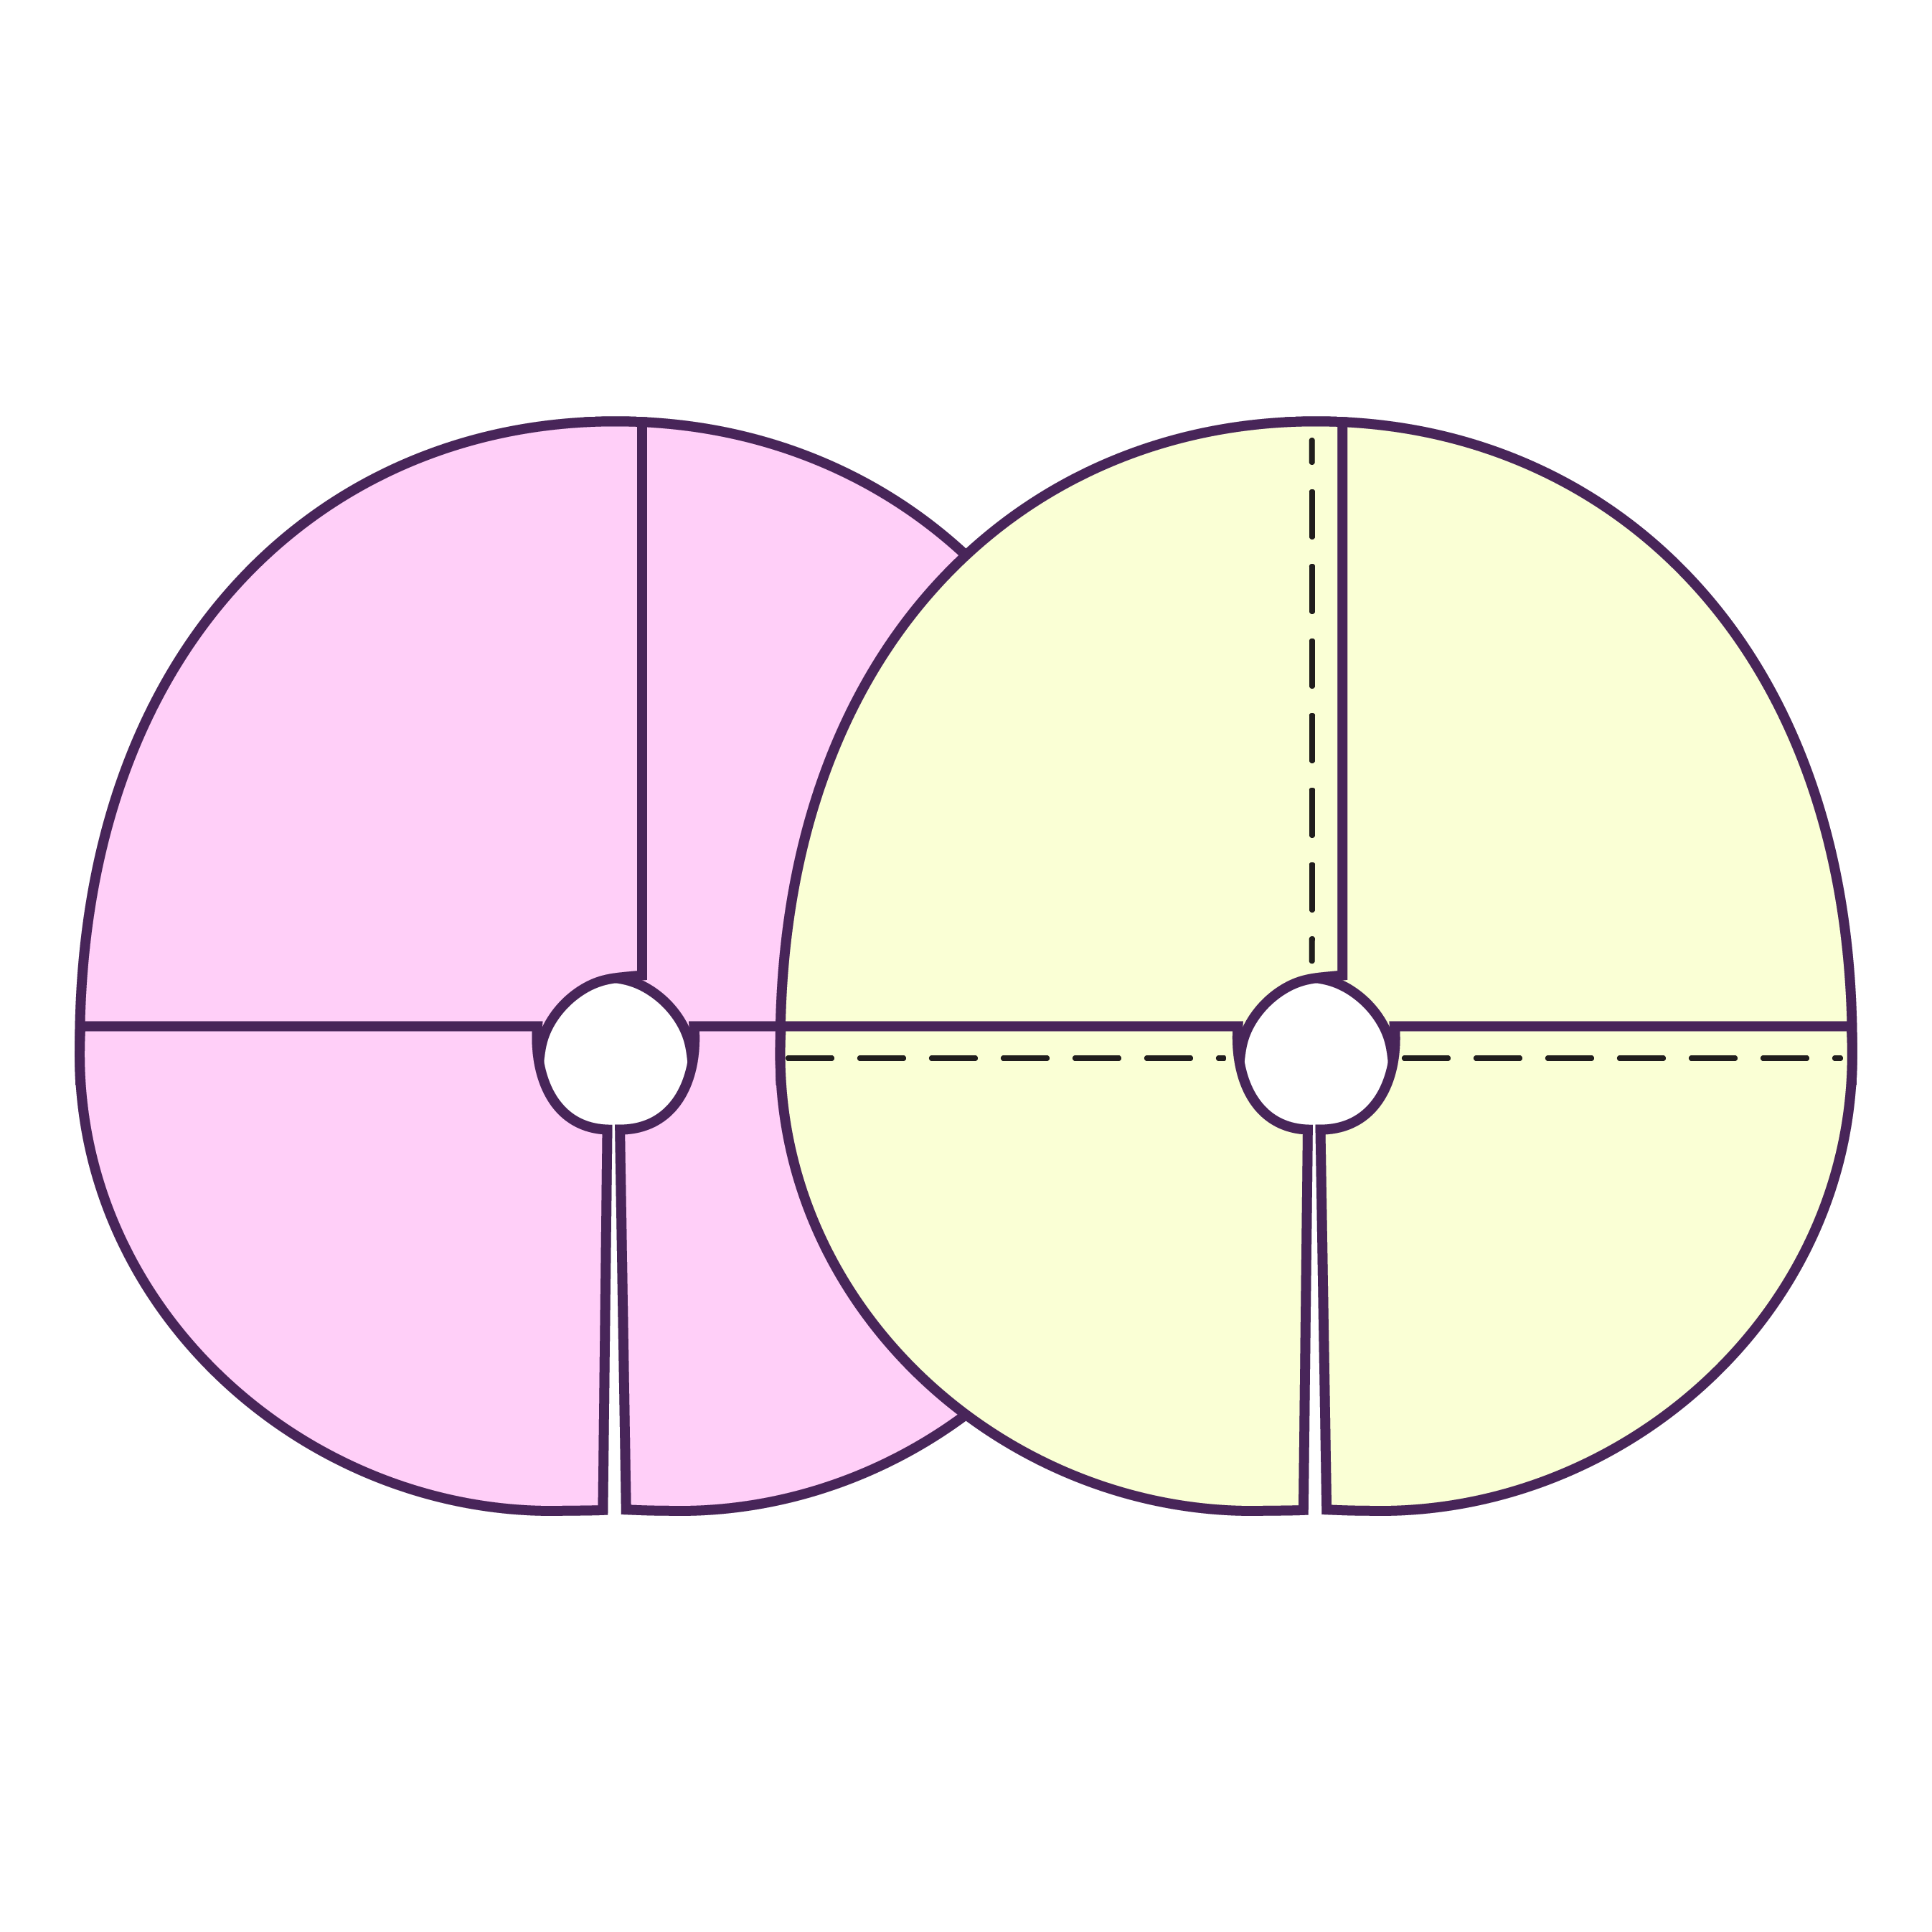
STEP 11
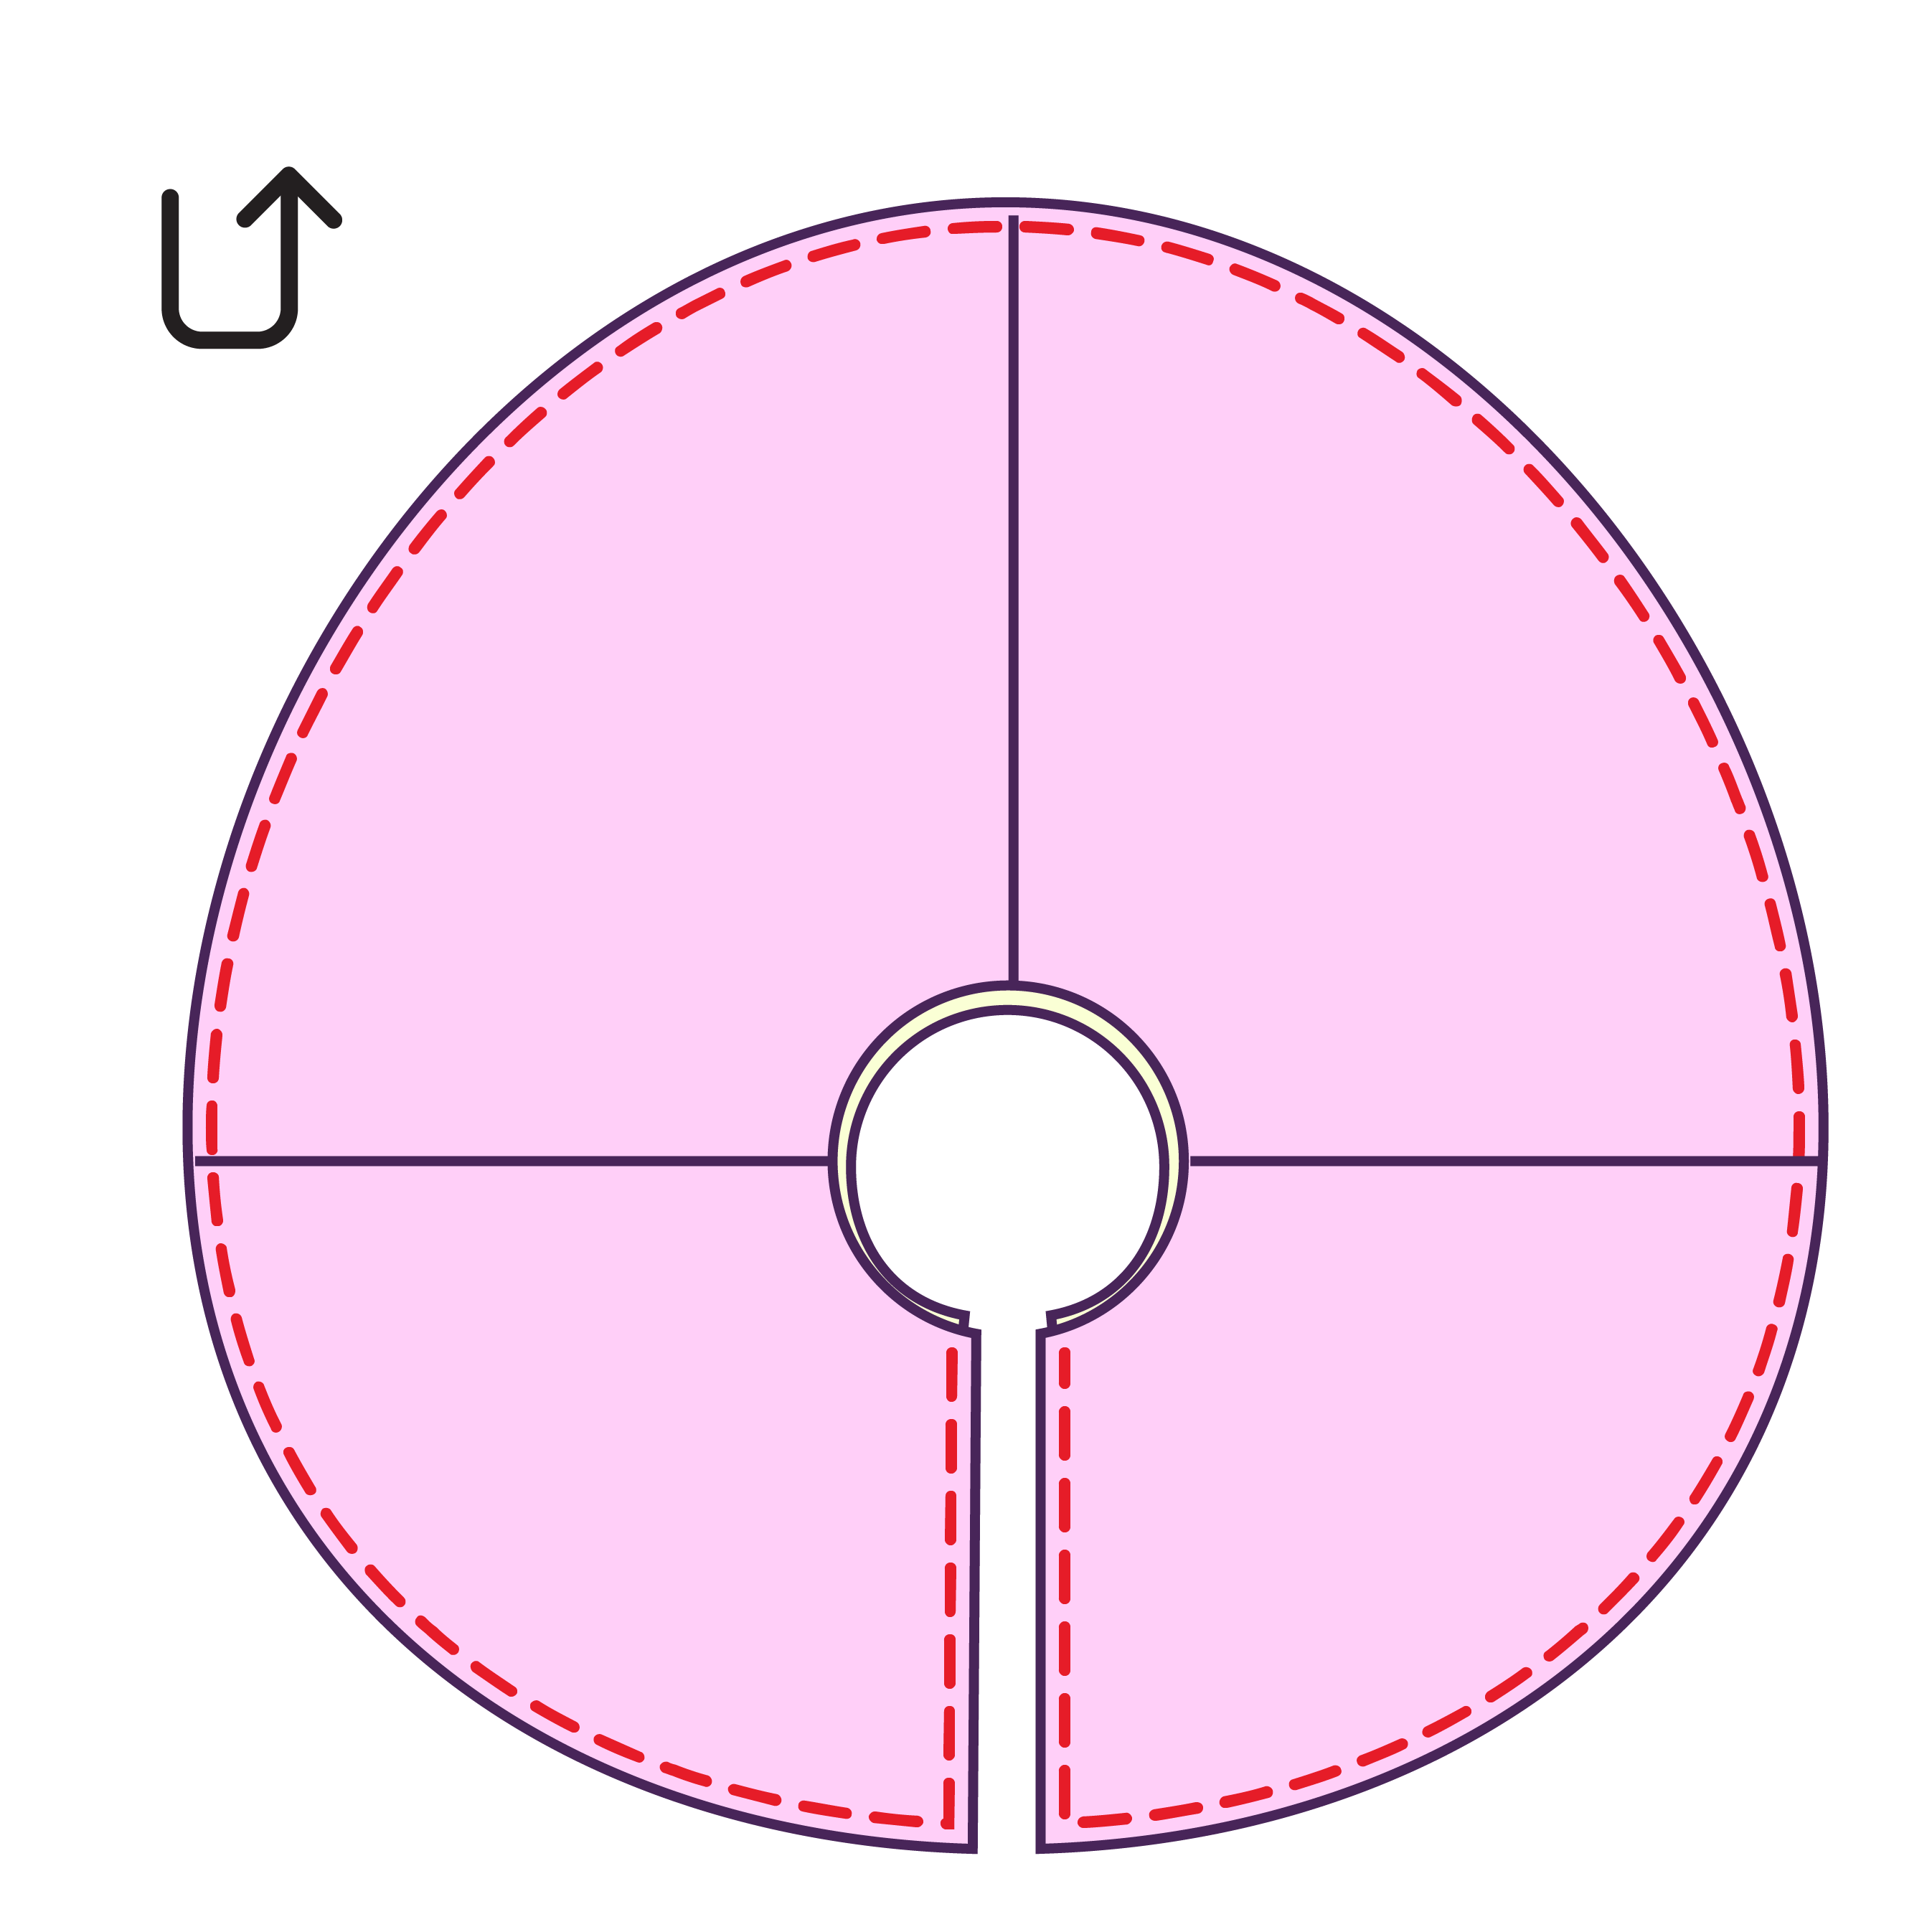
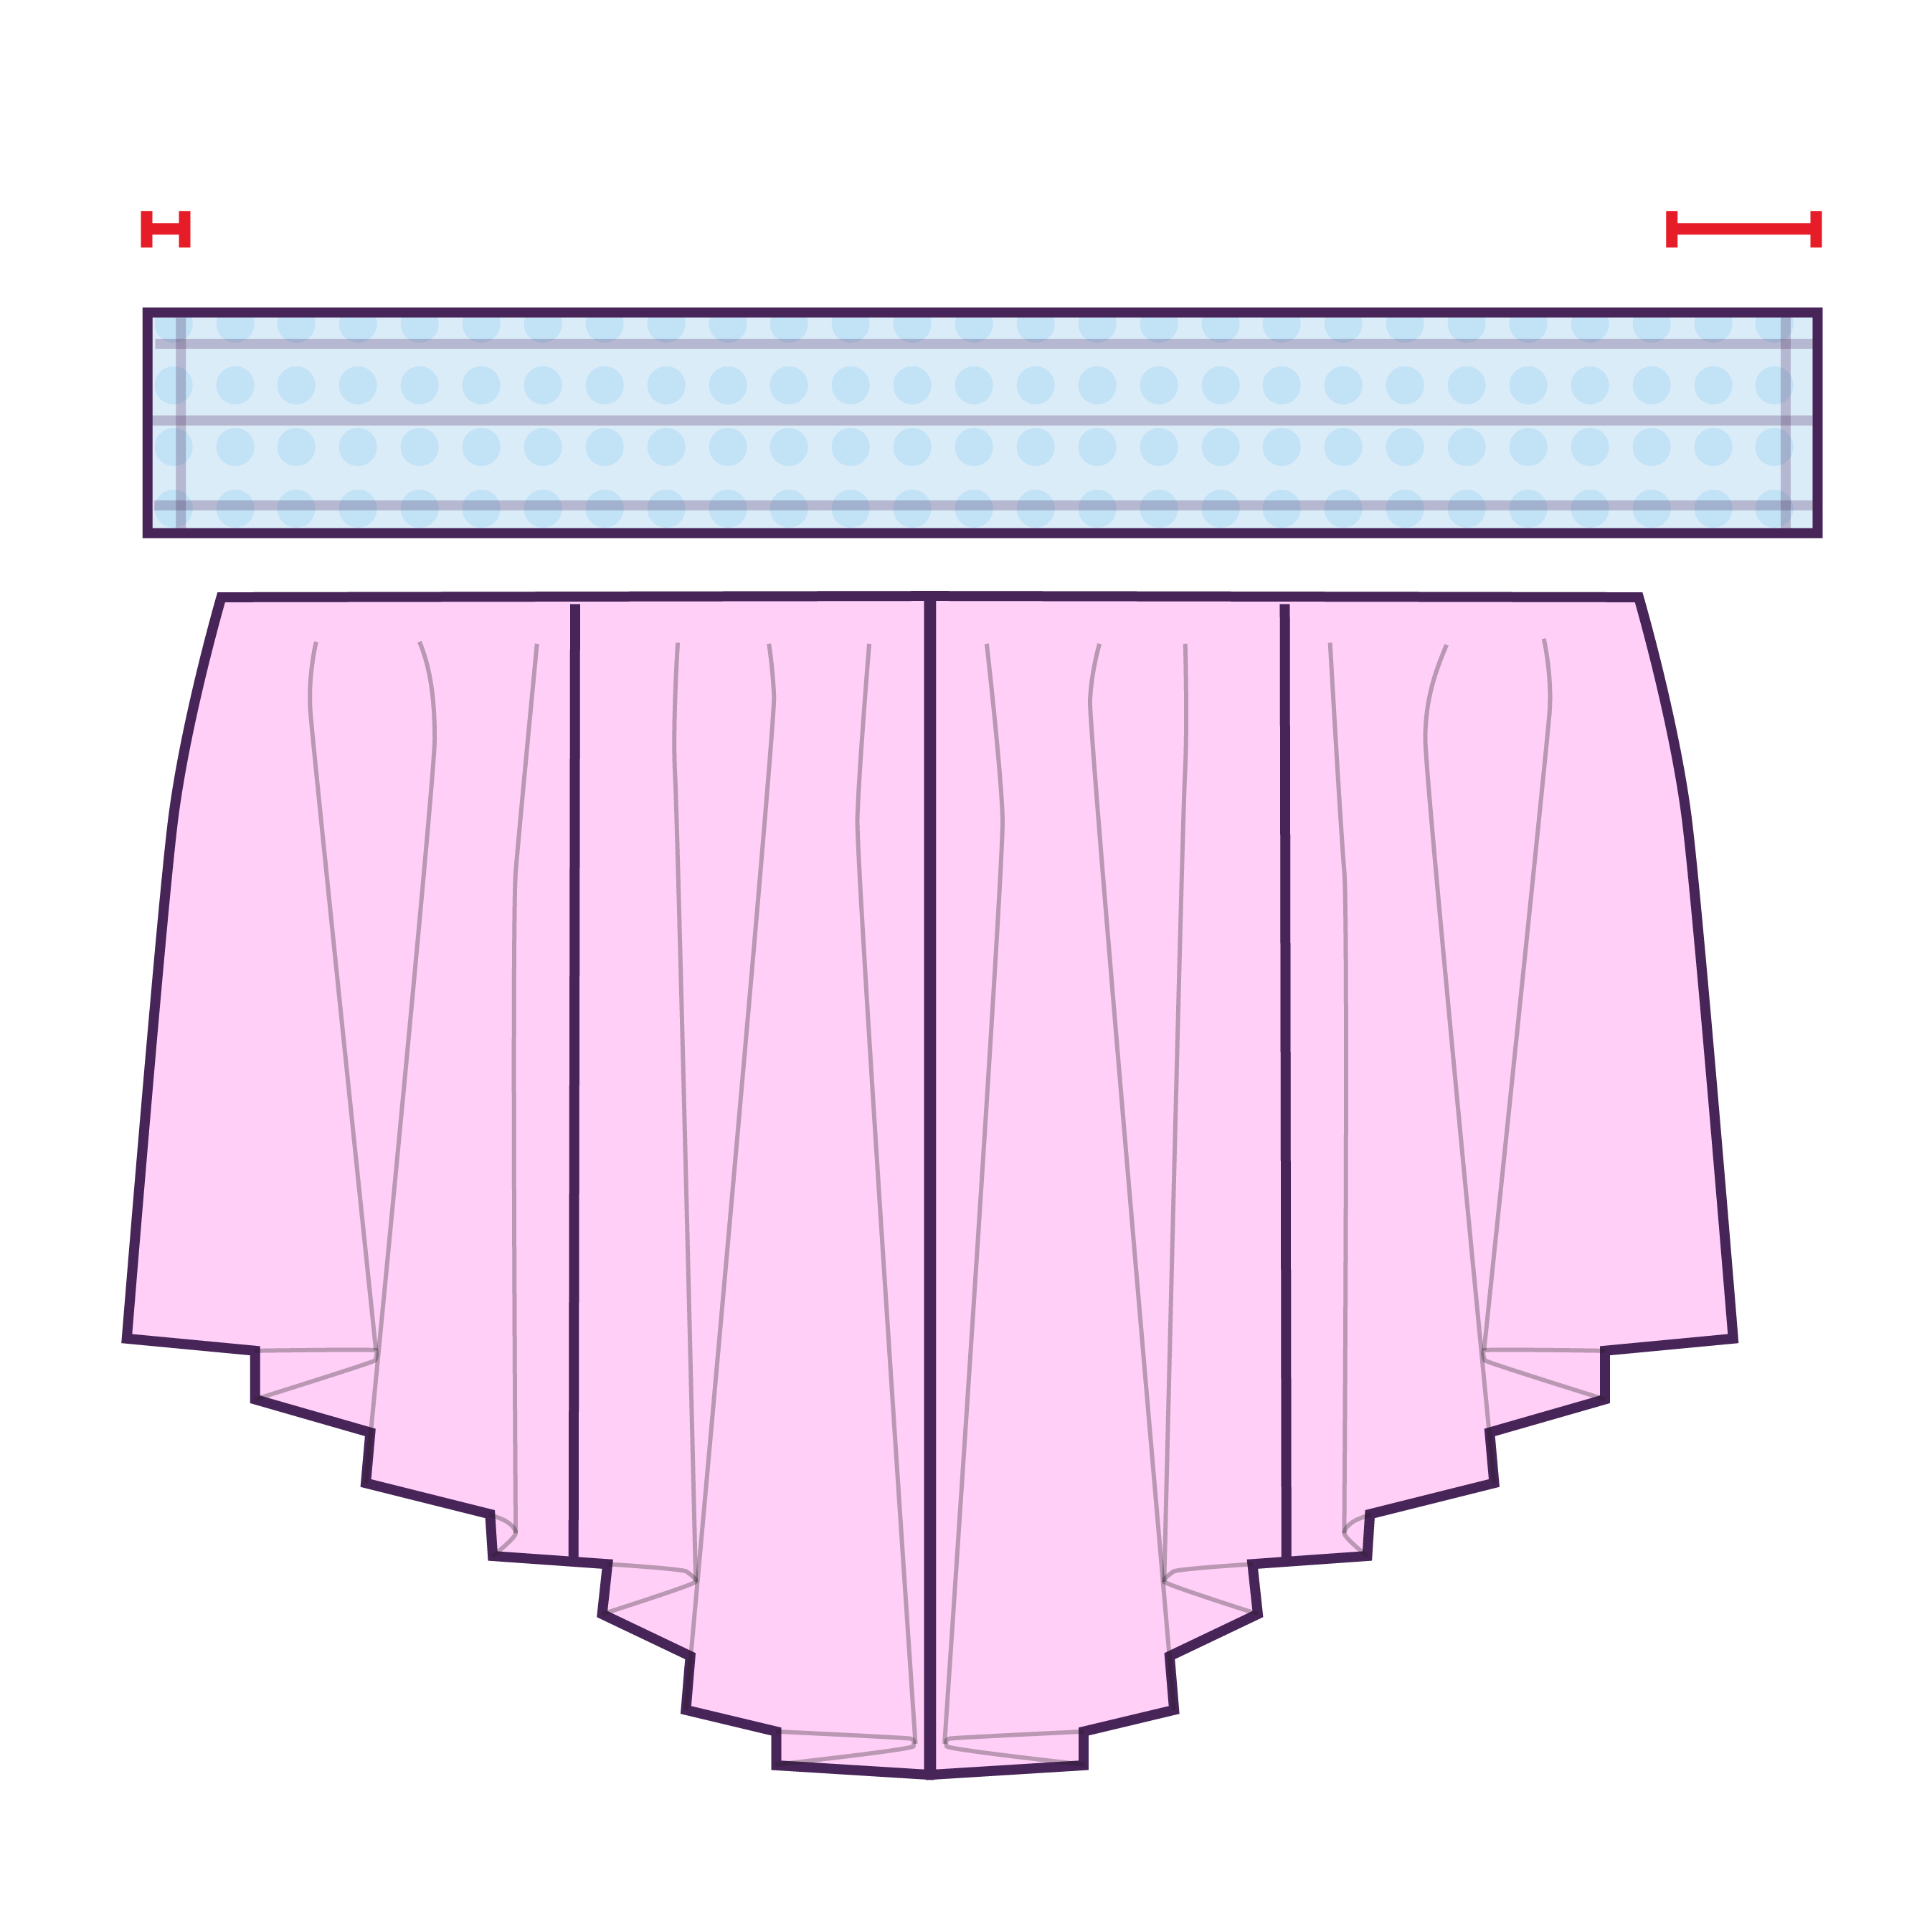
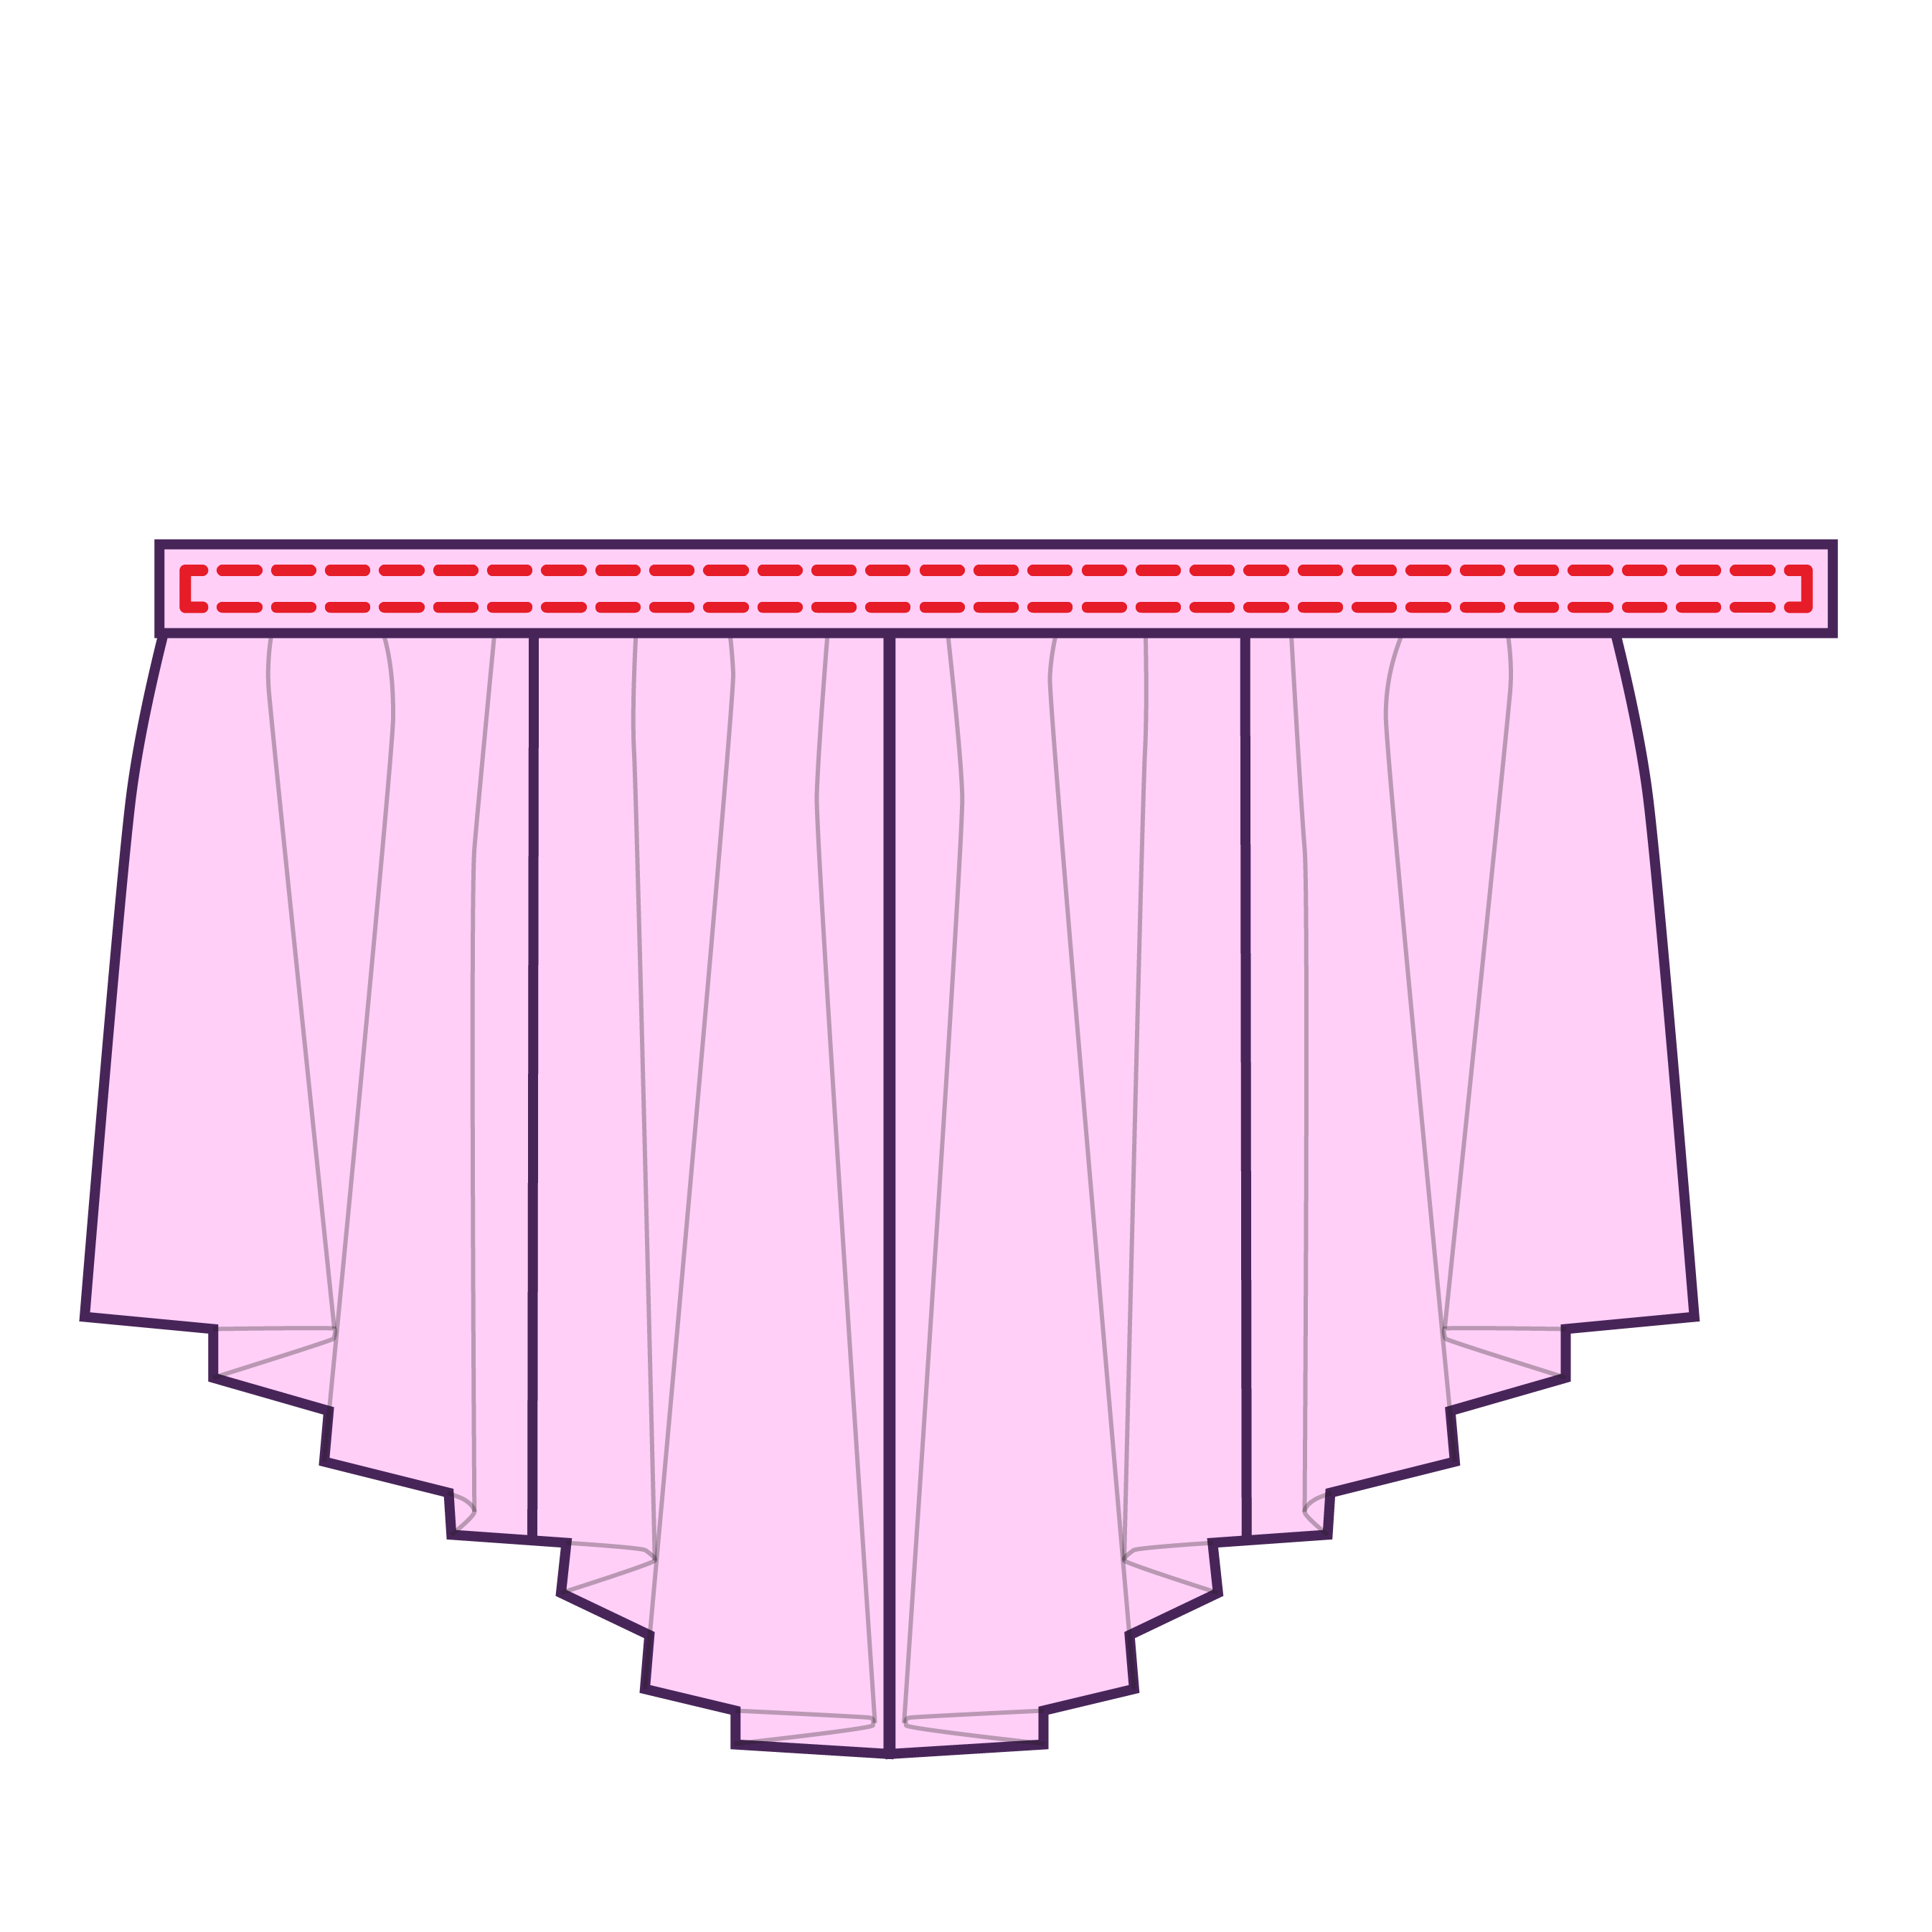
Gather your waist belt and skirt. Layout the skirt so the inner circle lines up straight with the waist belt. The waist belt should be slightly longer to allow room for snaps or velcro.
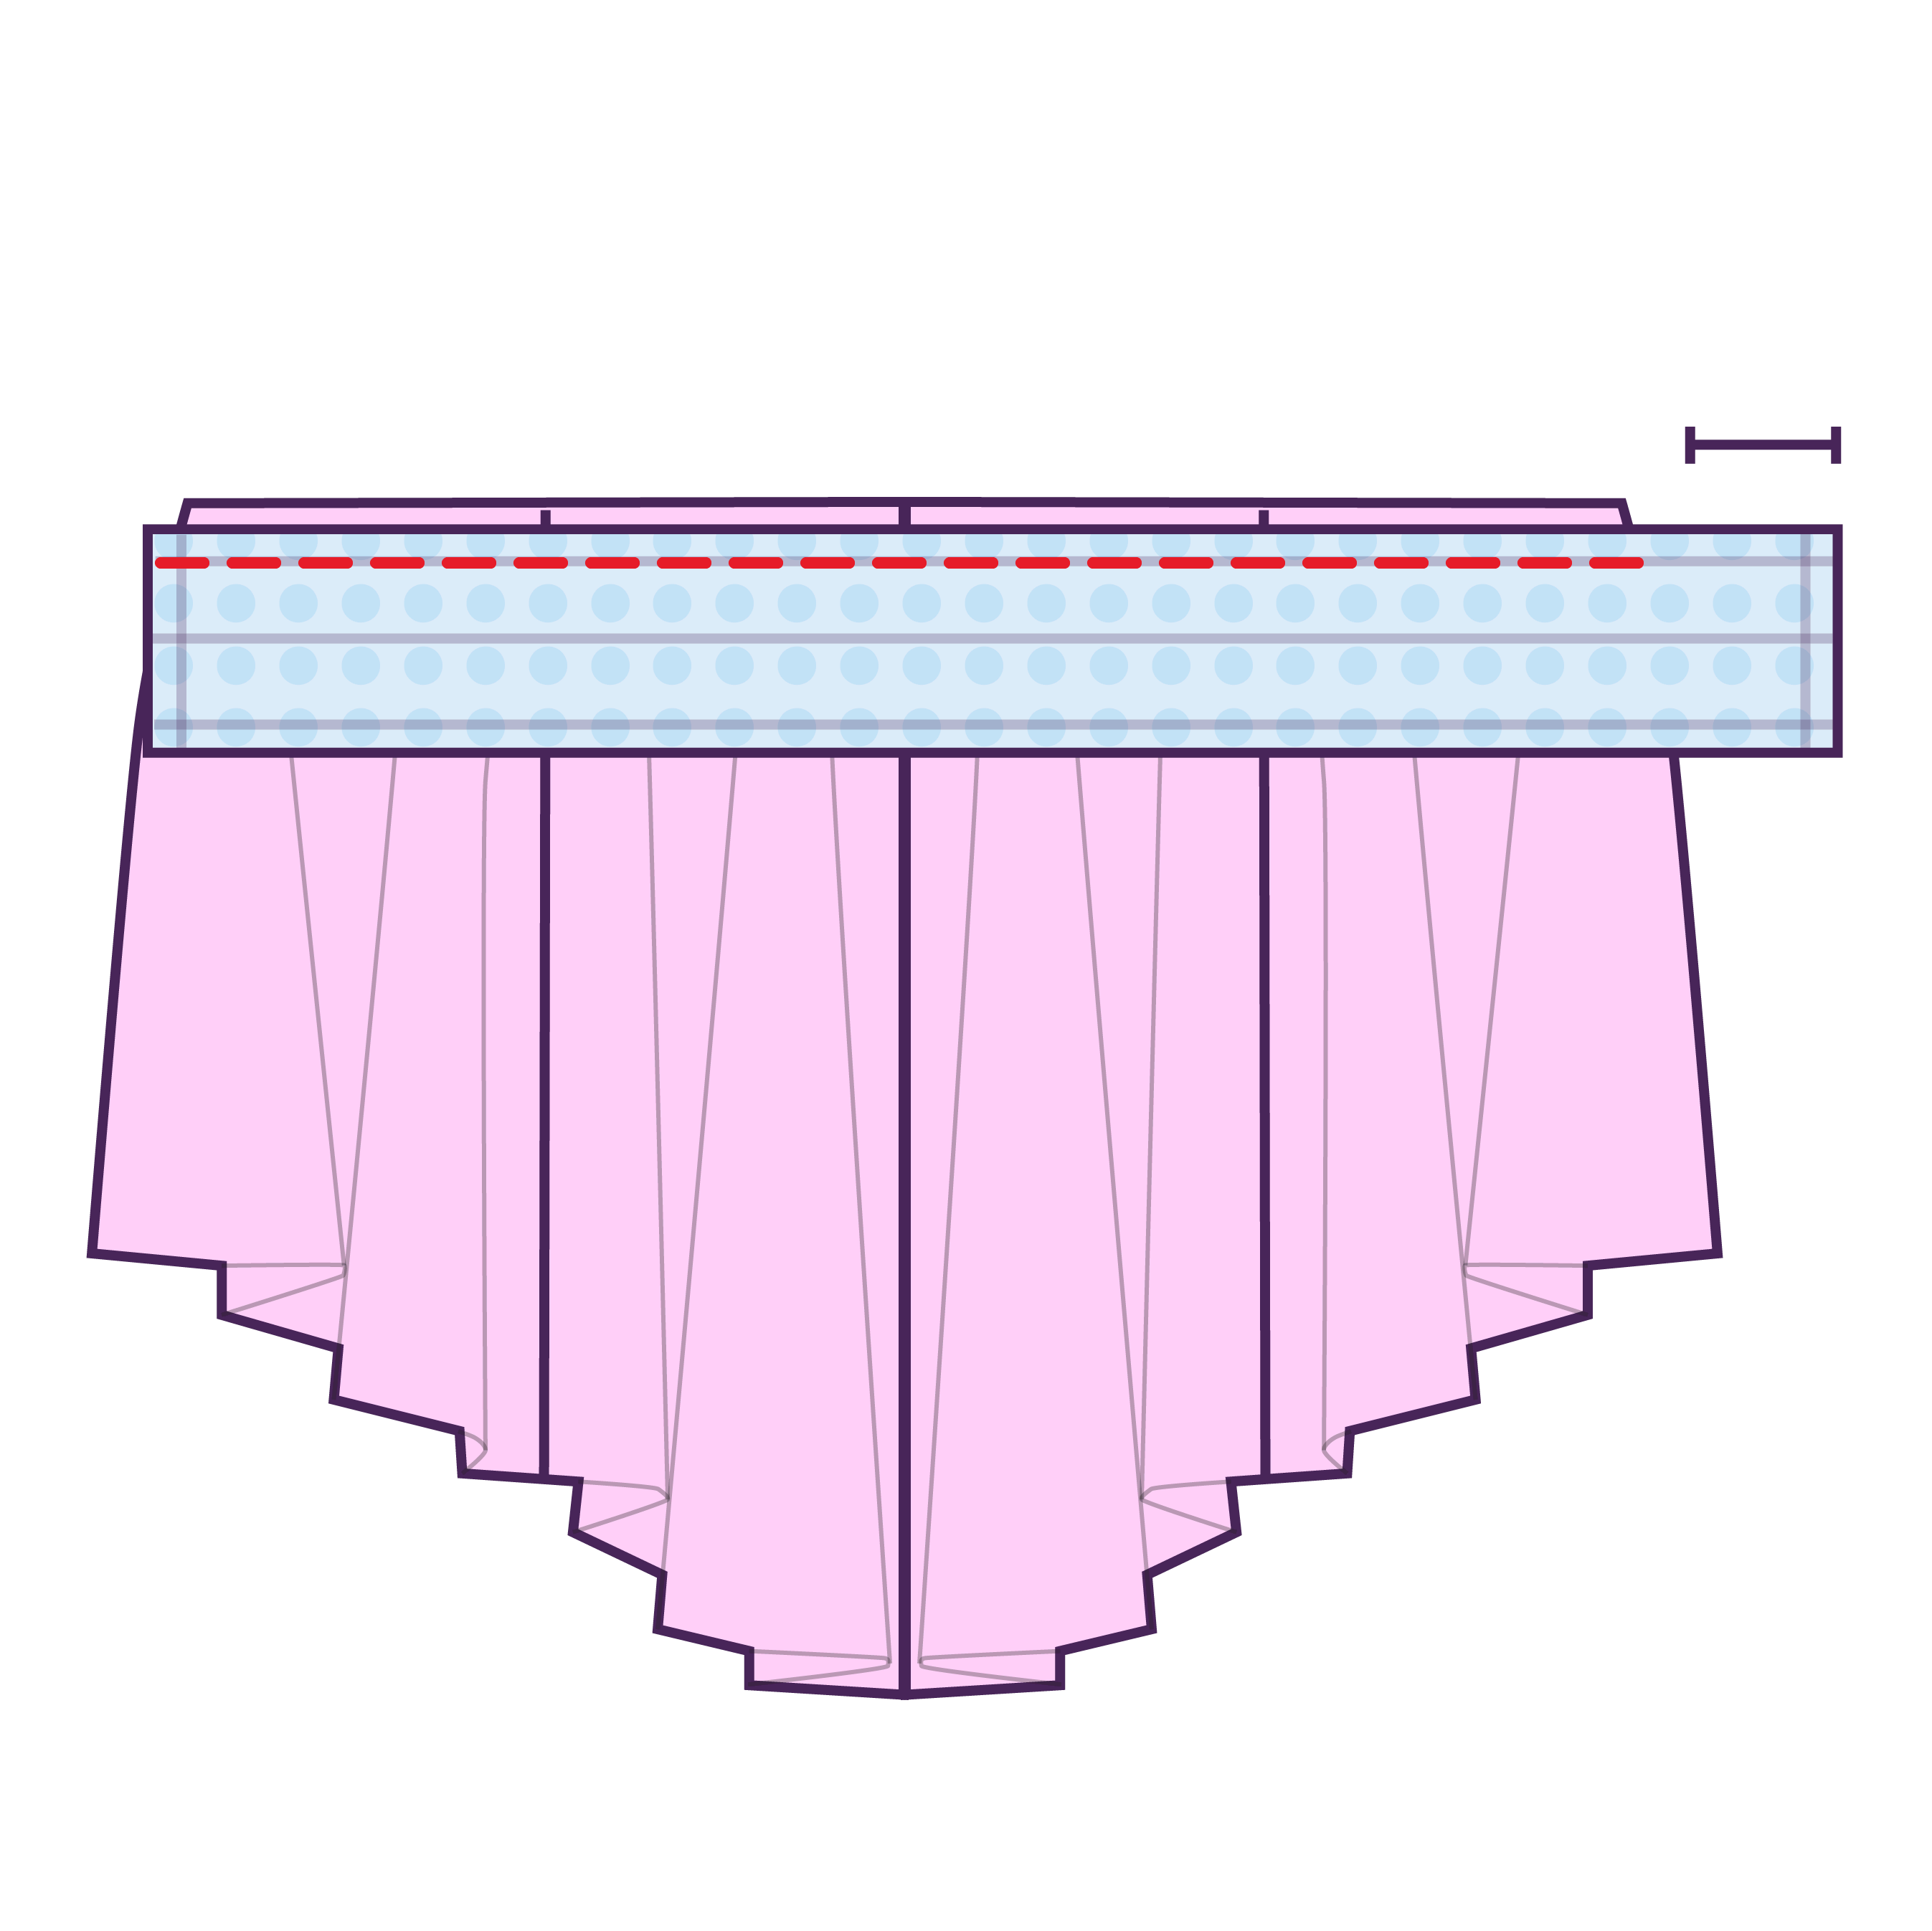
STEP 12
Stack the waist belt over the skirt, right sides facing each other, leaving 0.5 inches of fabric at the start of the waist belt. Then sew the top edge of the waist belt to the skirt, the entire length of the skirt opening.
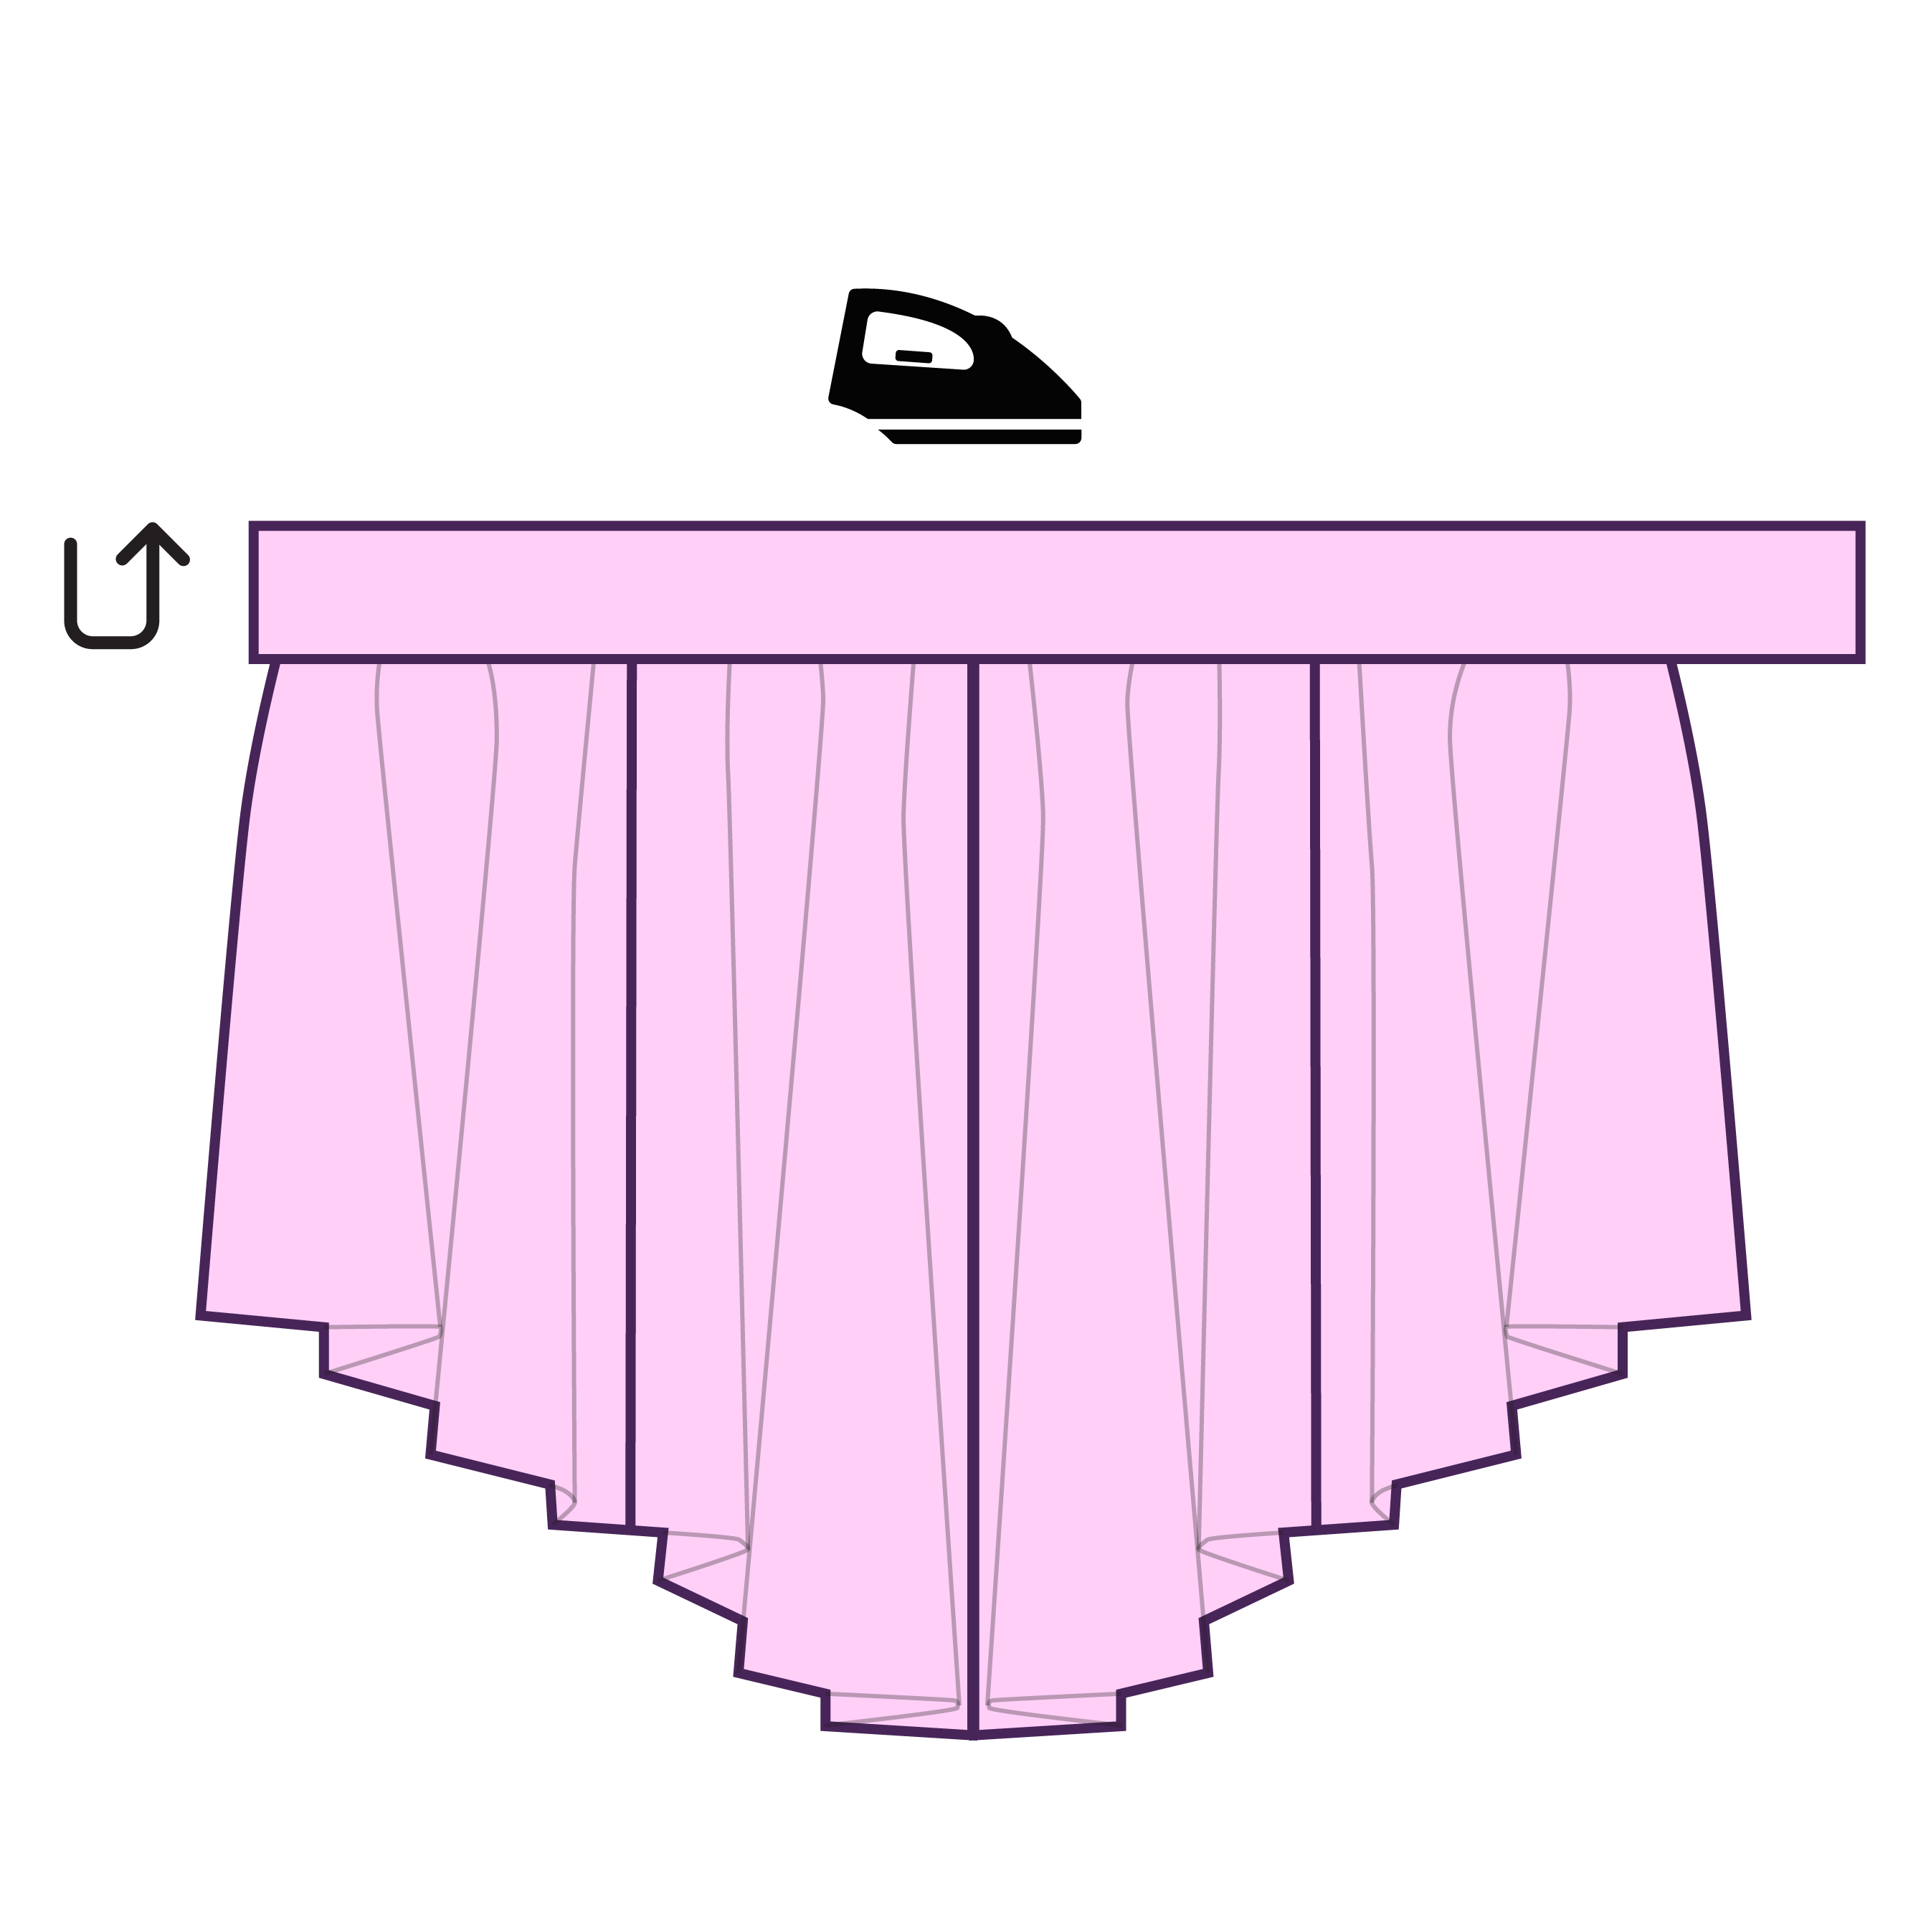
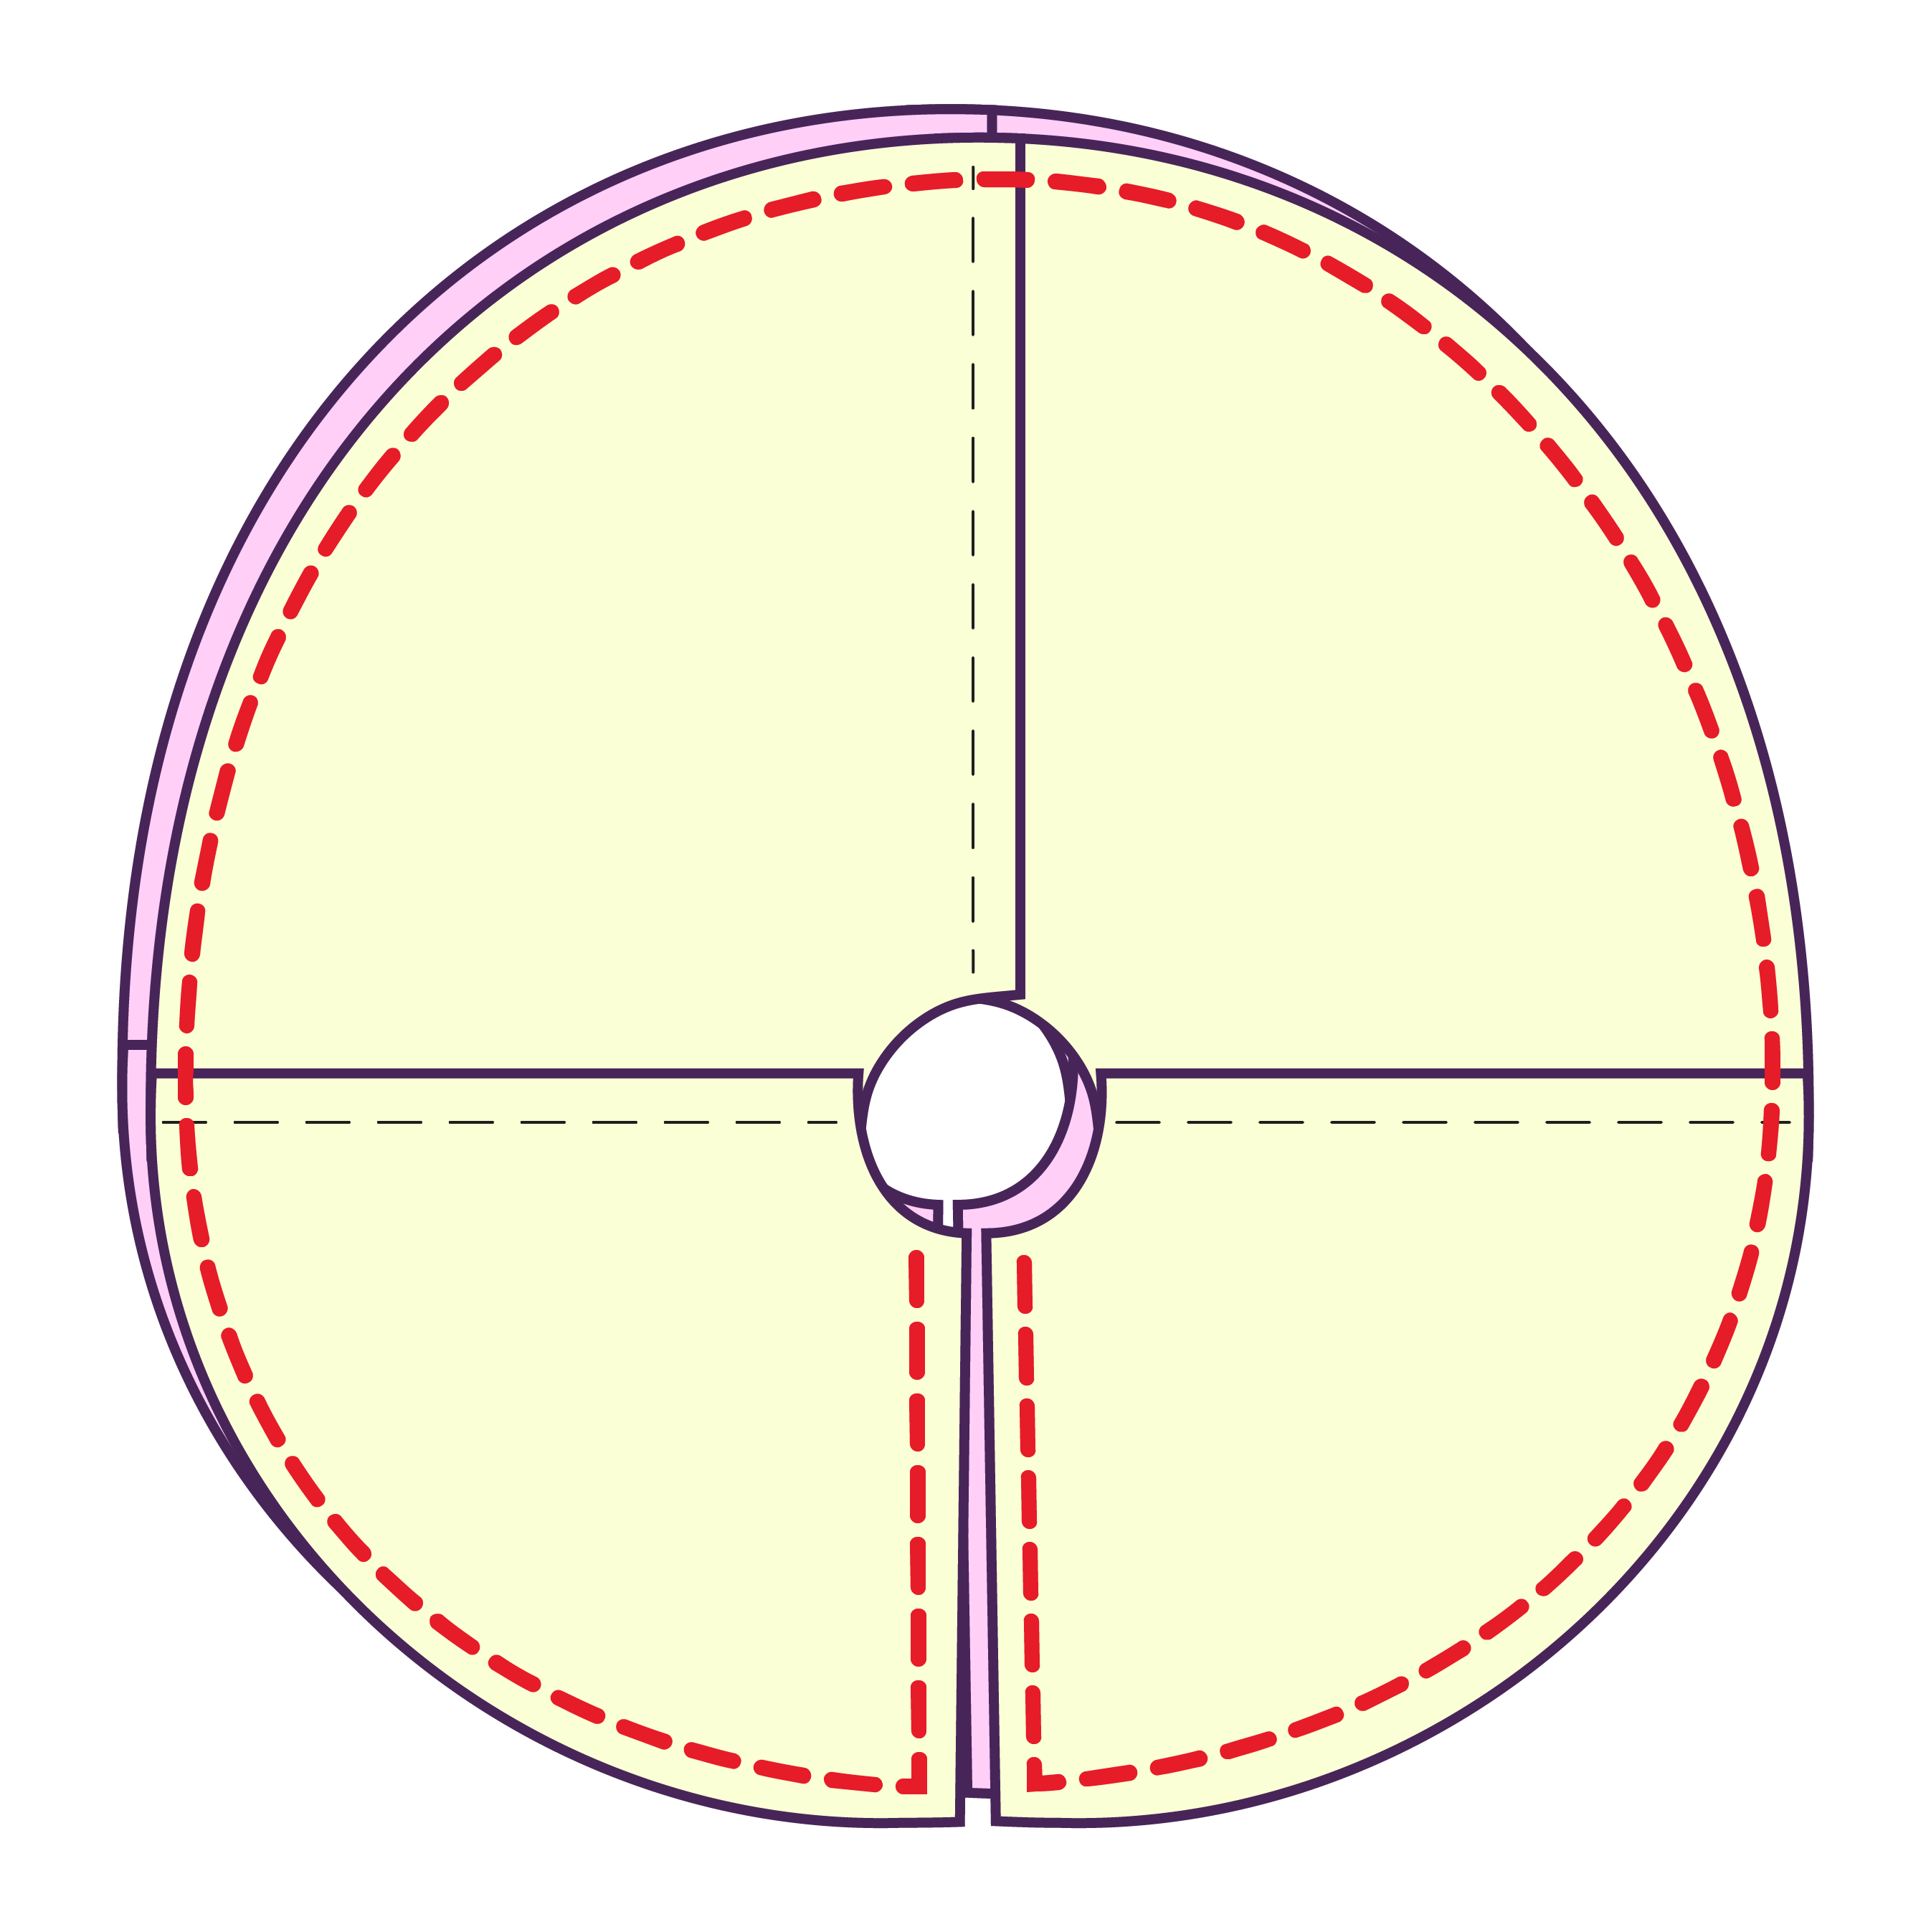
STEP 13
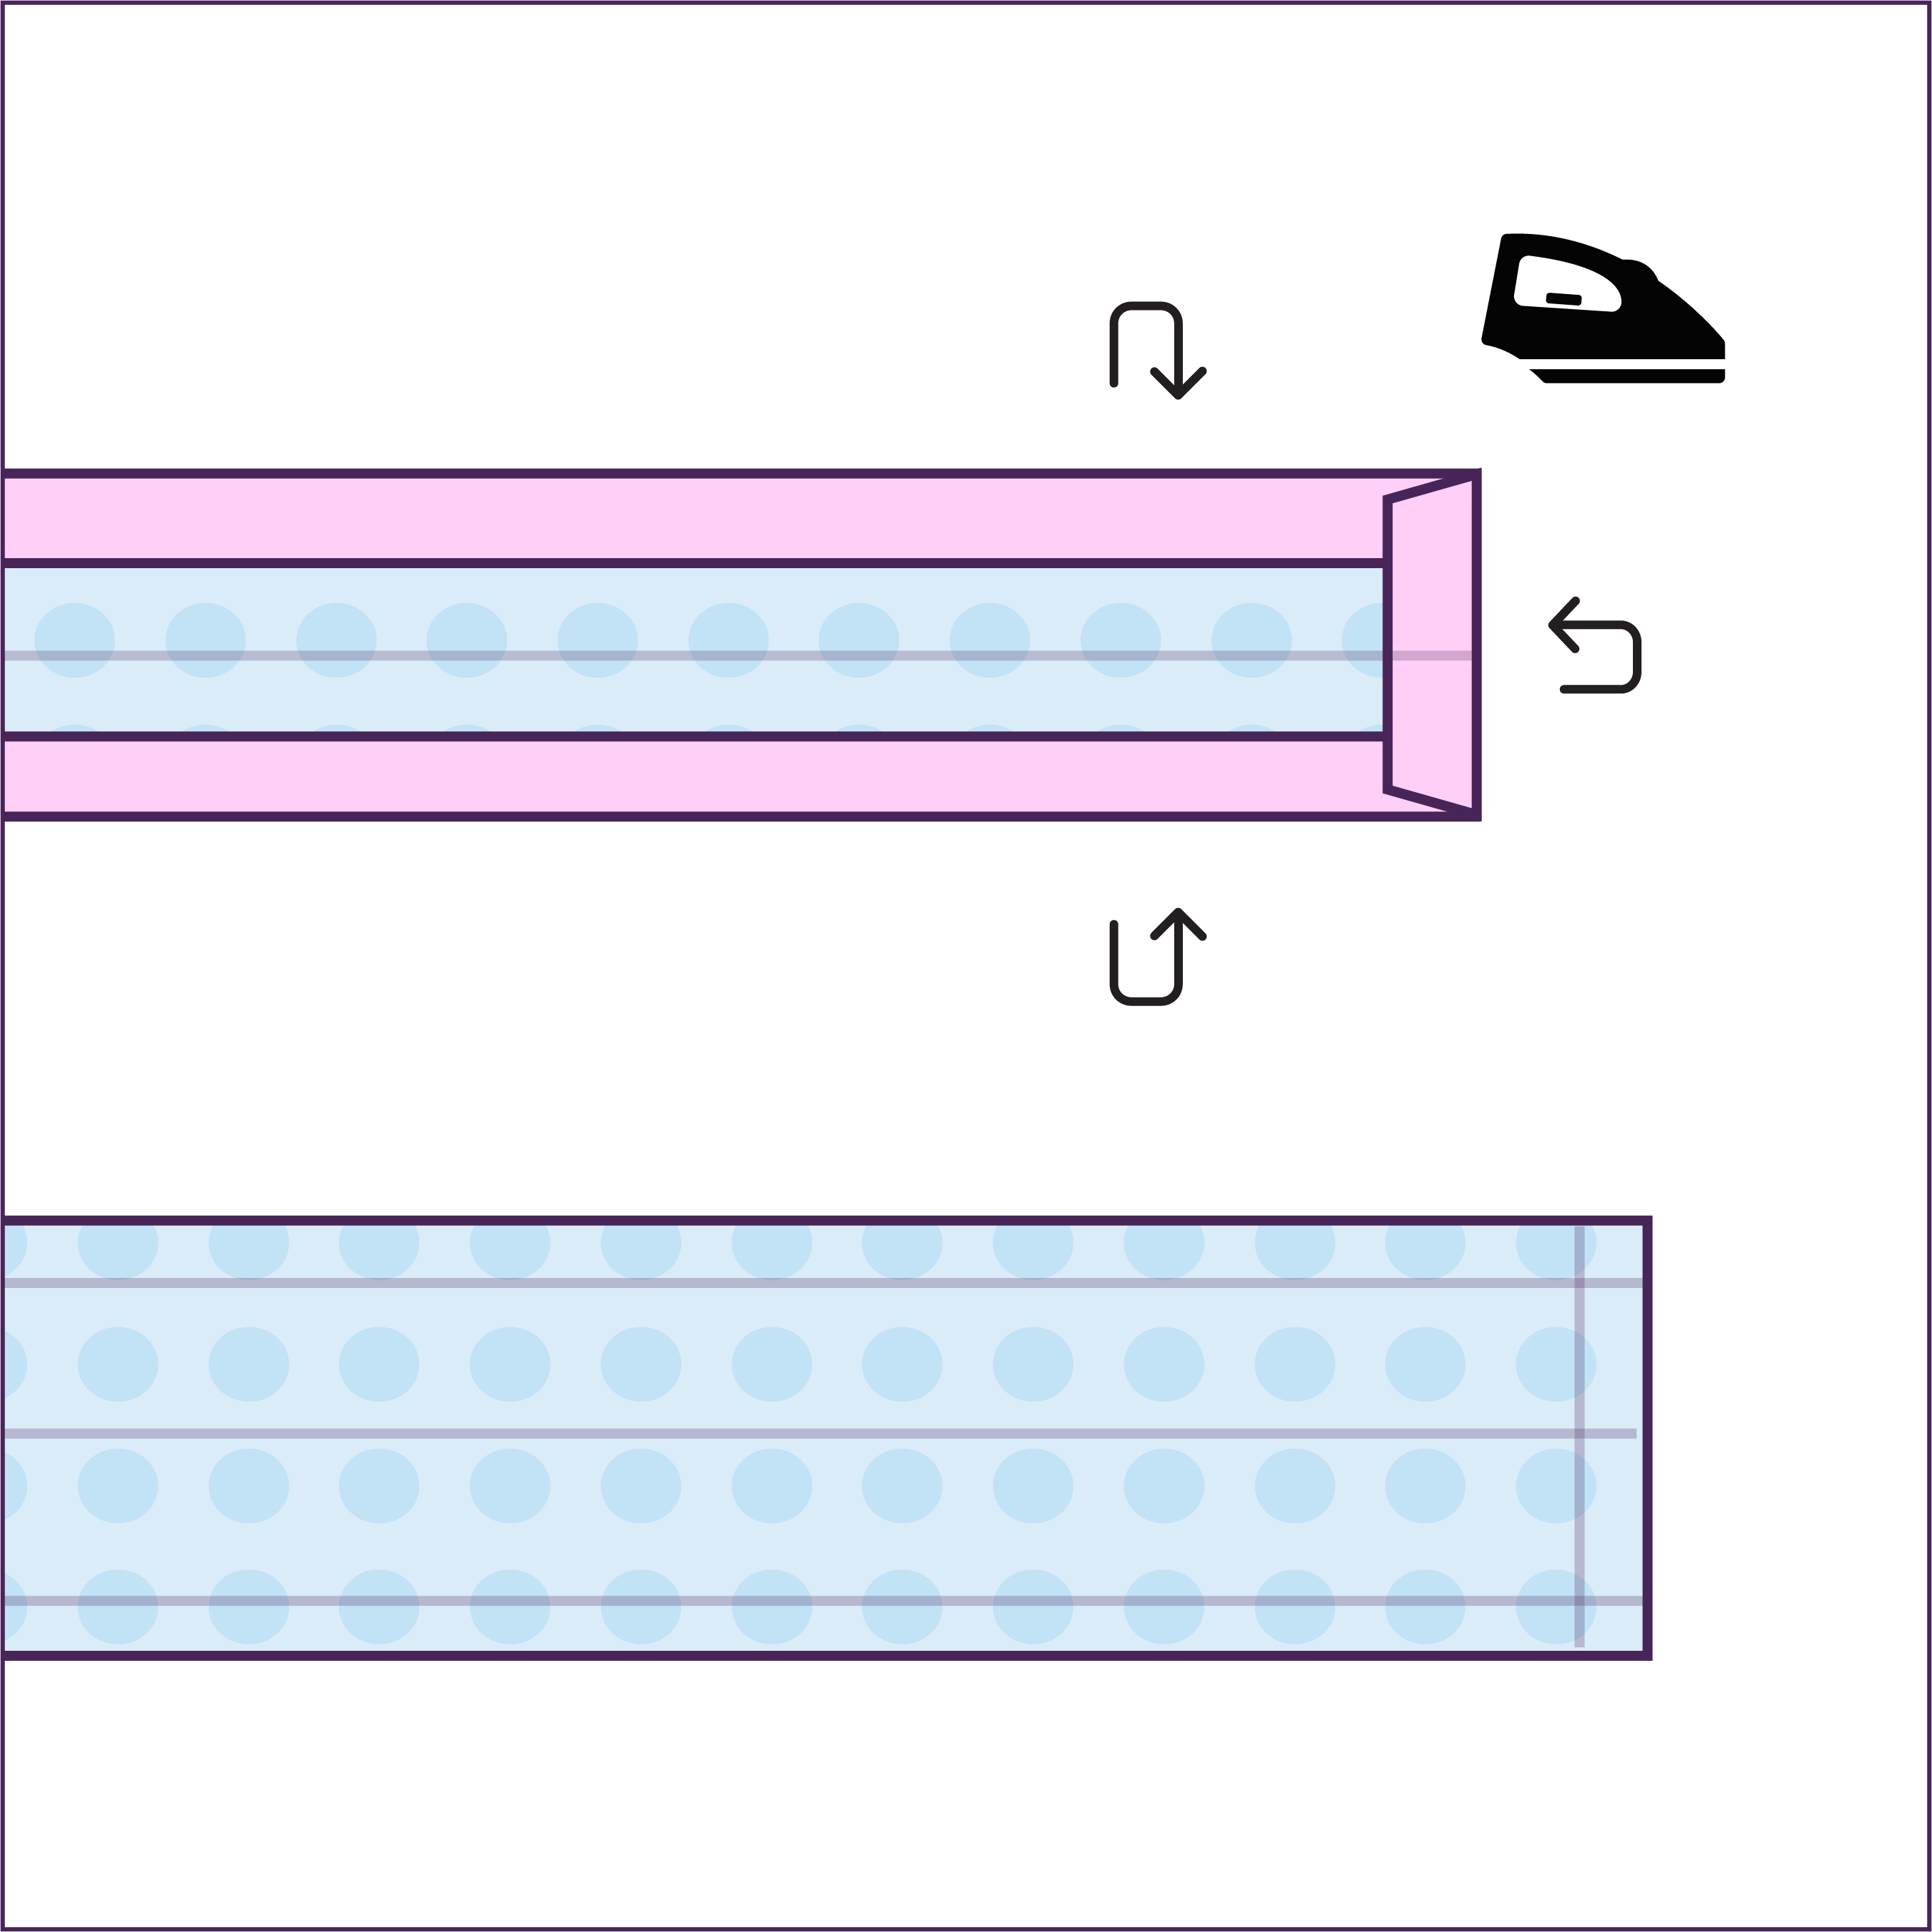
Fold the waist belt up and over, then press the seam.
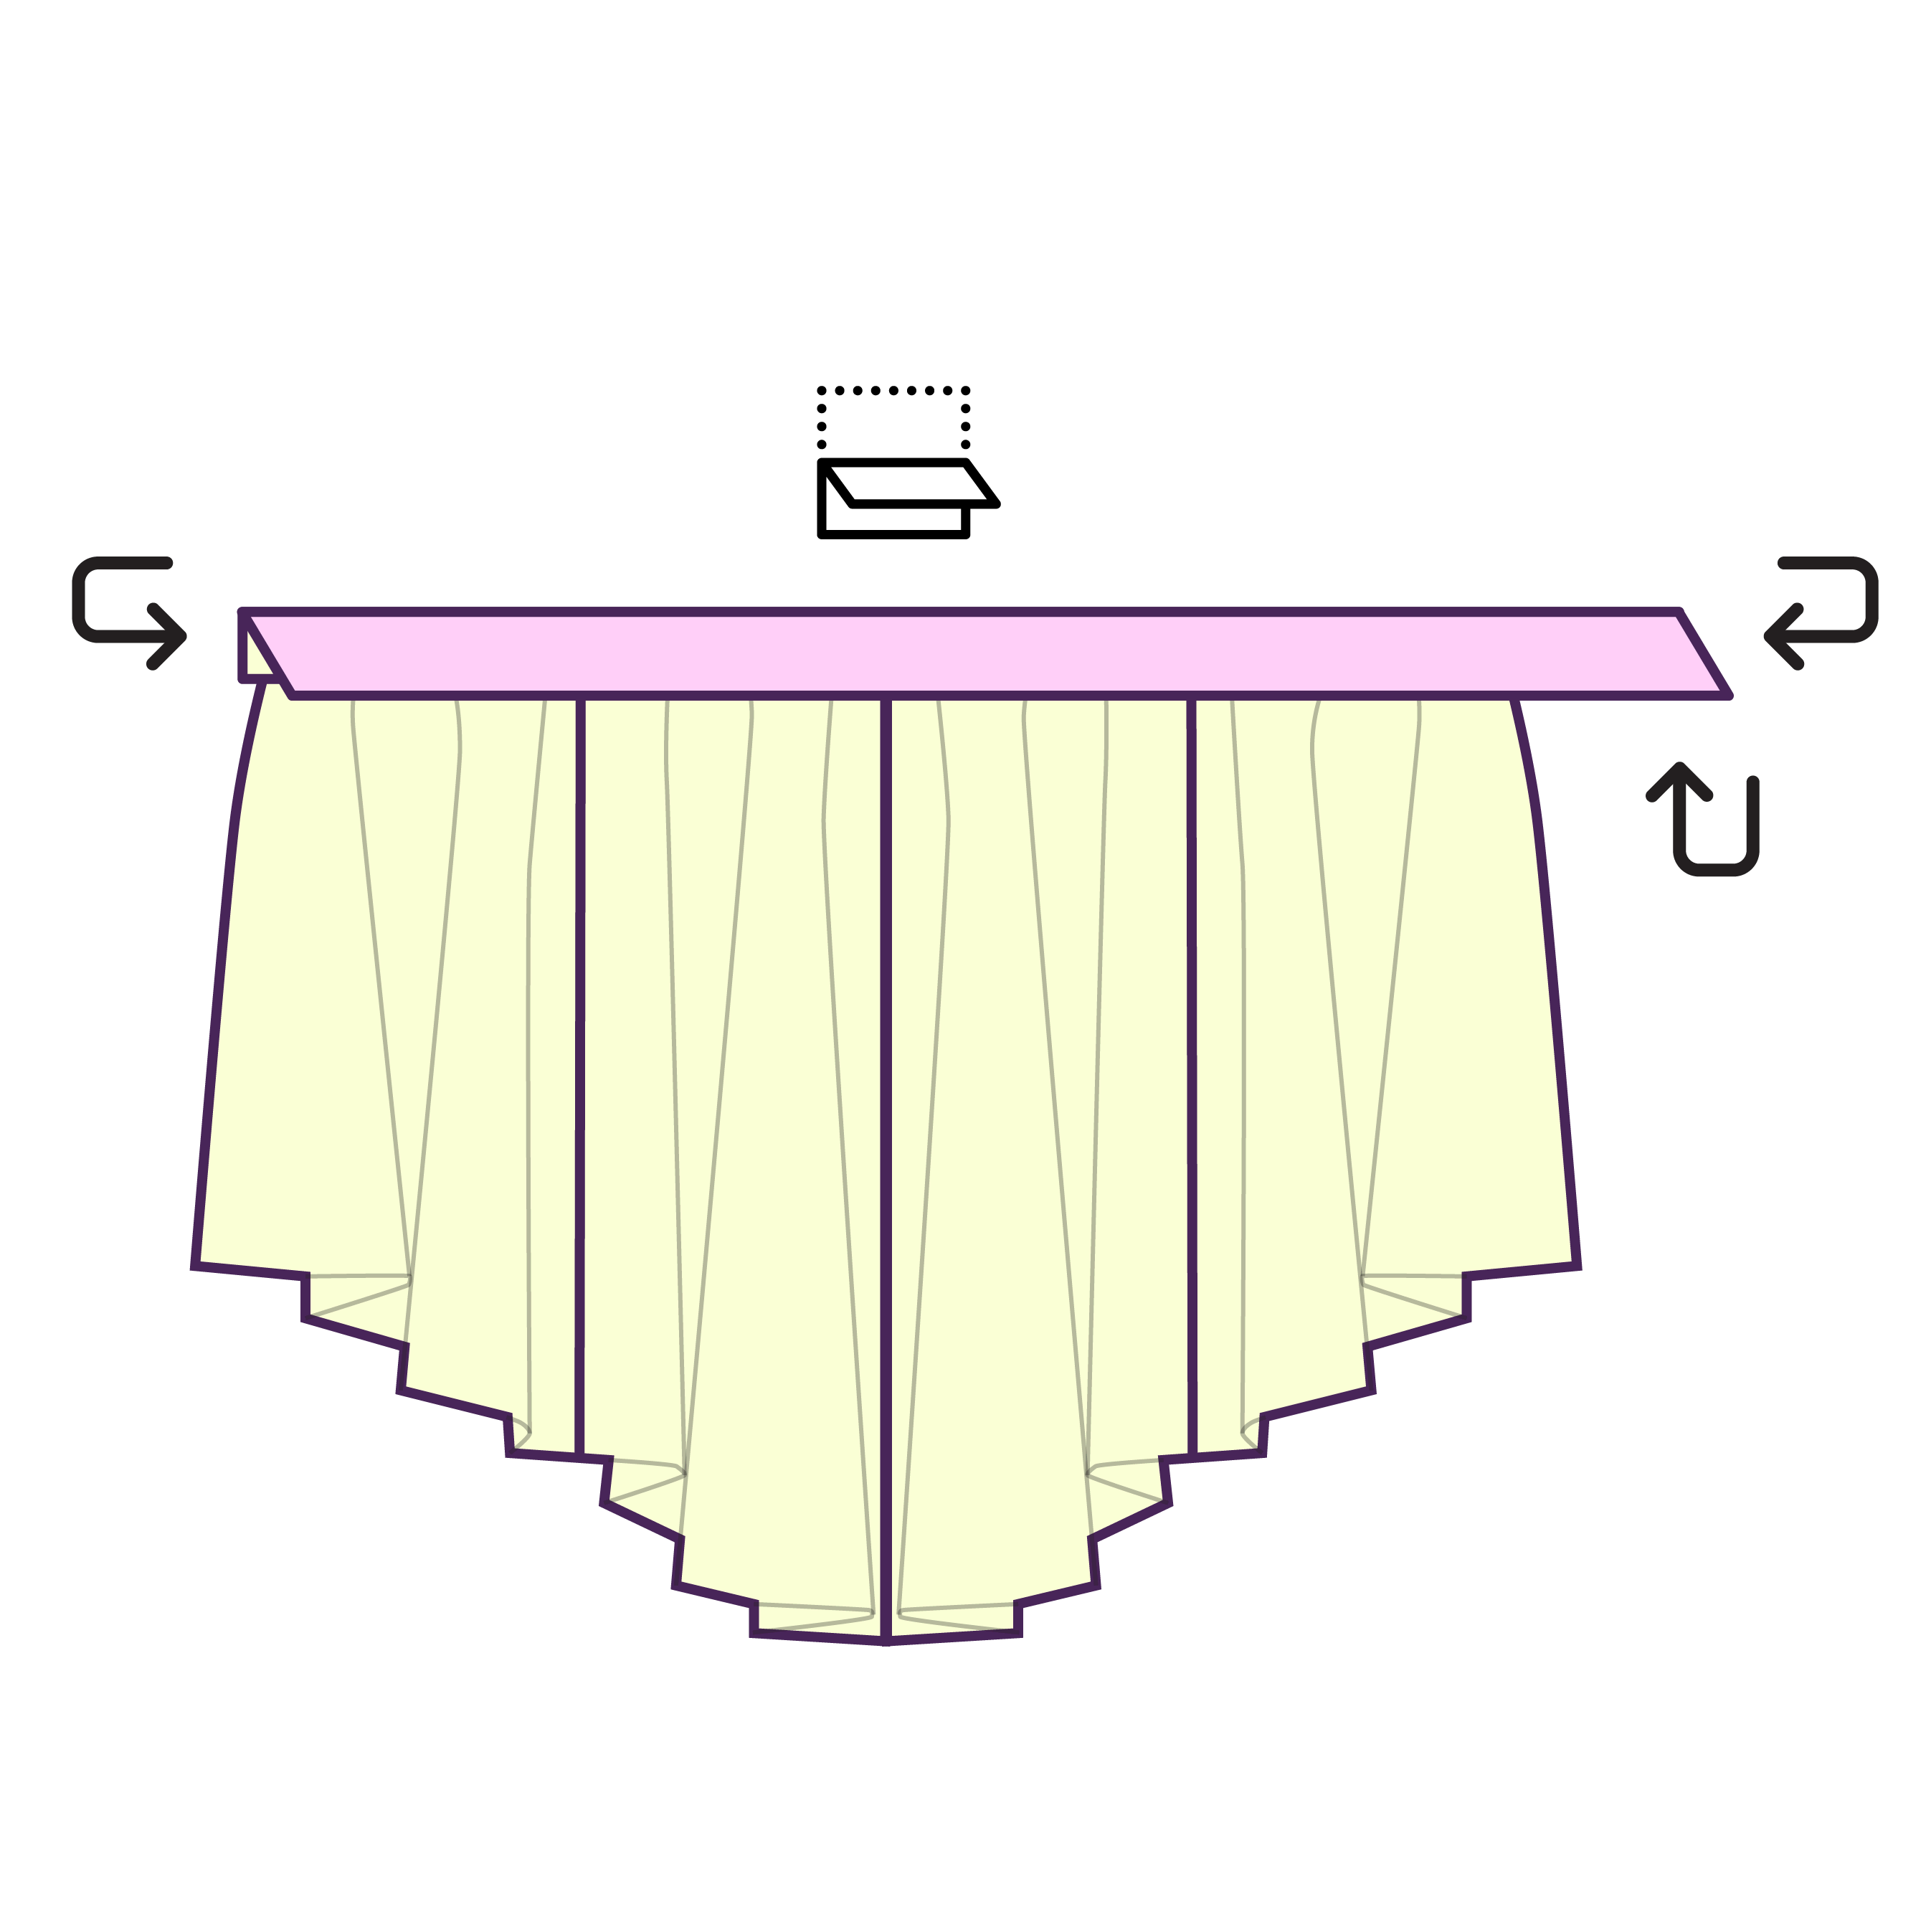
STEP 14
On the wrong side, reinforce the previously made folds. Fold the waist belt in half as well as fold in all of the pressed edges 0.5 inches. Set folds in place with pins.
STEP 15
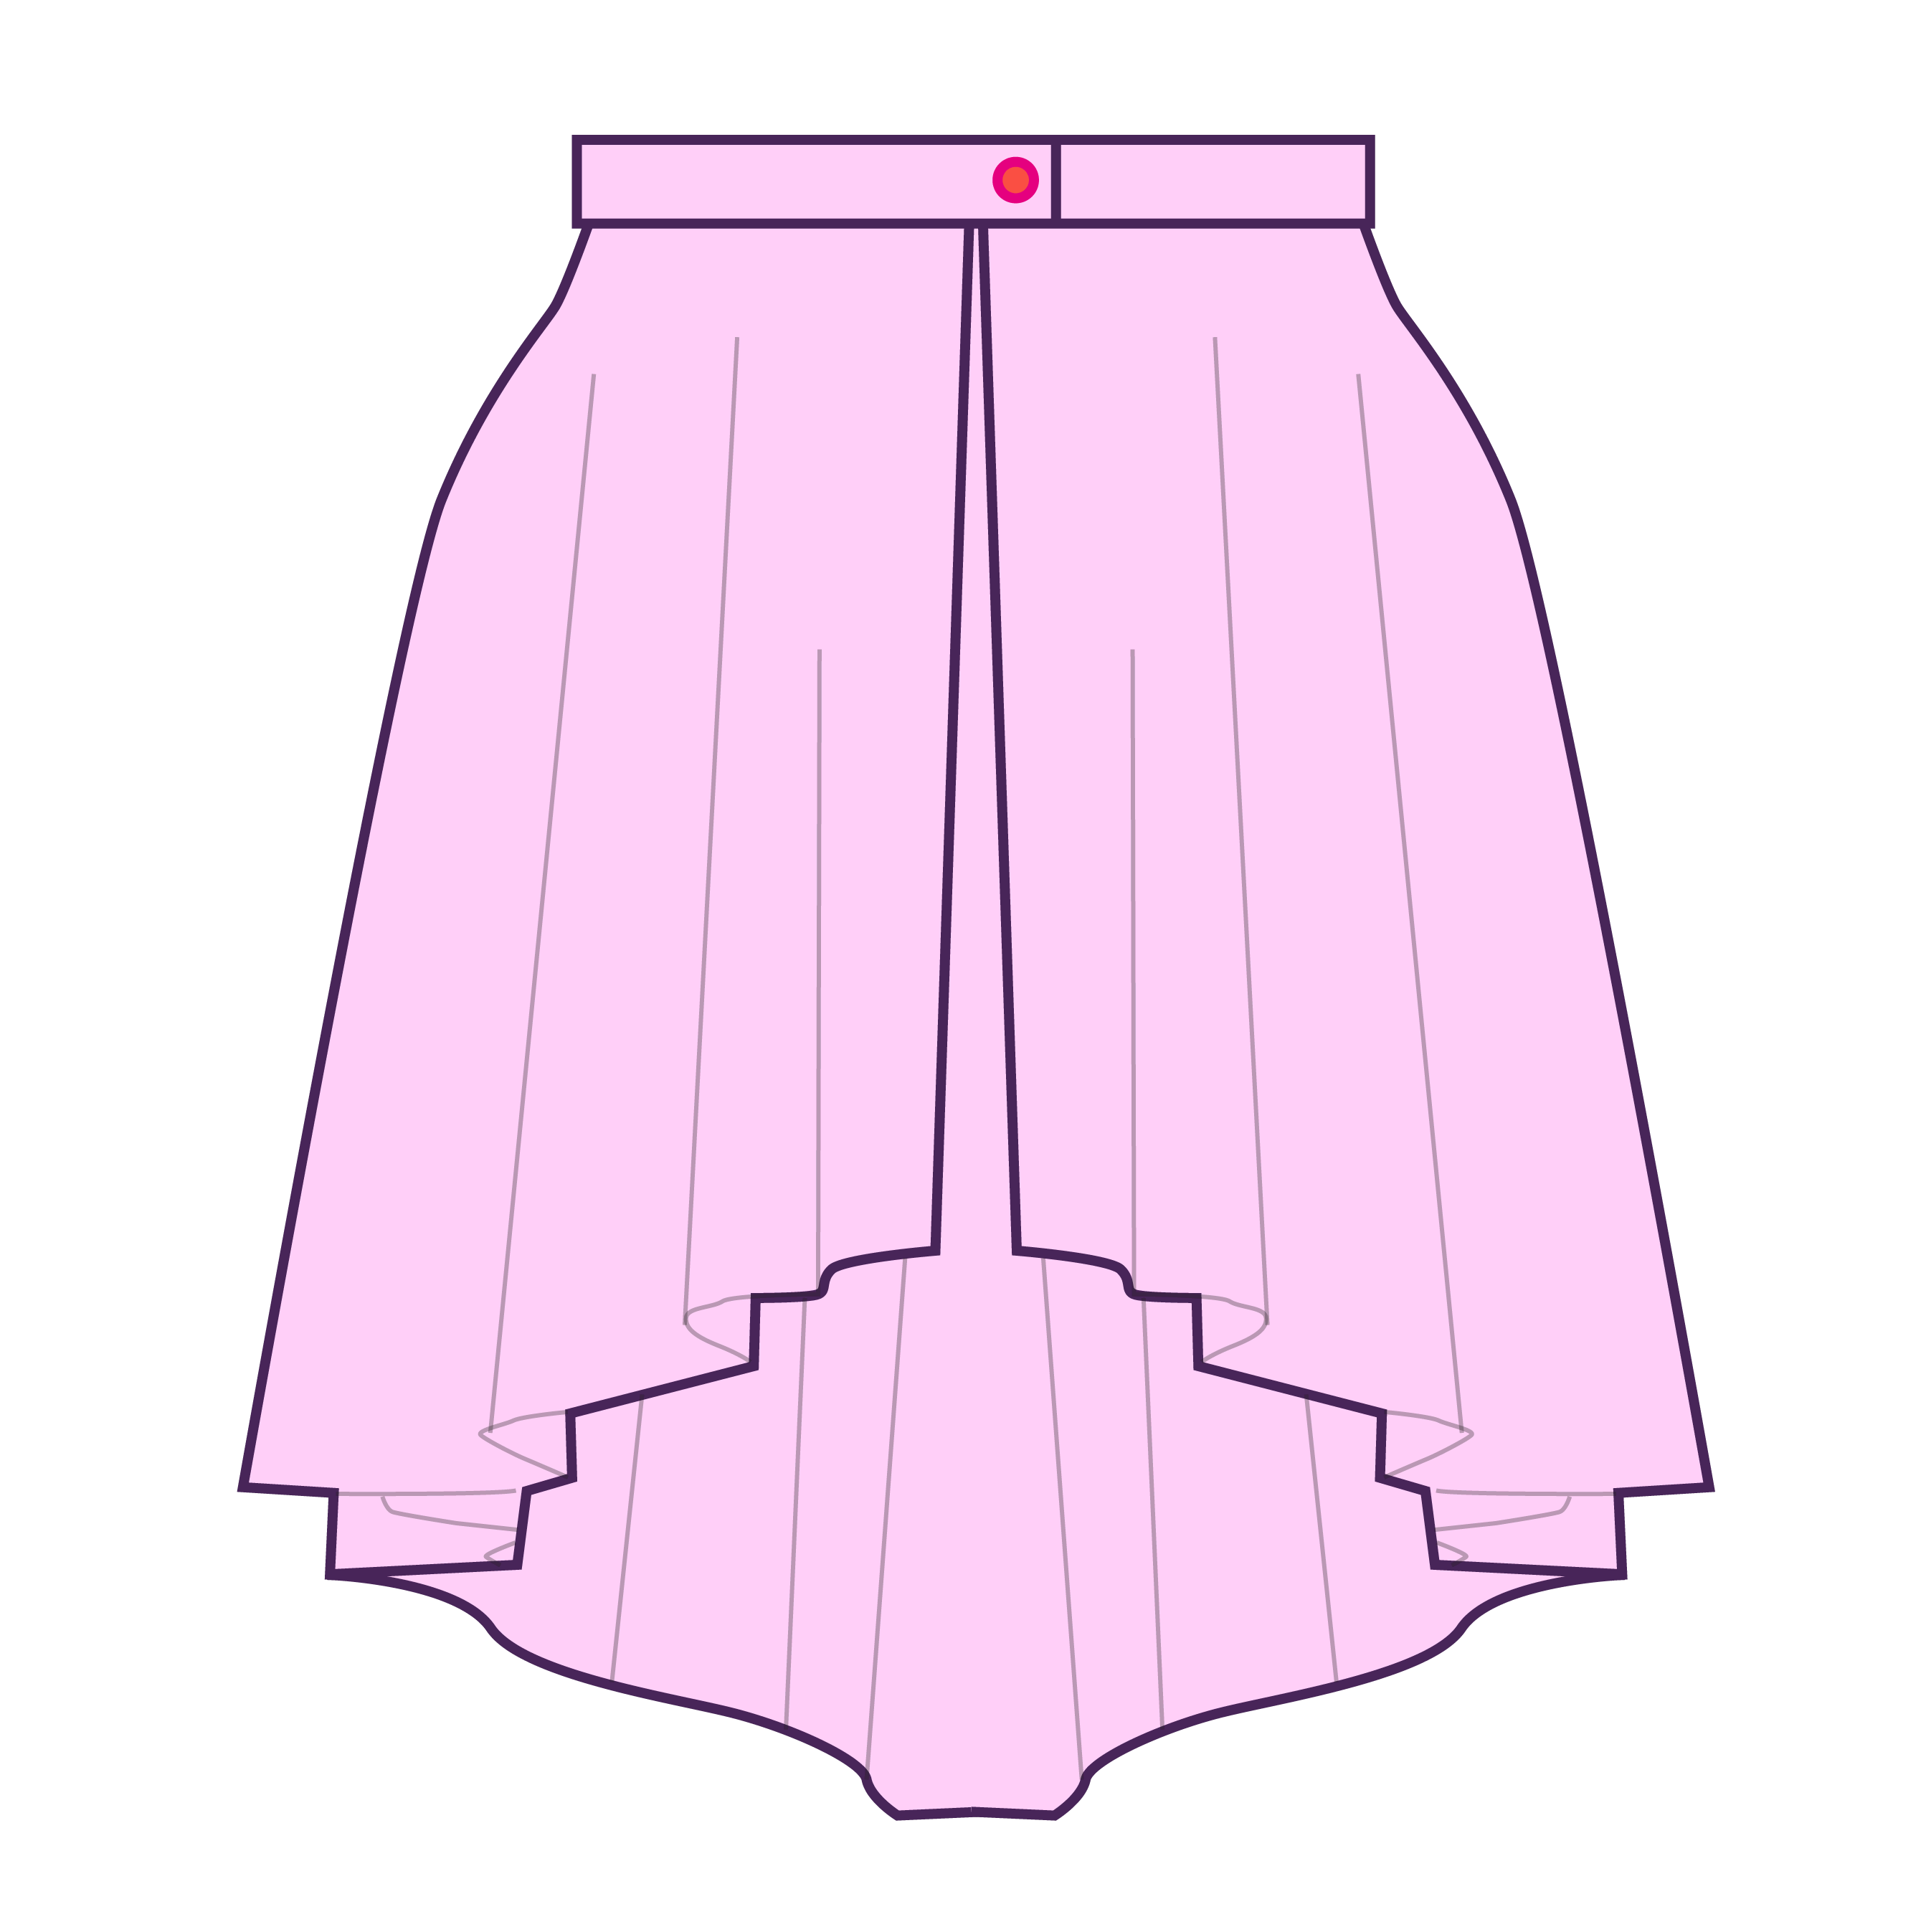
On the right side, sew the folds together by topstitching all around the waist belt.

STEP 16
Finally, Install snaps or velcro to the open and overlapping ends of the belt.
STEP 17
Using the smaller arm cuffs patterns, repeat all steps above for each arm cuff.