Cómo coser un maillot y una falda Pride
Saltar a instrucciones
Descripción general
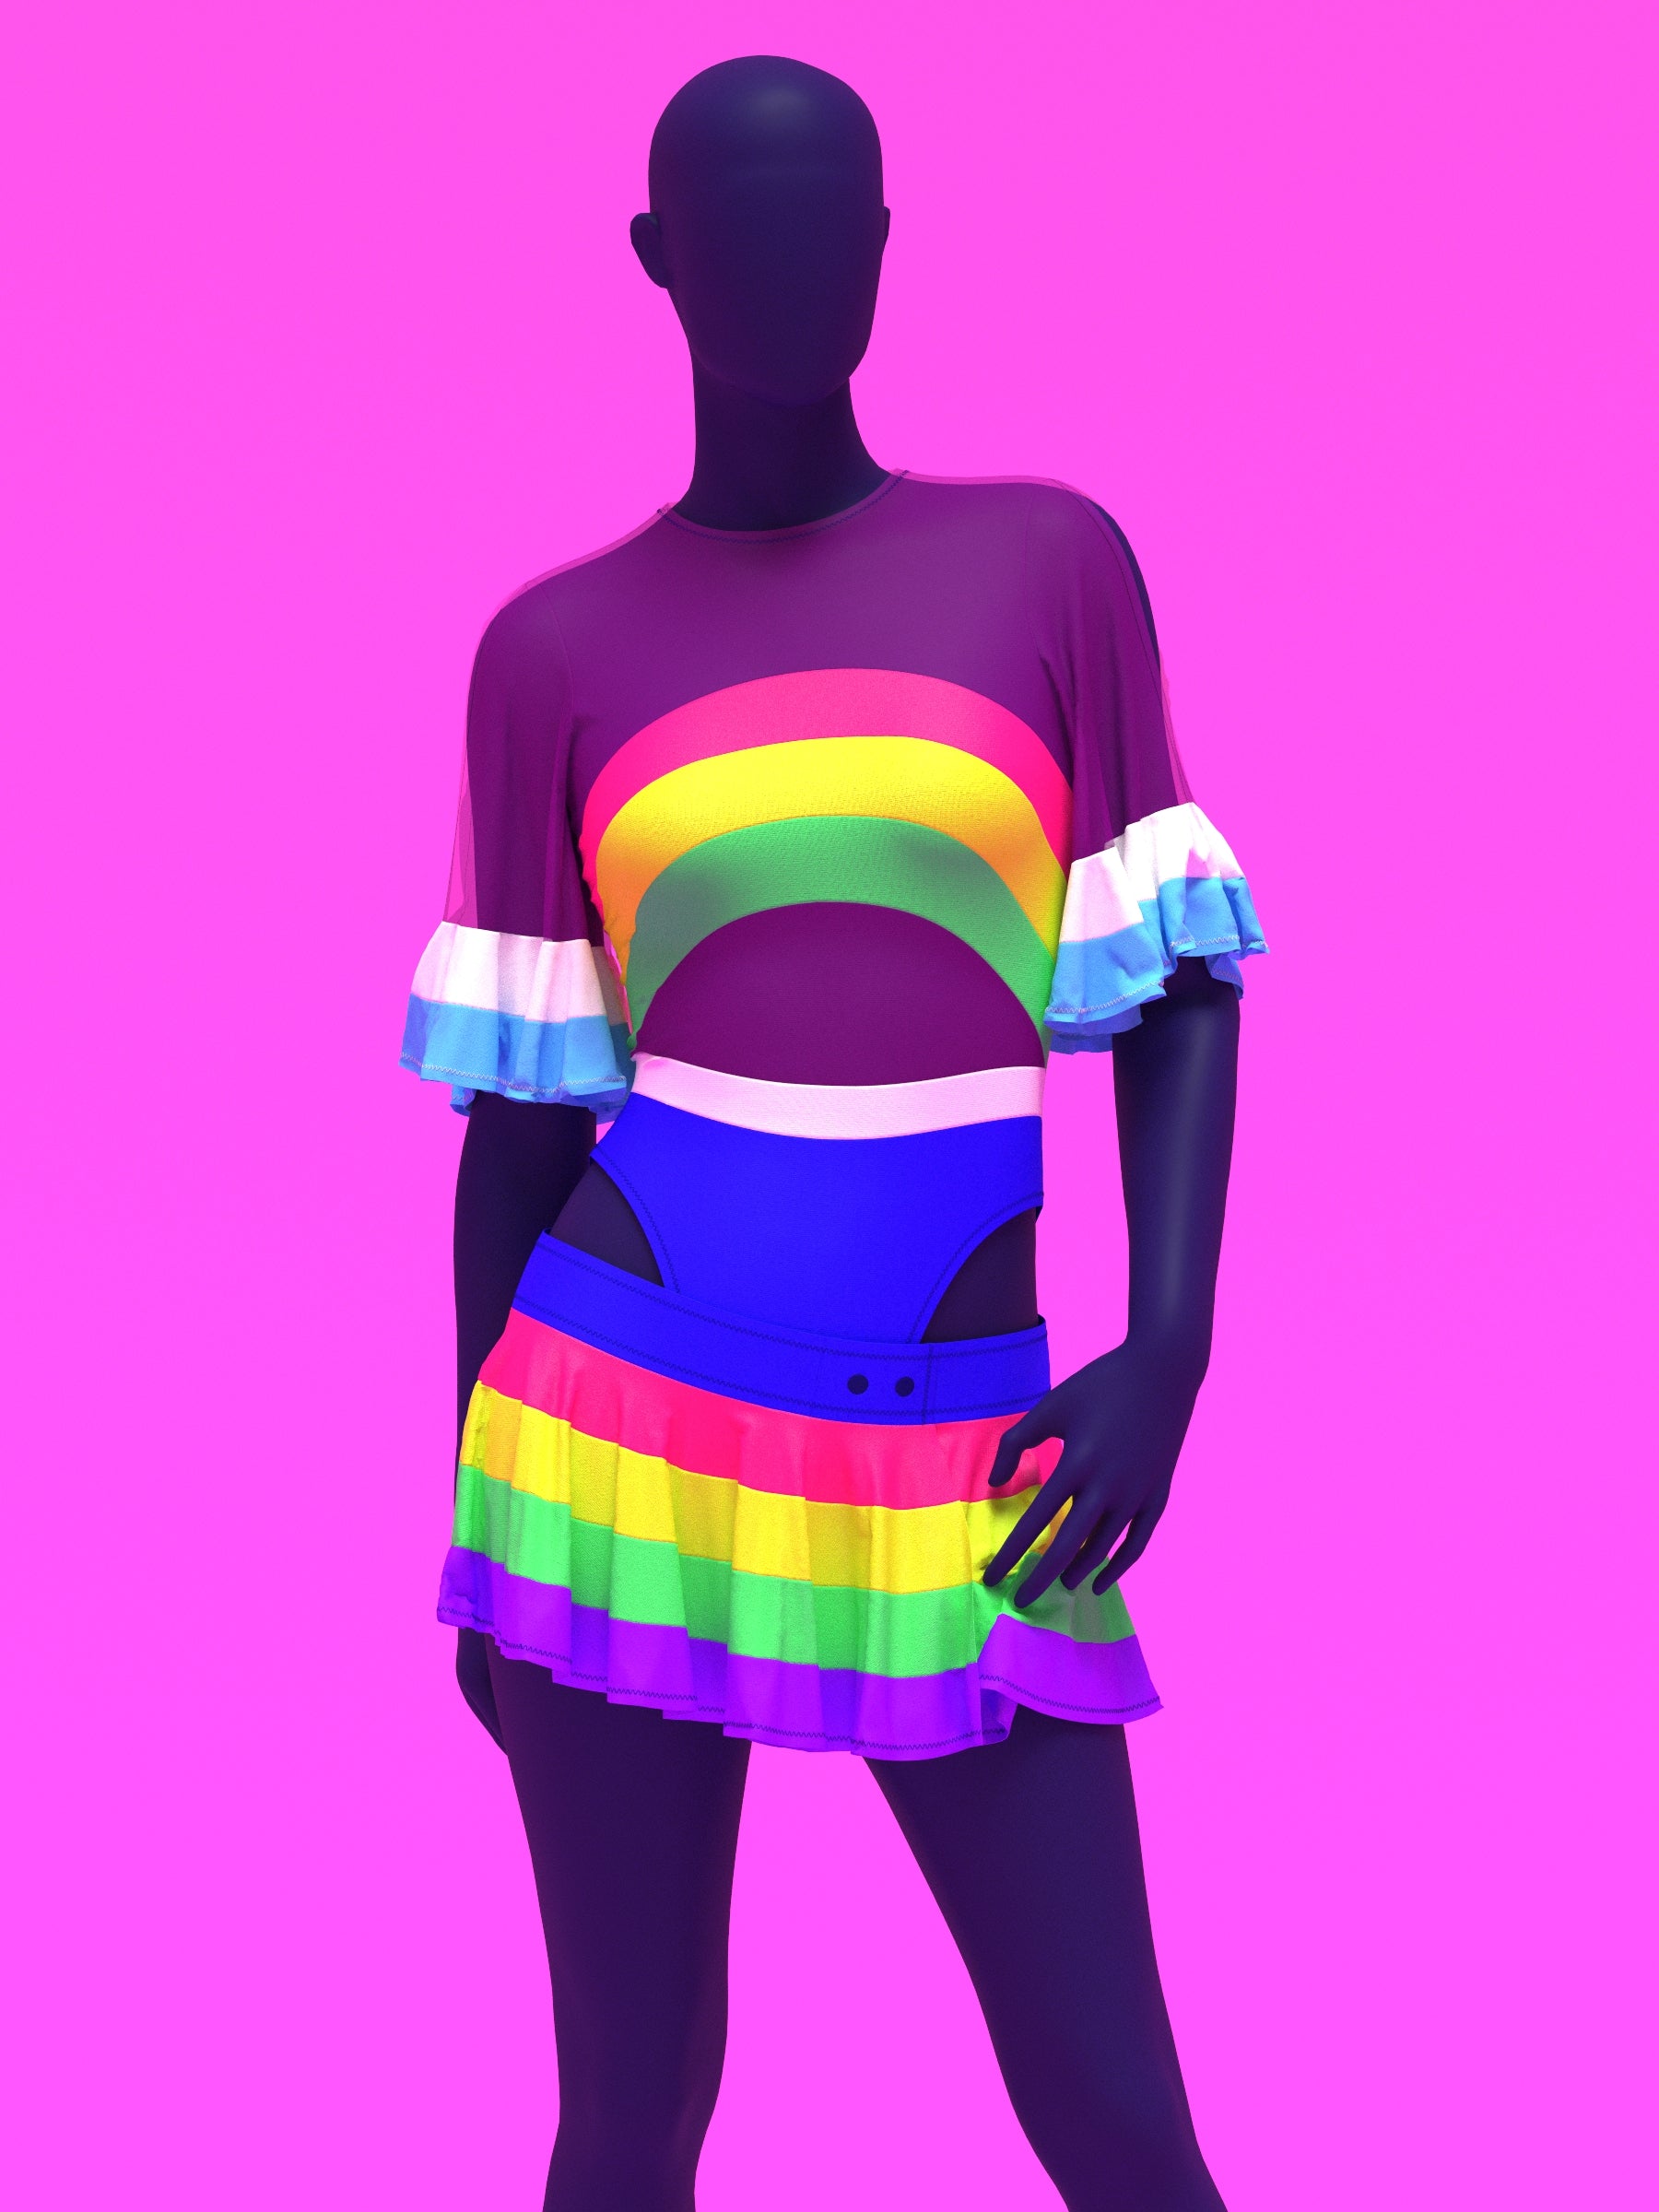
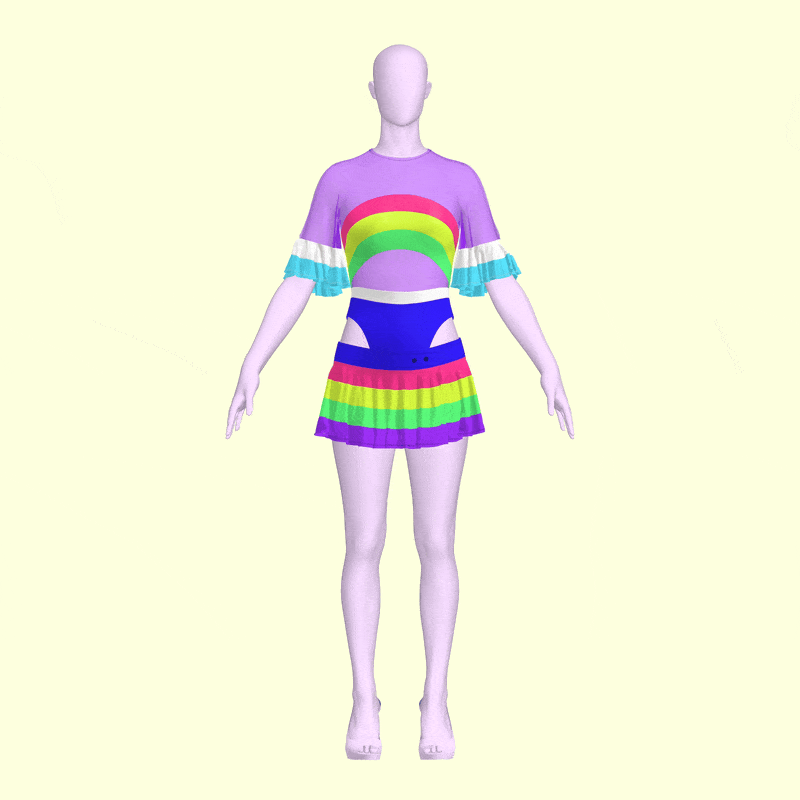
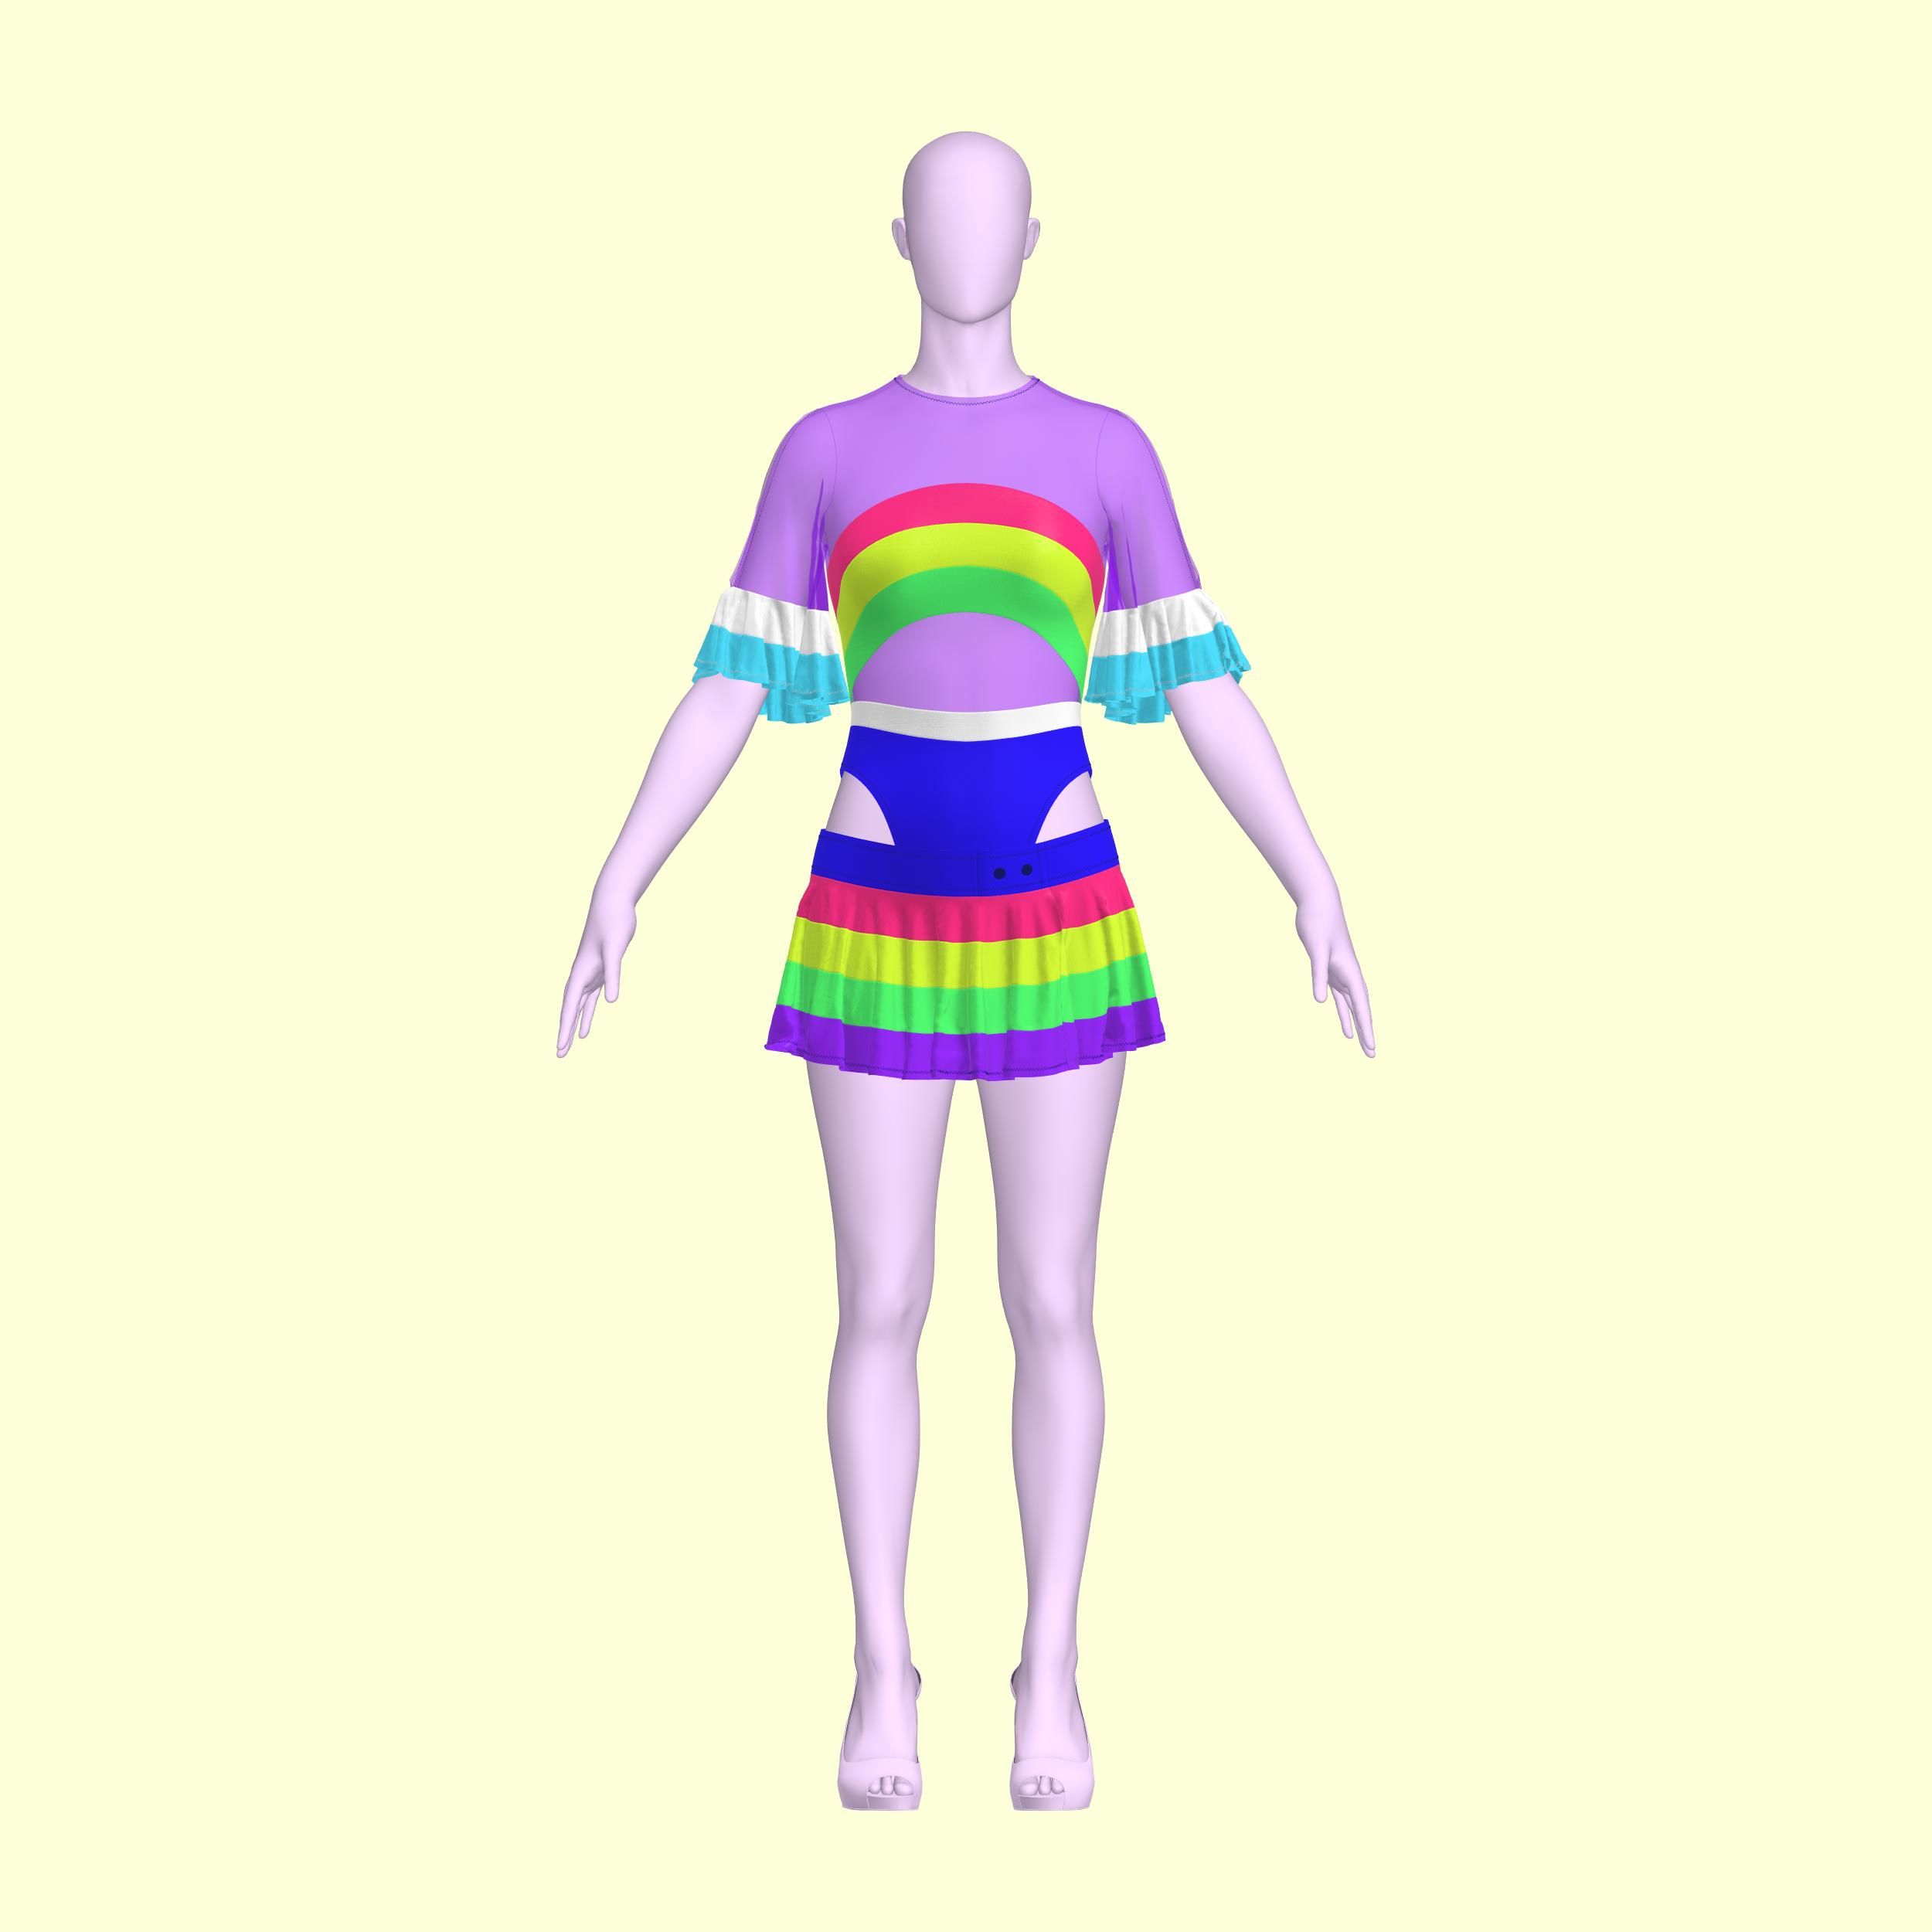
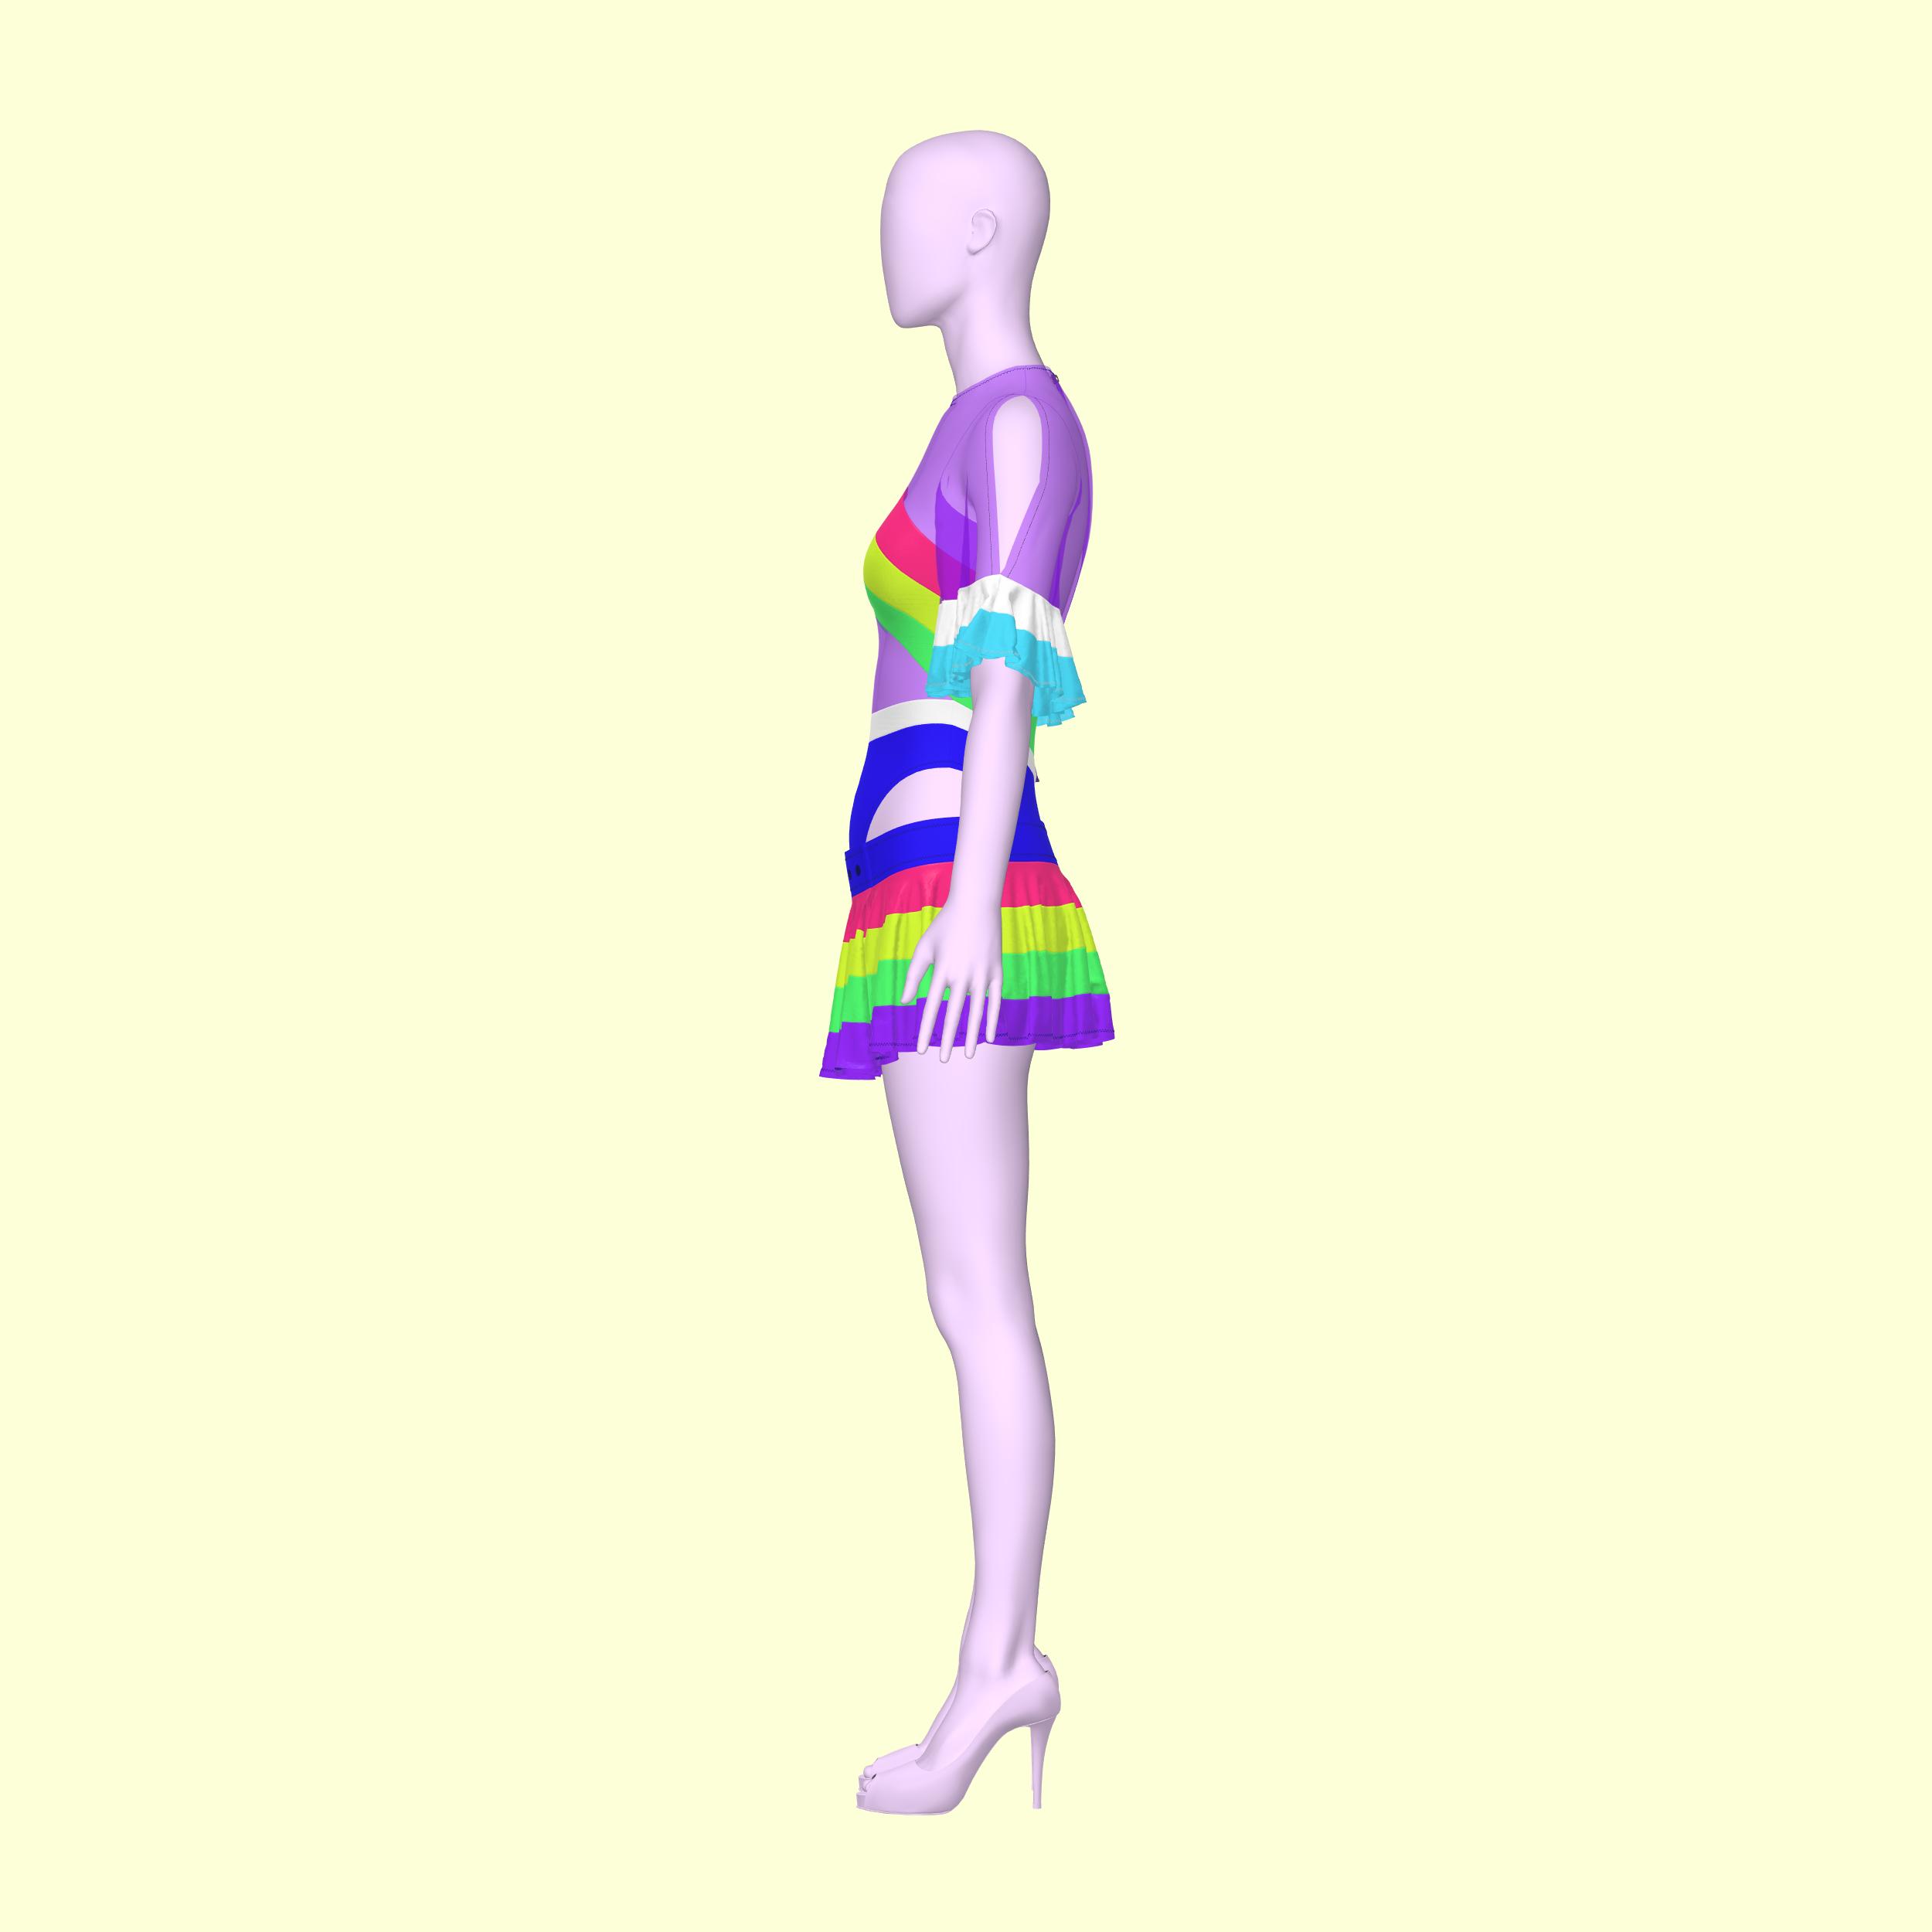
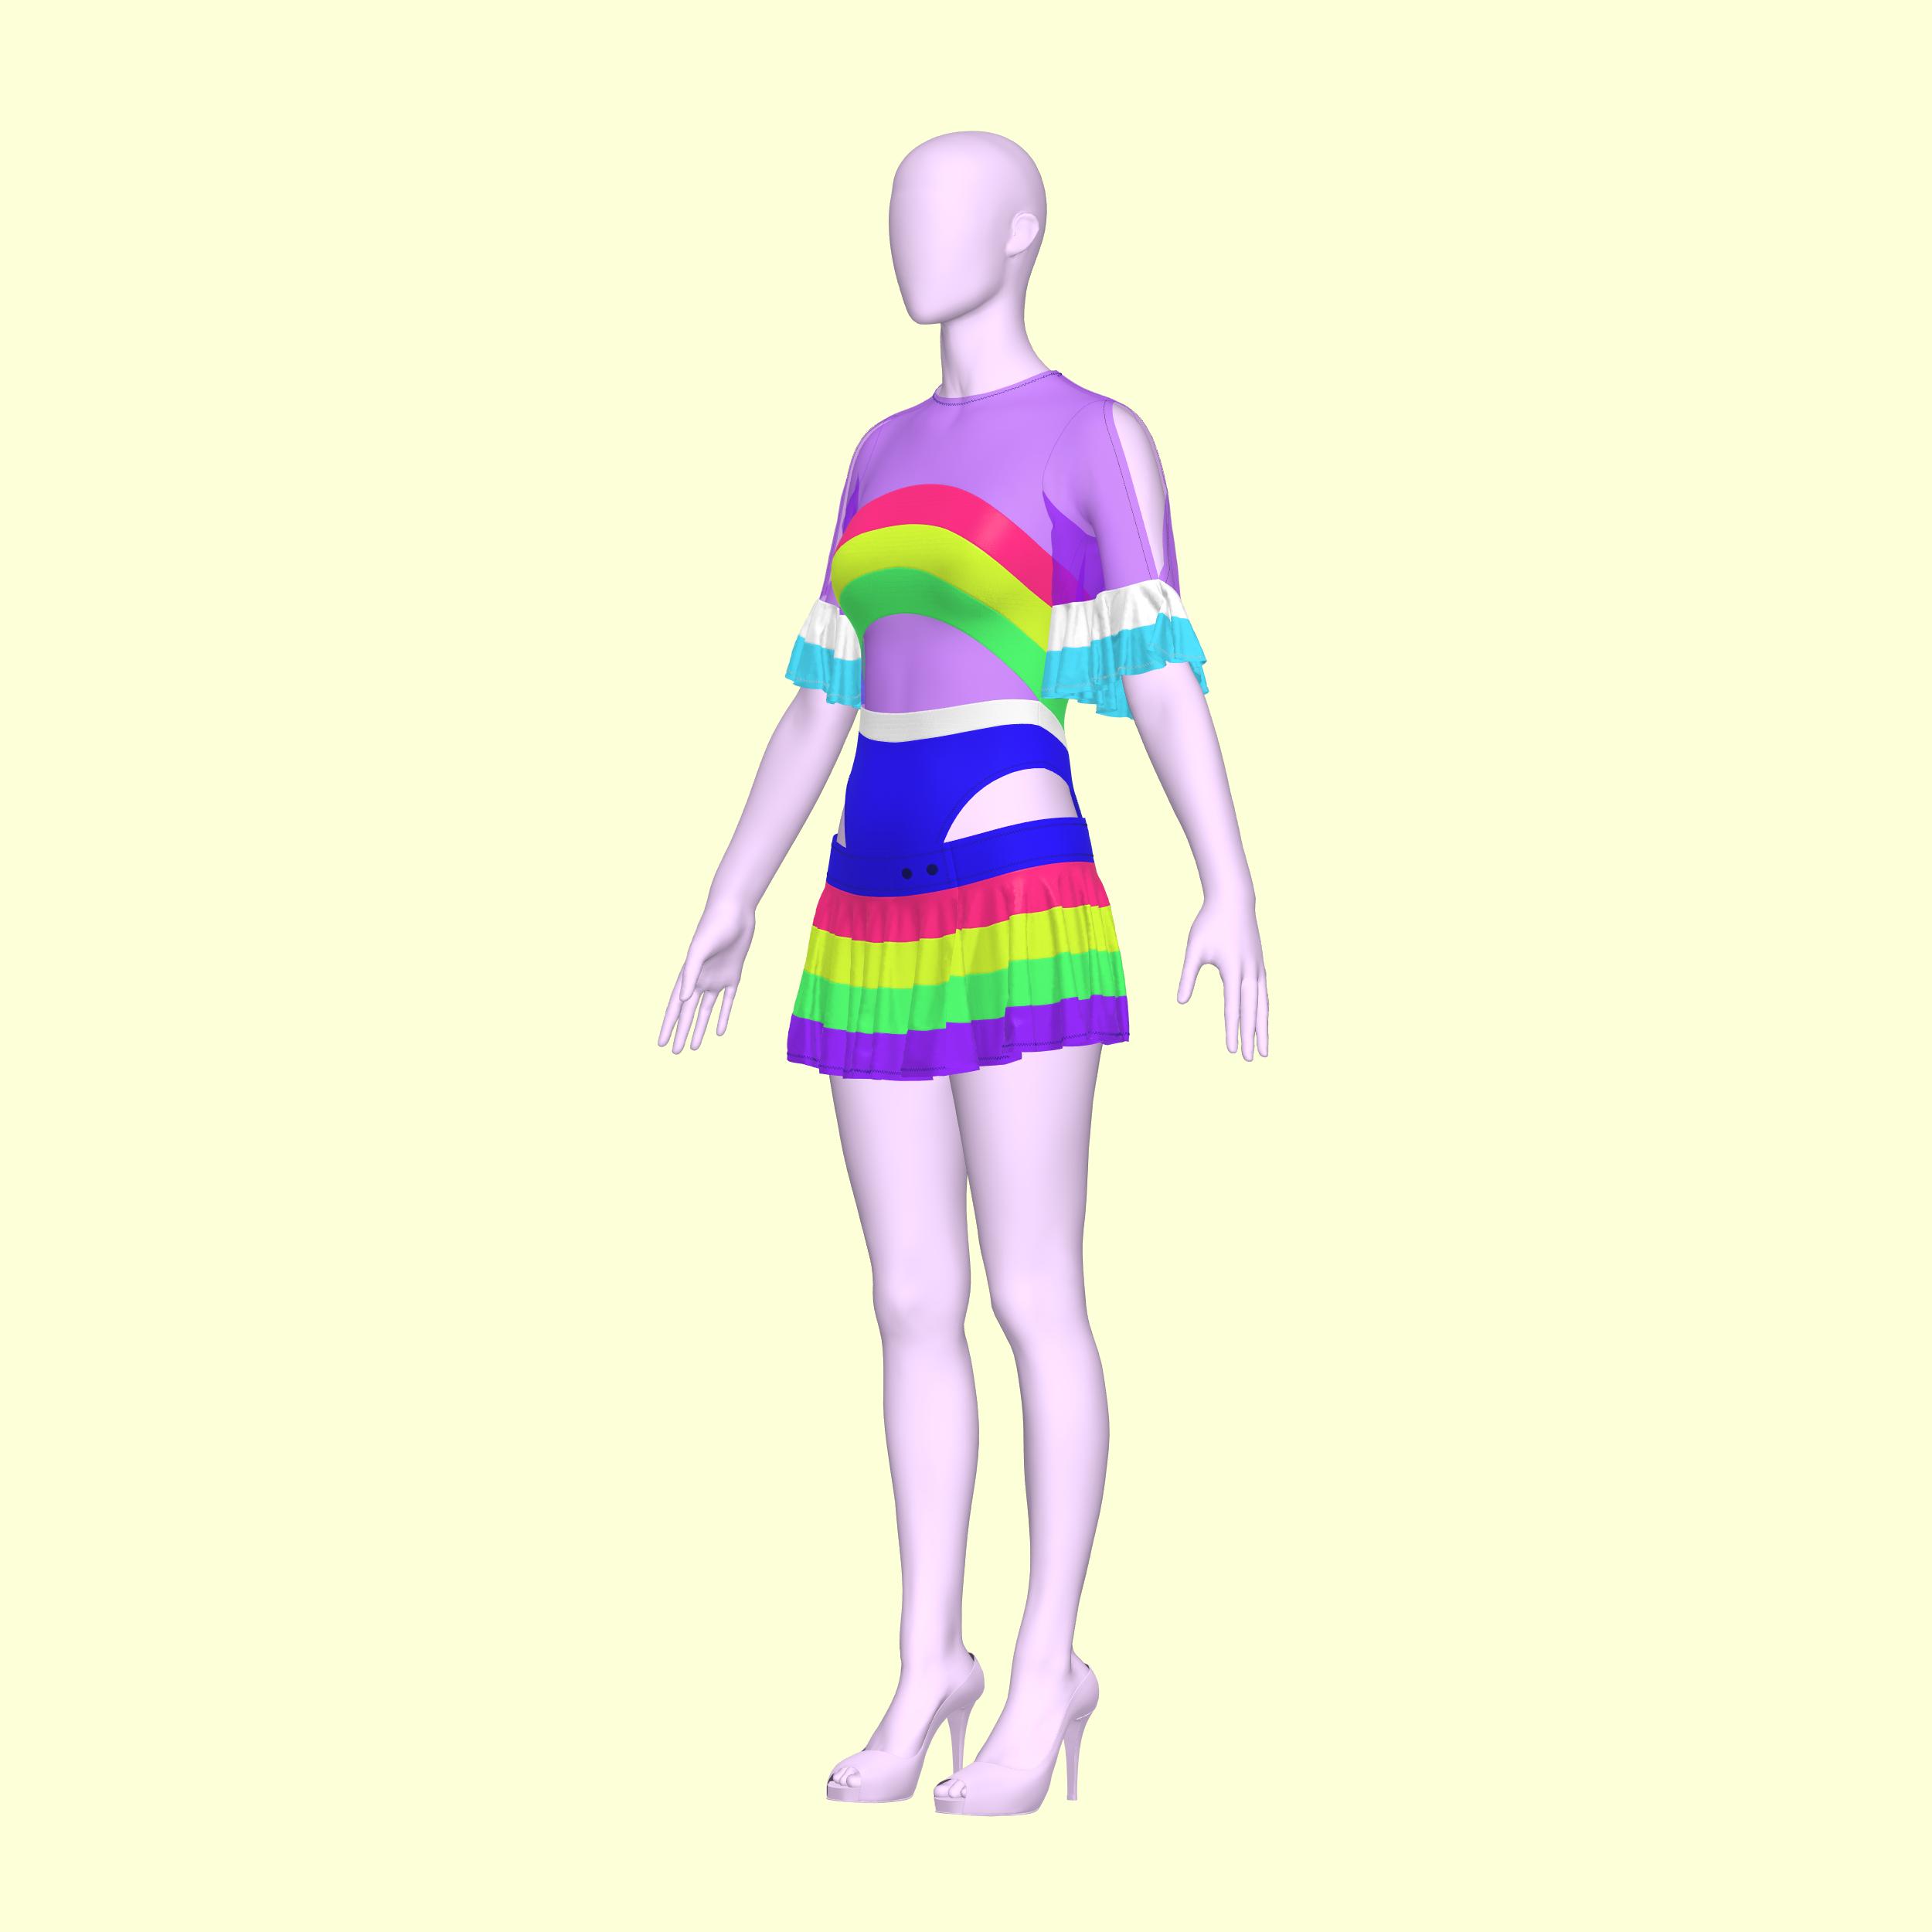
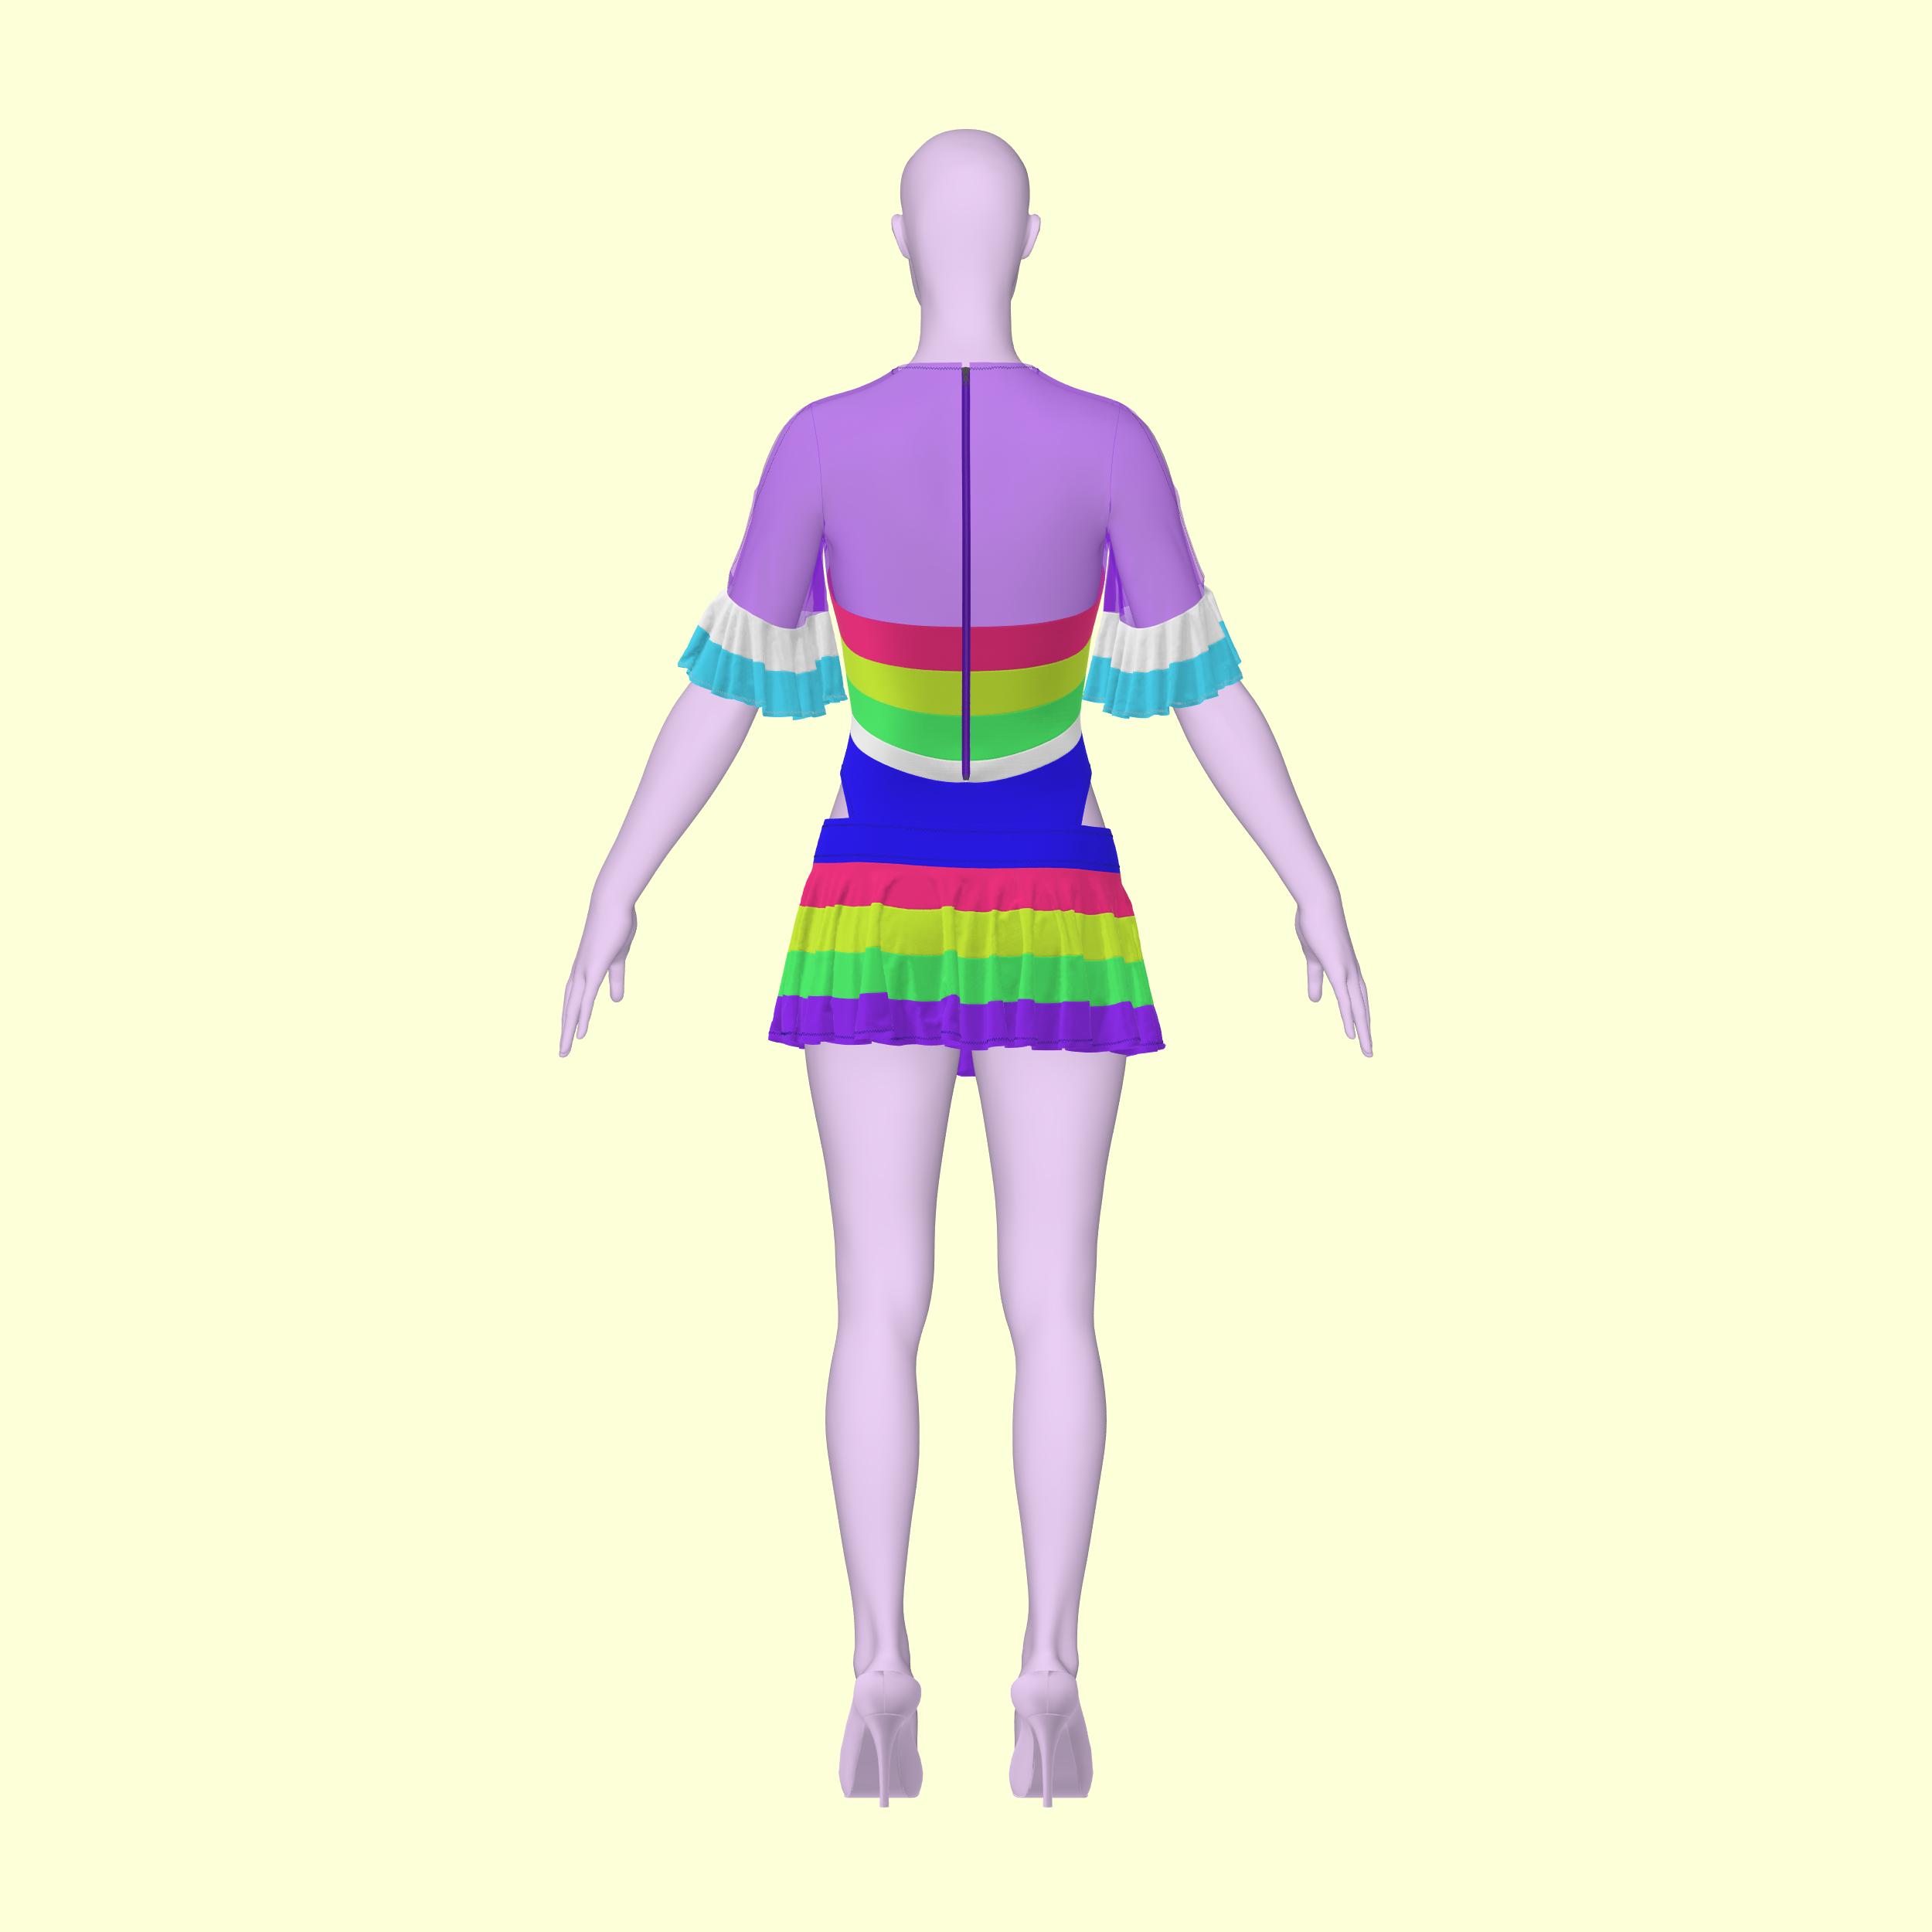
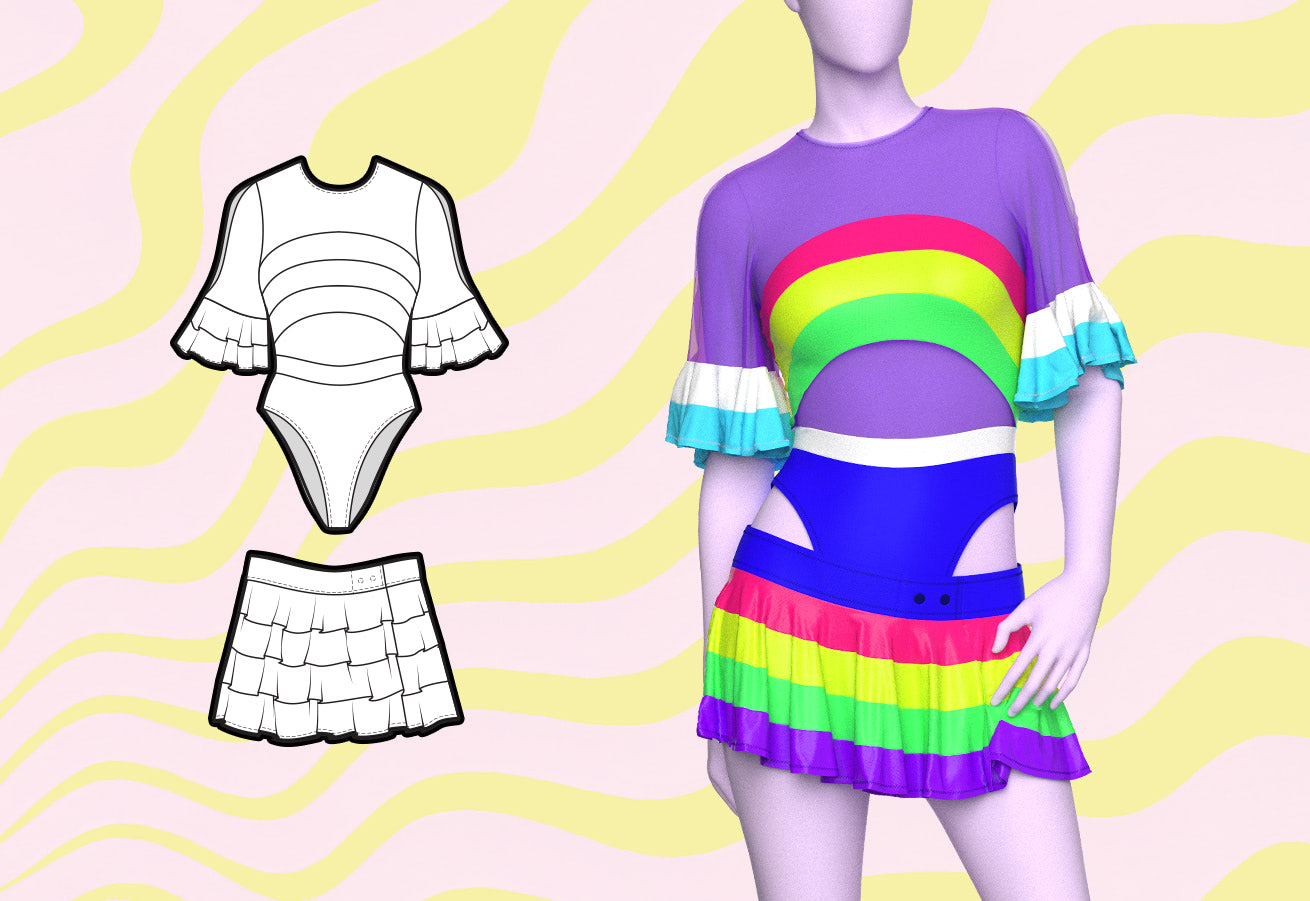
Brilla con nuestro conjunto de patrones de costura de leotardo y falda cruzada Pride Rainbow, diseñado especialmente para drag queens que quieren dejar huella. Este conjunto incluye un leotardo de arcoíris vibrante con cortes en bloques de color y mangas acampanadas con aberturas, perfecto para combinar con telas de malla o en tonos piel para lograr un look atrevido y colorido. Junto con el leotardo hay un patrón de minifalda cruzada a juego que presenta cortes y broches en bloques de color similares, diseñado para quedar bajo en las caderas para un máximo estilo.
Dificultad del patrón: Intermedio
Detalles de tallas
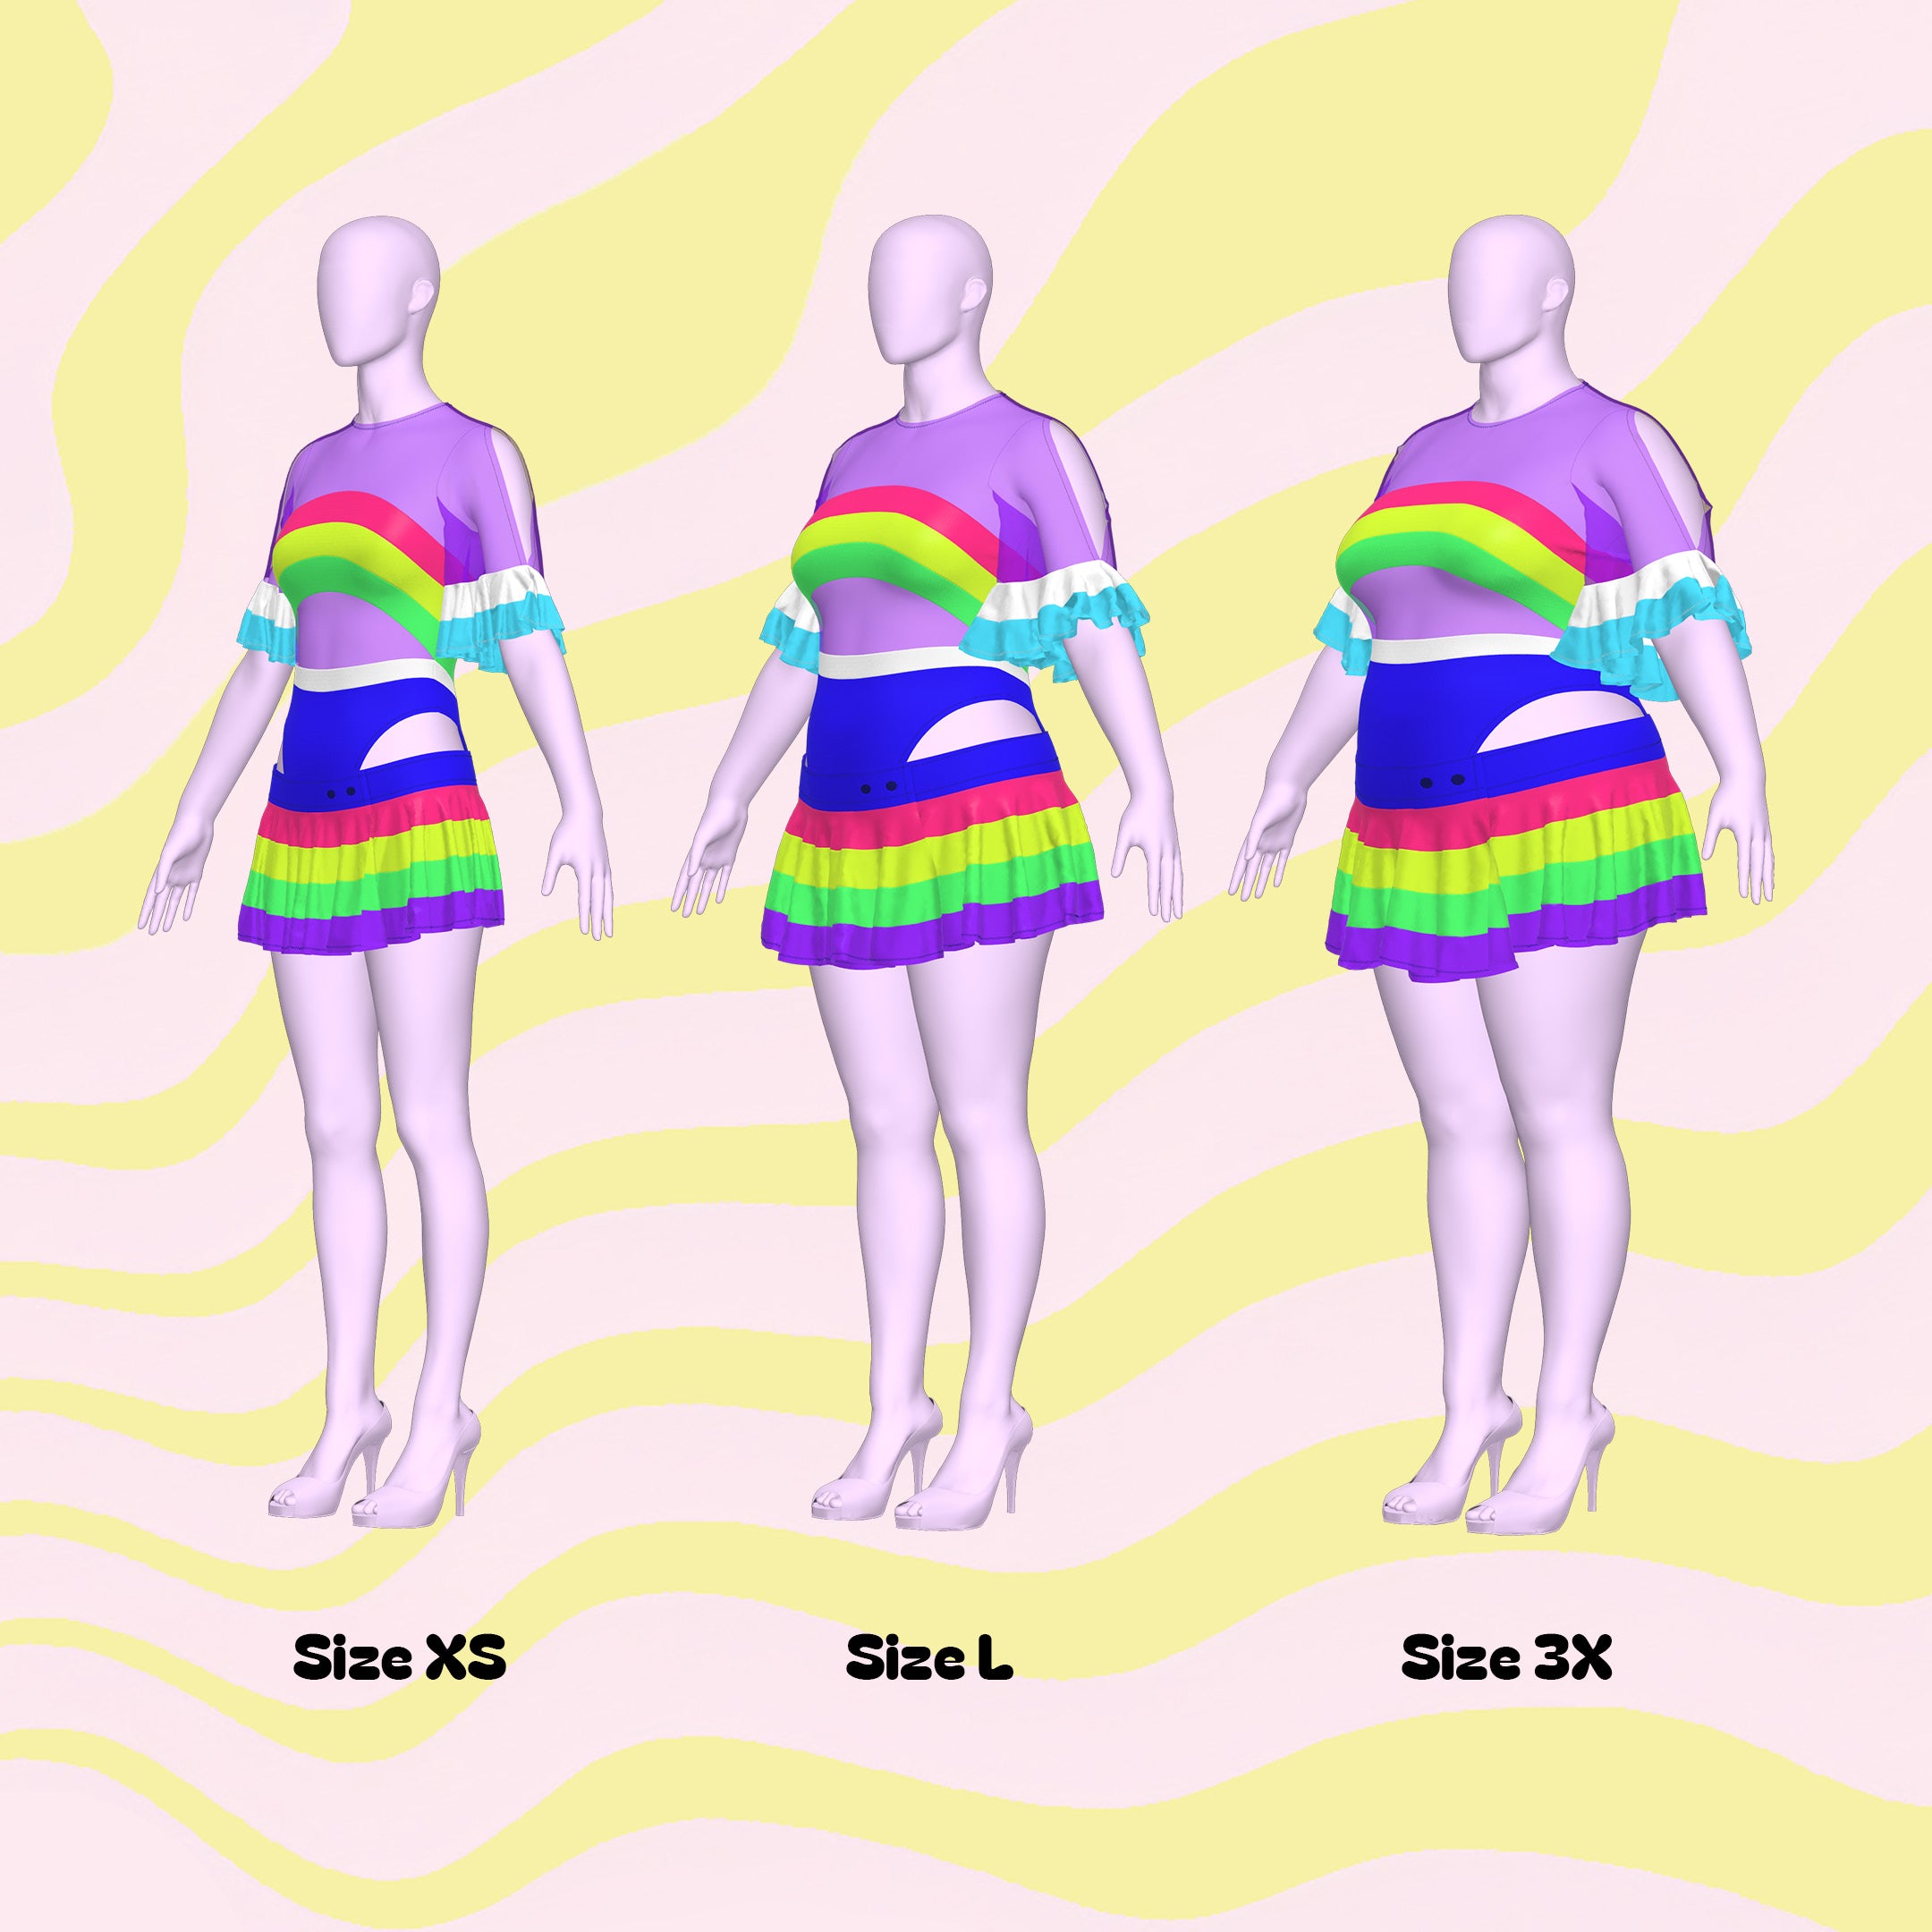
Este patrón está disponible en nuestros exclusivos talles Drag Queen (XS-4X). Consulta nuestra guía de talles para obtener más información sobre nuestras medidas de talle.
Telas y artículos de mercería
Adecuado para tejidos elásticos en 4 direcciones:
- Spandex
- Miliskin
- Malla de potencia
- Licra
- Vinilo elástico
- Tejidos de punto elásticos
- Cremallera invisible de 16 a 20"
- 2-3 chasquidos
Yardas de tela
This pattern requires the use of 4-way stretch fabric with a fabric yard width of 58" inches. The garment shown use 8 types of fabric colors. Please find the yardage needed for each fabric type below.

| Size | A | B | C | D | E | F | G | H |
|---|---|---|---|---|---|---|---|---|
| XS | 0.5y | 0.5y | 0.5y | 0.75y | 0.25y | 0.5y | 0.5y | 0.75y |
| S | 0.5y | 0.5y | 0.5y | 0.75y | 0.25y | 0.75y | 0.5y | 0.75y |
| M | 0.5y | 0.5y | 0.5y | 0.75y | 0.25y | 0.75y | 0.5y | 0.75y |
| L | 0.75y | 0.5y | 0.5y | 0.75y | 0.25y | 0.75y | 0.5y | 0.75y |
| XL | 0.75y | 0.5y | 0.5y | 0.75y | 0.25y | 0.75y | 0.5y | 0.75y |
| 2X | 0.75y | 0.5y | 0.75y | 0.75y | 0.25y | 0.75y | 0.5y | 1y |
| 3X | 0.75y | 0.5y | 0.75y | 0.75y | 0.25y | 0.75y | 0.5y | 1y |
| 4X | 0.75y | 0.5y | 0.75y | 0.75y | 0.5y | 1y | 0.5y | 1y |
For information on converting inches to meters, please check out our conversion guide.
Instrucciones de costura

Fabric Pieces
Once your fabric is cut you should have the following pieces.
Front of the Leotard: Seven pieces on a fold, labeled front 1 through front 7. Arrange them sequentially from top (1) to bottom (7).
Sleeves: Four upper half sleeves. Four pieces each for sleeve ruffle 1 and sleeve ruffle 2.
Back of the Leotard: Cut two pieces each of back 1, back 2, back 3, back 4, and back 5. Cut one piece of back 6 on a fold.
Optional Modification (No Zipper at the Back): If you prefer not to include a zipper, omit the ½ inch center back seam allowance on back pieces 1 through 5. Extend the back crotch area by 2 inches to provide space for installing snaps, which can replace the need for a back zipper.
For the Skirt: One waistband on a fold. Two pieces each, on a fold, for skirt ruffle 1, skirt ruffle 2, skirt ruffle 3, and skirt ruffle 4.

Stitches
Preferred stitches: Stretch stitch, zigzag stitch, or serger overlock stitch. You can use a straight stitch only on non-stretch areas like ruffles.

STEP 1
Place the front 1 and front 2 pieces right sides together. Align the center notches along the center fold, pin them in place, and sew together using a stretch stitch, zigzag stitch, or serger.

STEP 2
Take all other front pieces from front 3 to front 5 and repeat the previous step. Pin them right sides facing each other, matching at the center notches on the fold lines. Sew them together using a stretch stitch, zigzag stitch, or serger.
This completes your entire front piece.

STEP 3
Take the back pieces from back1 to back 5 and repeat the previous step for each side. Pin them right sides facing each other and sew them together using a stretch stitch, zigzag stitch, or serger.
This creates two upper back pieces.

STEP 4
Gather the two upper back pieces. Install a 20-inch invisible zipper along the center back opening, starting ½ inch away from the neck to allow space for hemming.
The right side of the zipper should face the right side of the fabric. Use a straight stitch with a zipper foot for sewing. For a flat zipper finish, you may use a tear-away stabilizer between the zipper and the fabric.

STEP 5
After attaching the zipper, fold the excess fabric at the top of the zipper vertically and hand-stitch it down to secure this fold before proceeding.

STEP 6
Next, fold the zipper tape horizontally and pin in place, ready for topstitching. Repeat the same steps on the opposite side.

STEP 7
Topstitch around the zipper sides to reinforce and neatly finish the edges.

STEP 8
Attach back 6 to the lower part of the back piece that has the zipper. Sew them right sides facing each other using a stretch stitch, zigzag stitch, or serger.
Be careful when sewing over the zipper. Alternatively, avoid sewing over the zipper tail by flipping it upwards. Then trimming any excess once it’s sewn.
This completes your entire back piece.

STEP 9
Place the front and back pieces right sides together and pin at the shoulder seams. Sew along these seams using a stretch stitch, zigzag stitch, or serger.

STEP 10
Hem the center front seam of two upper half sleeves using a straight stitch to create the opening for the upper sleeve peek-a-boo. Repeat this process for the opposite sleeve halves.

STEP 11
Gather two sleeve ruffles 1 pieces. Stack them right sides facing each other and sew them together only at one end. Repeat for opposite sleeve ruffles.

STEP 12
Gather two sleeve ruffles 2 pieces. Stack them right sides facing each other and sew them together only at one end. Repeat for opposite sleeve ruffles.

STEP 13
For one sleeve, sew sleeve ruffles 1 and sleeve ruffles 2 together, right sides facing each other, matching the curve notches. Repeat for opposite sleeve ruffles.

STEP 14
Sew the sleeve ruffles to the bottom of the sleeve halves, right sides facing each other with a stretch or straight stitch. You can pin the two sleeve halves together at the top to keep them in place. Repeat for the opposite sleeve.

STEP 15
Spread out the front and back right side up and gather your sleeves.

STEP 16
Align and pin the sleeves around the armholes, right side of the sleeve facing the right side of the front and back, using notches as a guide. The peek-a-boo seam should line up with the shoulder seam.
Each sleeve curve is symmetrical, so there's no designated front or back. Serge or sew the sleeves in place and repeat for the other side.

STEP 17
Turn the garment wrong side out and sew the inner sleeve seams closed, including the ruffles, continuing down the sides of the garment and the crotch, using a stretch stitch, zigzag stitch, or serger.

STEP 18
Hem with leg holes using a zig zag stitch or fold over twice for a rolled hem effect with a stretch stitch.

STEP 19
Lastly, hem the sleeves and neck using a stretch stitch, or zigzag stitch.

STEP 1
Gather the two skirt ruffle 1 pieces. Stack them right sides facing each other and sew them together only at one end.

STEP 2
Repeat for both skirt ruffle 2 pieces, skirt ruffle 3 pieces, and skirt ruffle 4 pieces.

STEP 3
Sew skirt ruffles 1 and sleeve ruffles 2 together, right sides facing each other, matching the curve notches.

STEP 4
Repeat for sewing skirt ruffles 2, 3, and 4 together, right sides facing each other, matching the curve notches.
This completes your entire skirt ruffles.

STEP 5
Gather your waistband. Fold the waistband horizontally in half so the right side is facing out, then press the fold.

STEP 6
Unfold, then fold in all edges 0.5 inches and press all edges. Then unfold again this time all folds.

STEP 7
Stack the waist belt over the skirt, right sides facing each other. Then sew the top edge of the waist belt to the skirt, the entire length of the skirt at the waist.

STEP 8
Fold the waist belt up and over, then press the seam.

STEP 9
On the wrong side, reinforce the previously made folds. Fold the waist belt in half as well as fold in all of the pressed edges 0.5 inches. Set folds in place with pins.

STEP 10
On the right side, sew the folds together by topstitching all around the waist belt.

STEP 11
Try on the skirt by wrapping it around your body, positioning it so the skirt sits low on your hips as designed. Place pins where you prefer the skirt to fall. Install 1-2 sets of snaps at these pin placements on the waistband, ensuring there is some overlap for secure closure.