Cómo coser un leotardo
Saltar a instrucciones
Descripción general
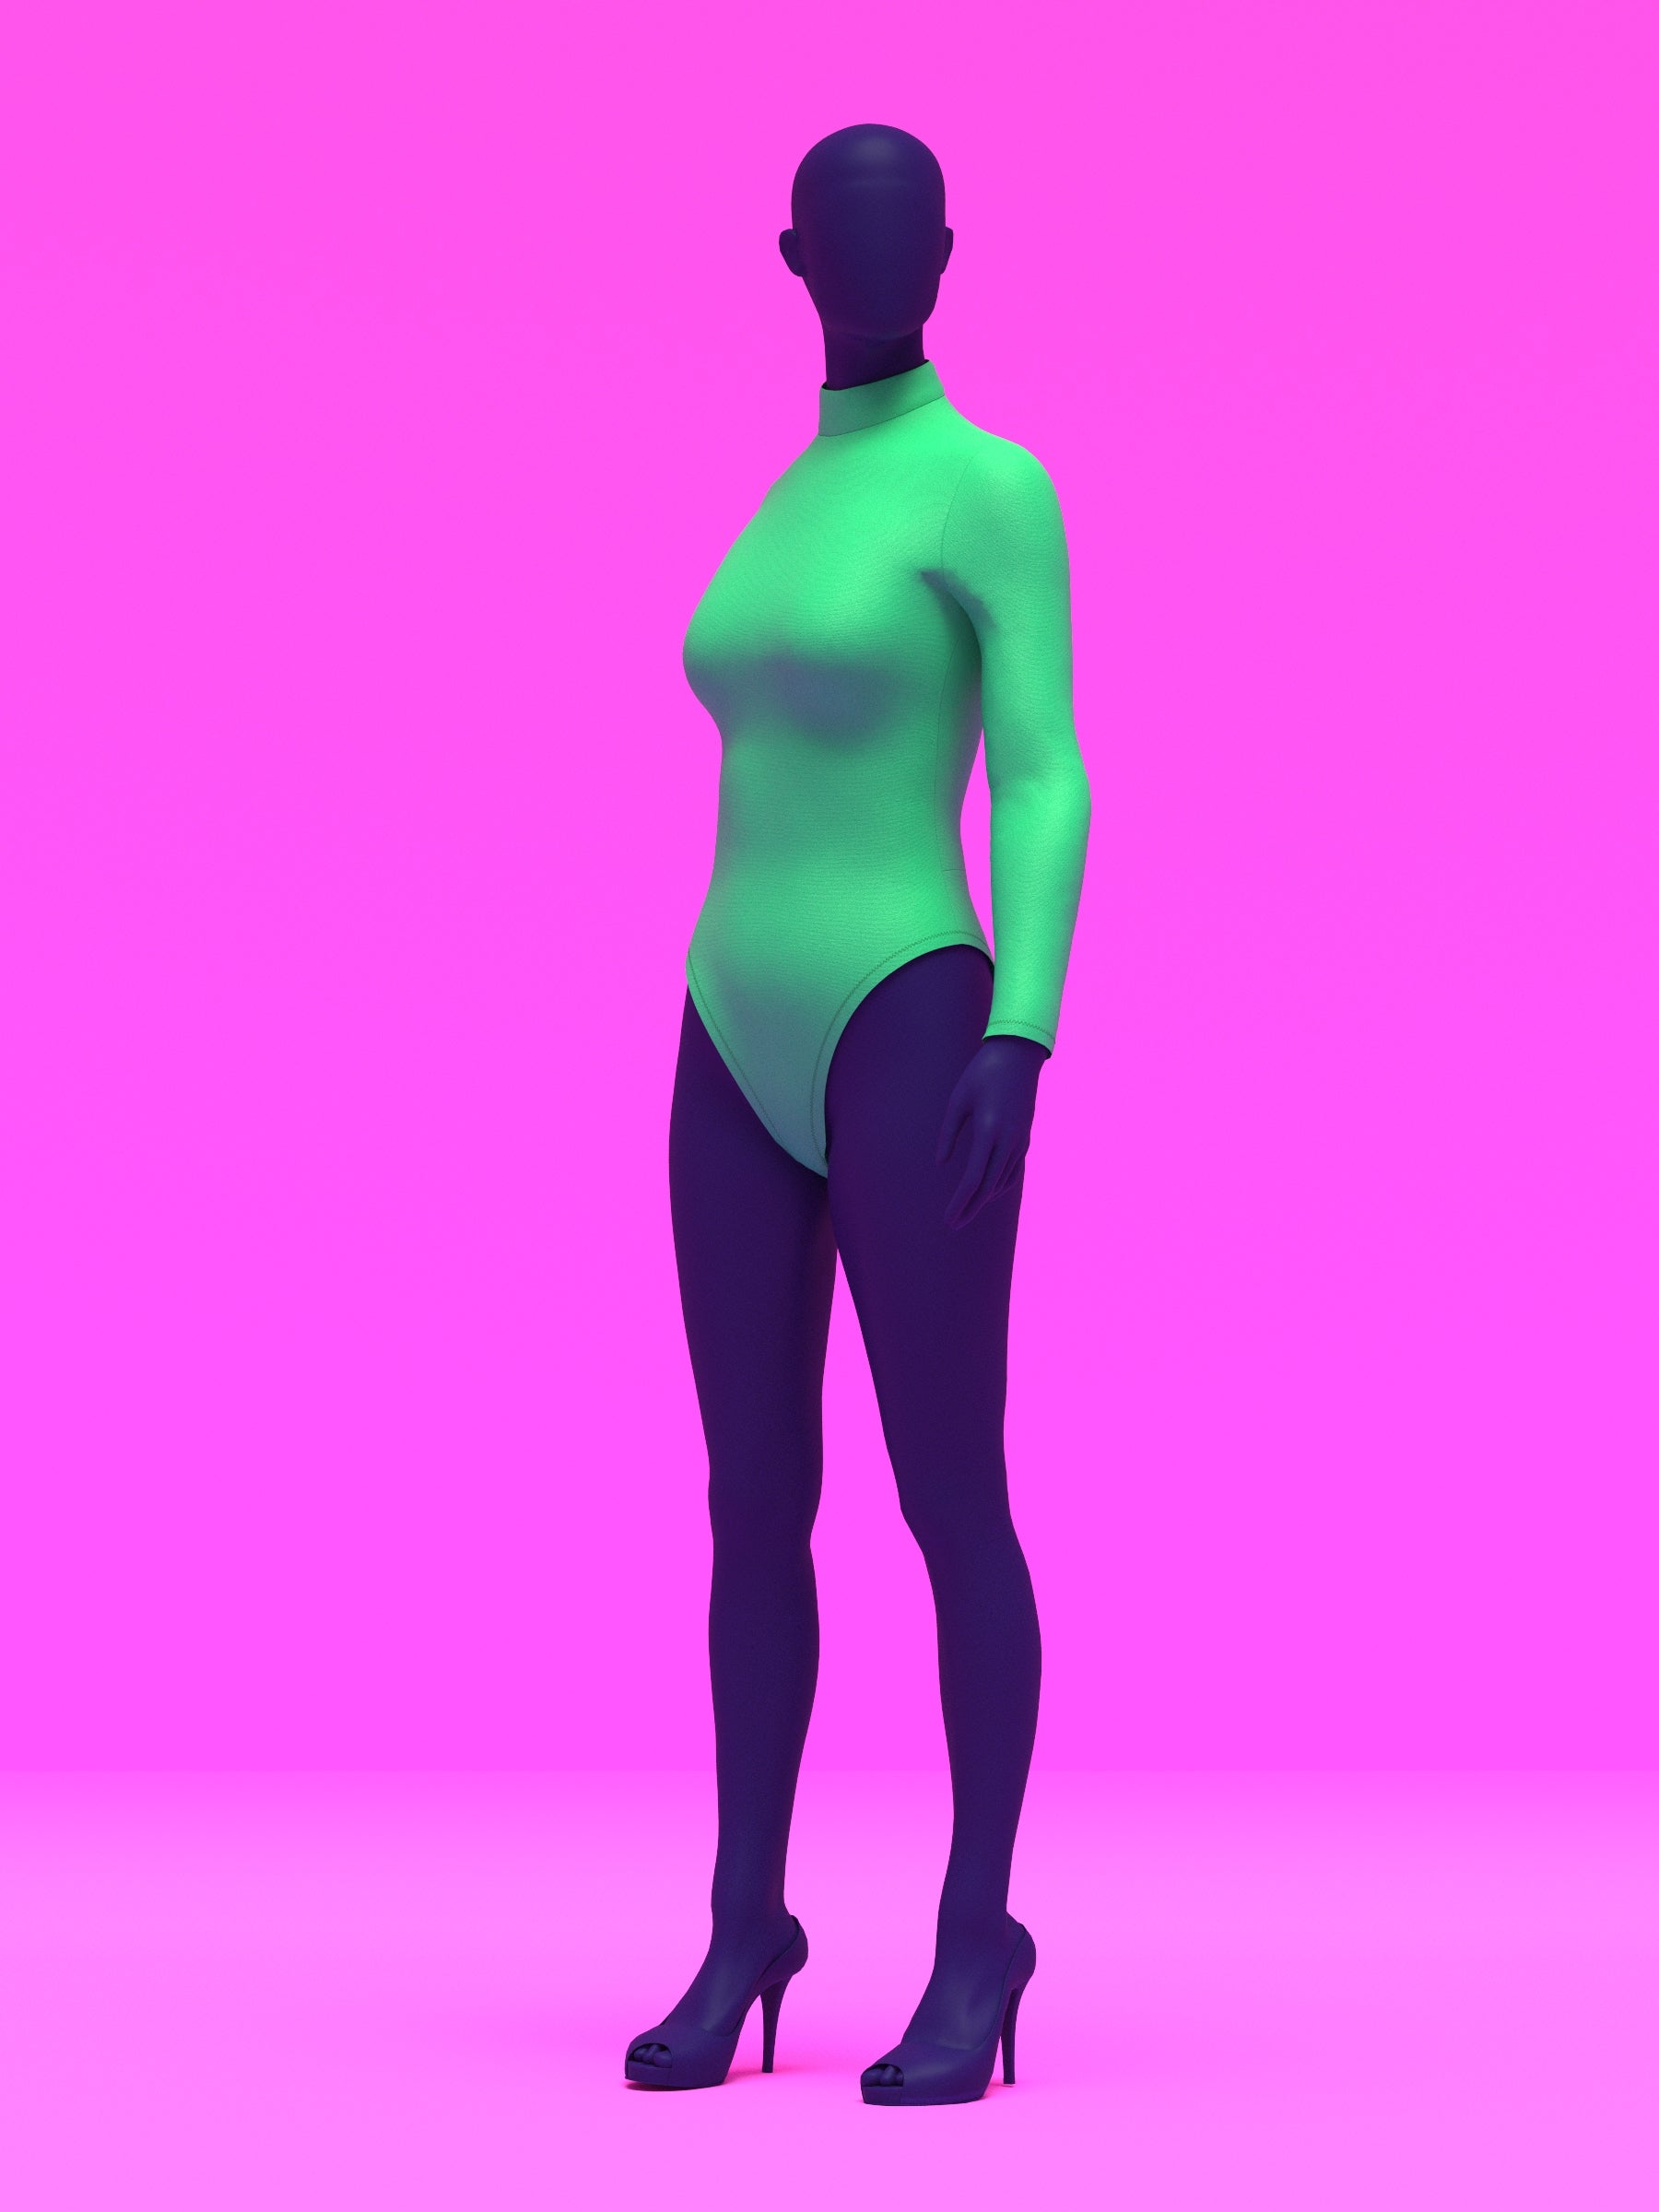
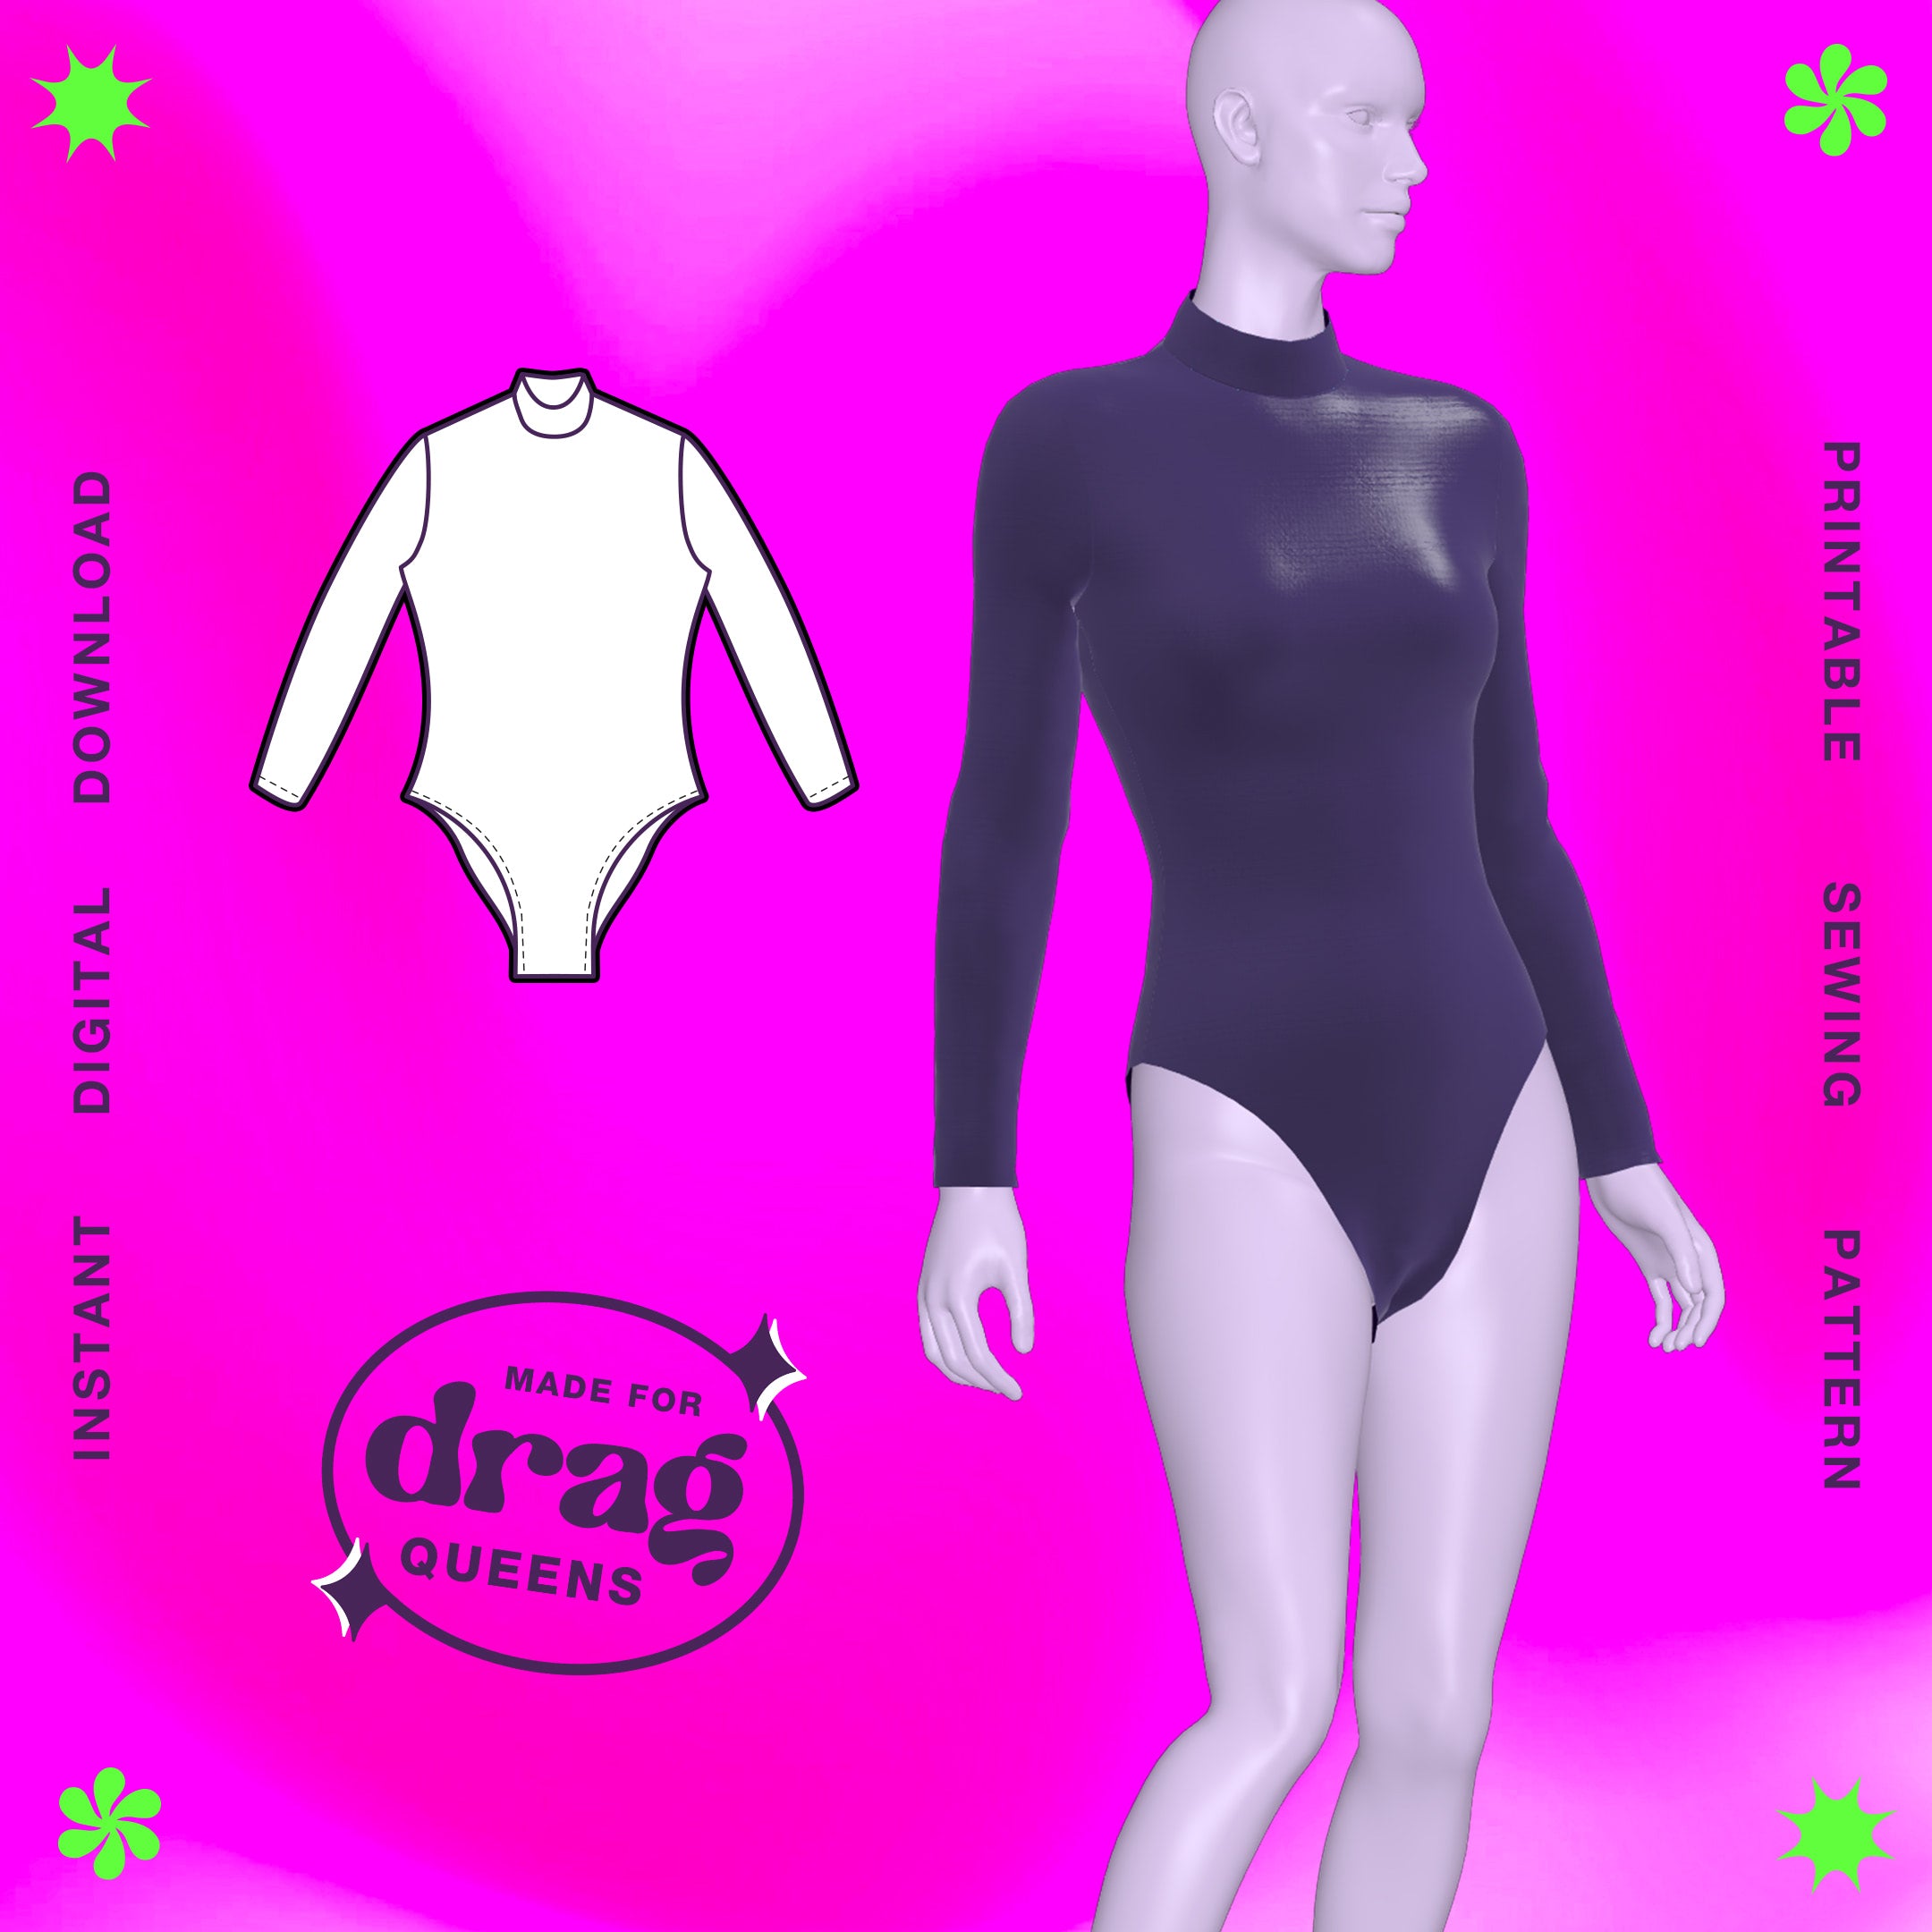
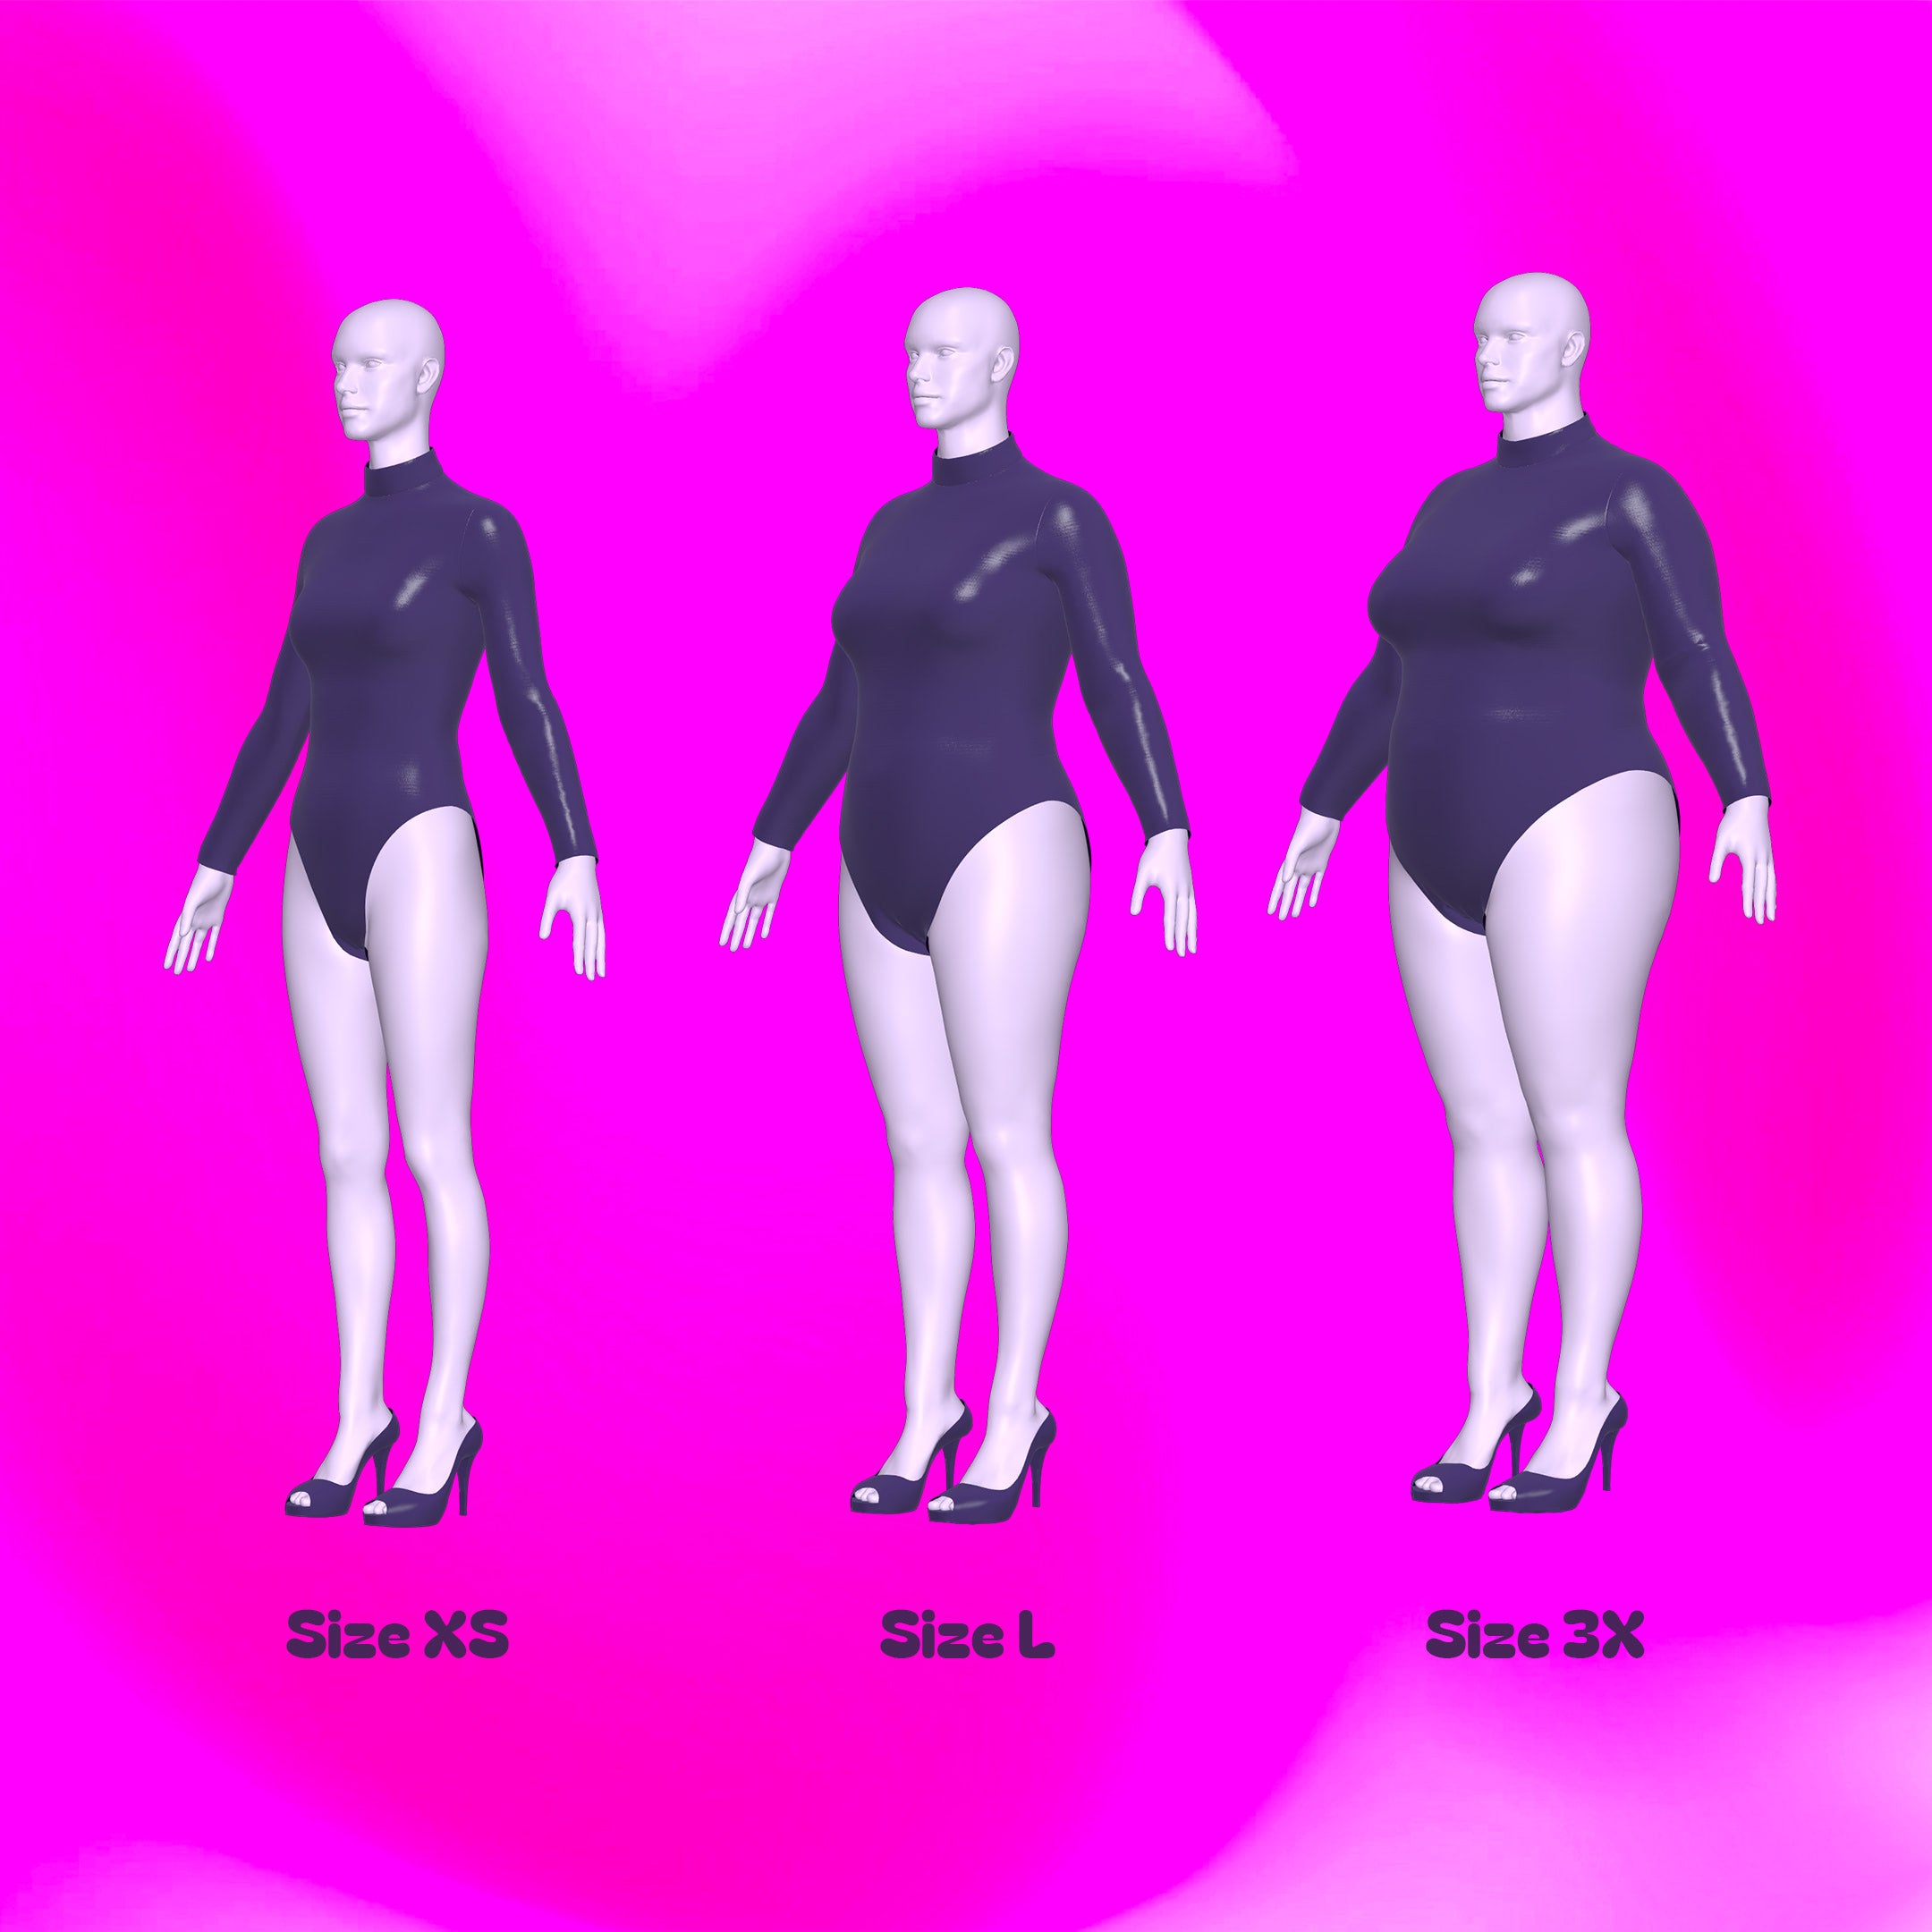
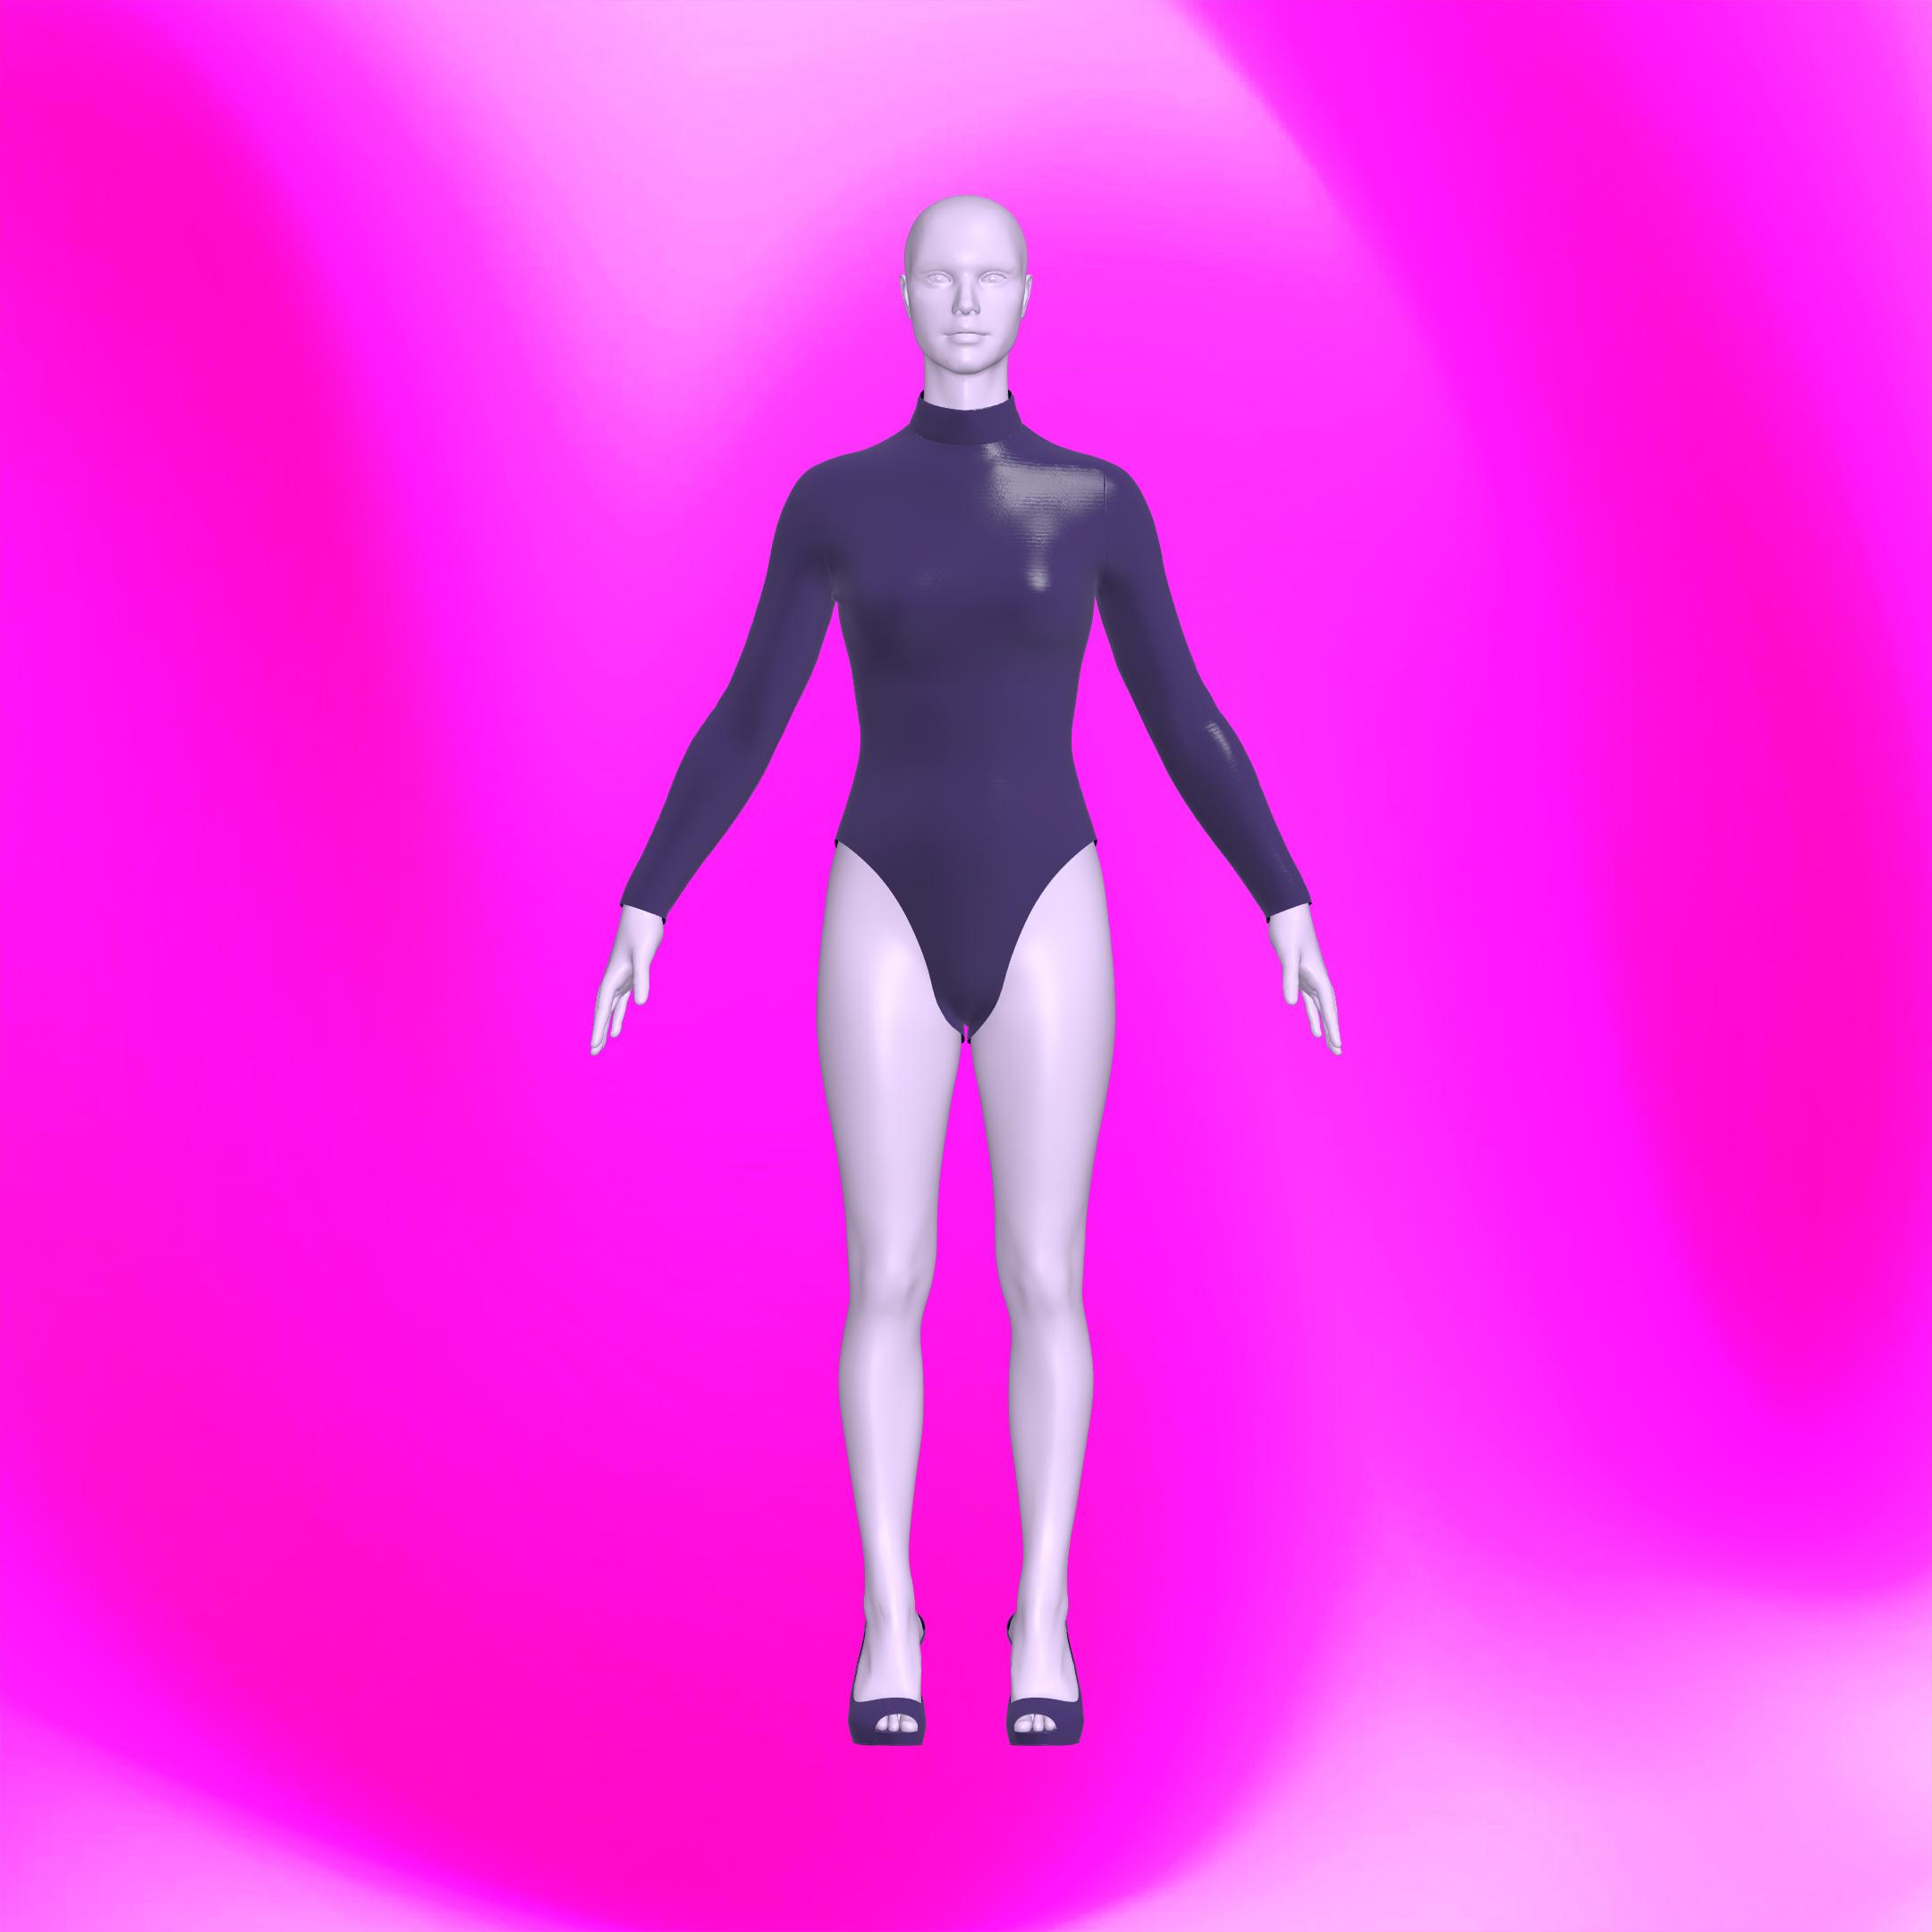
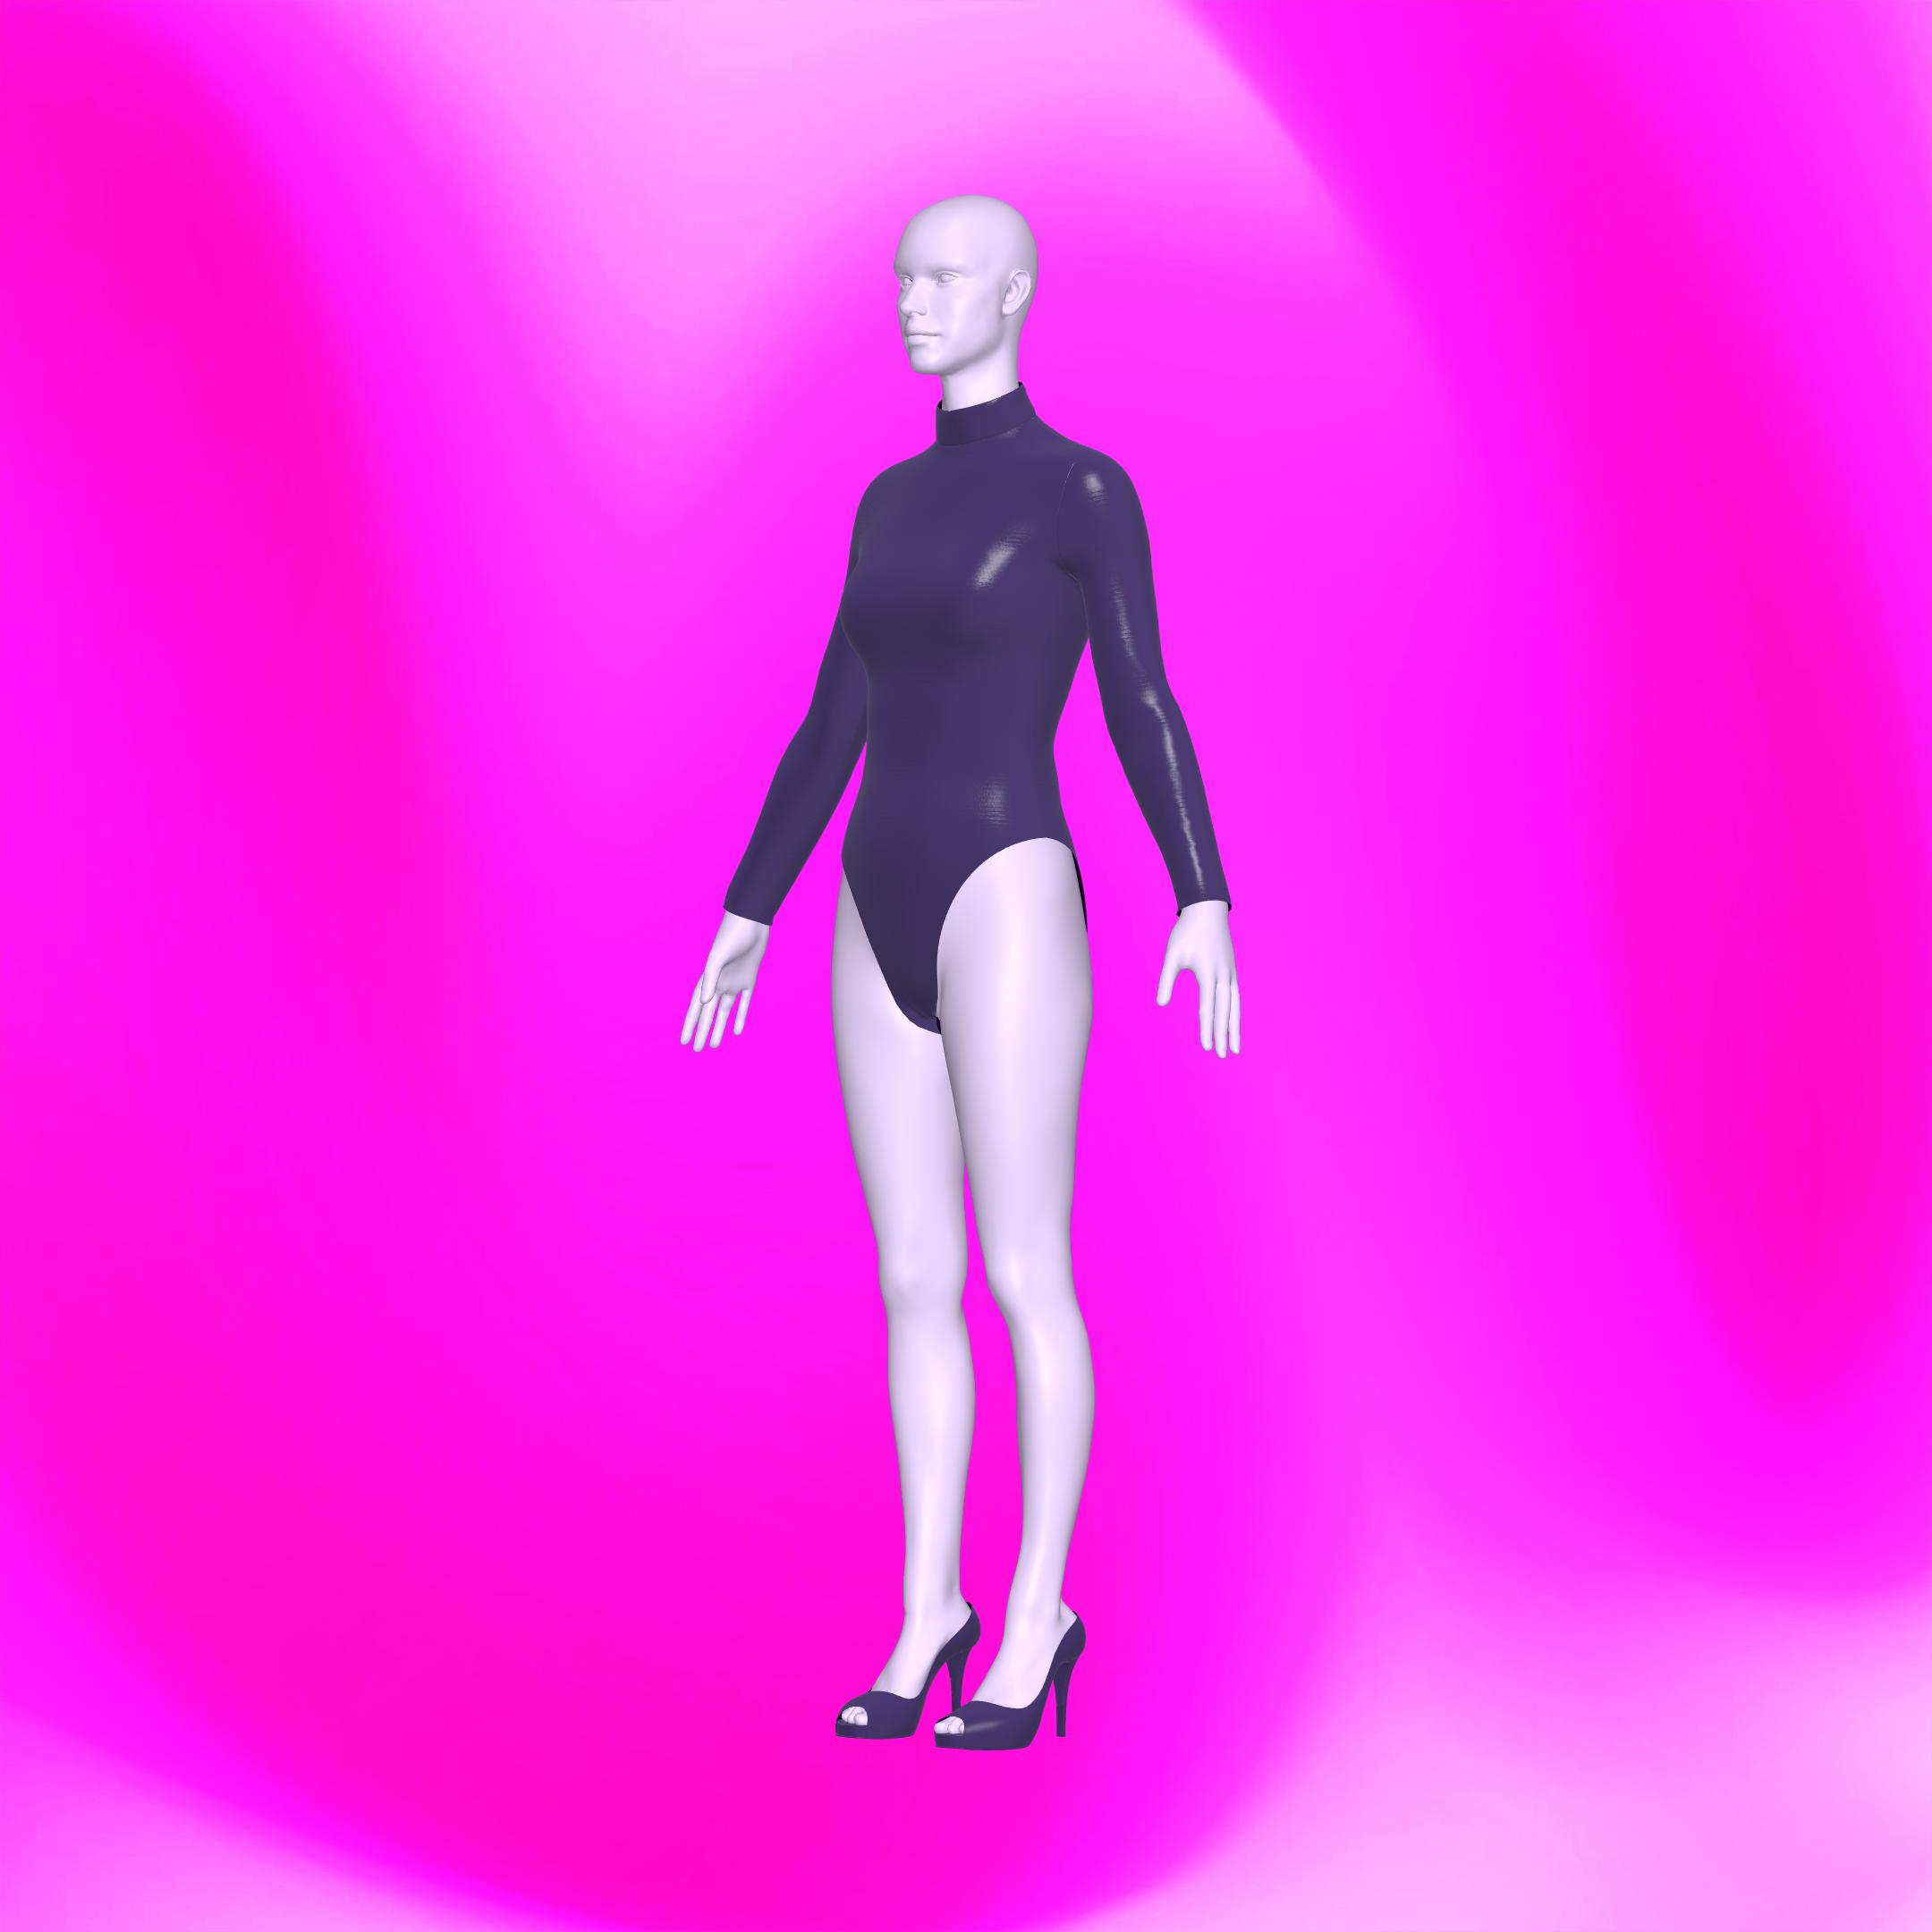
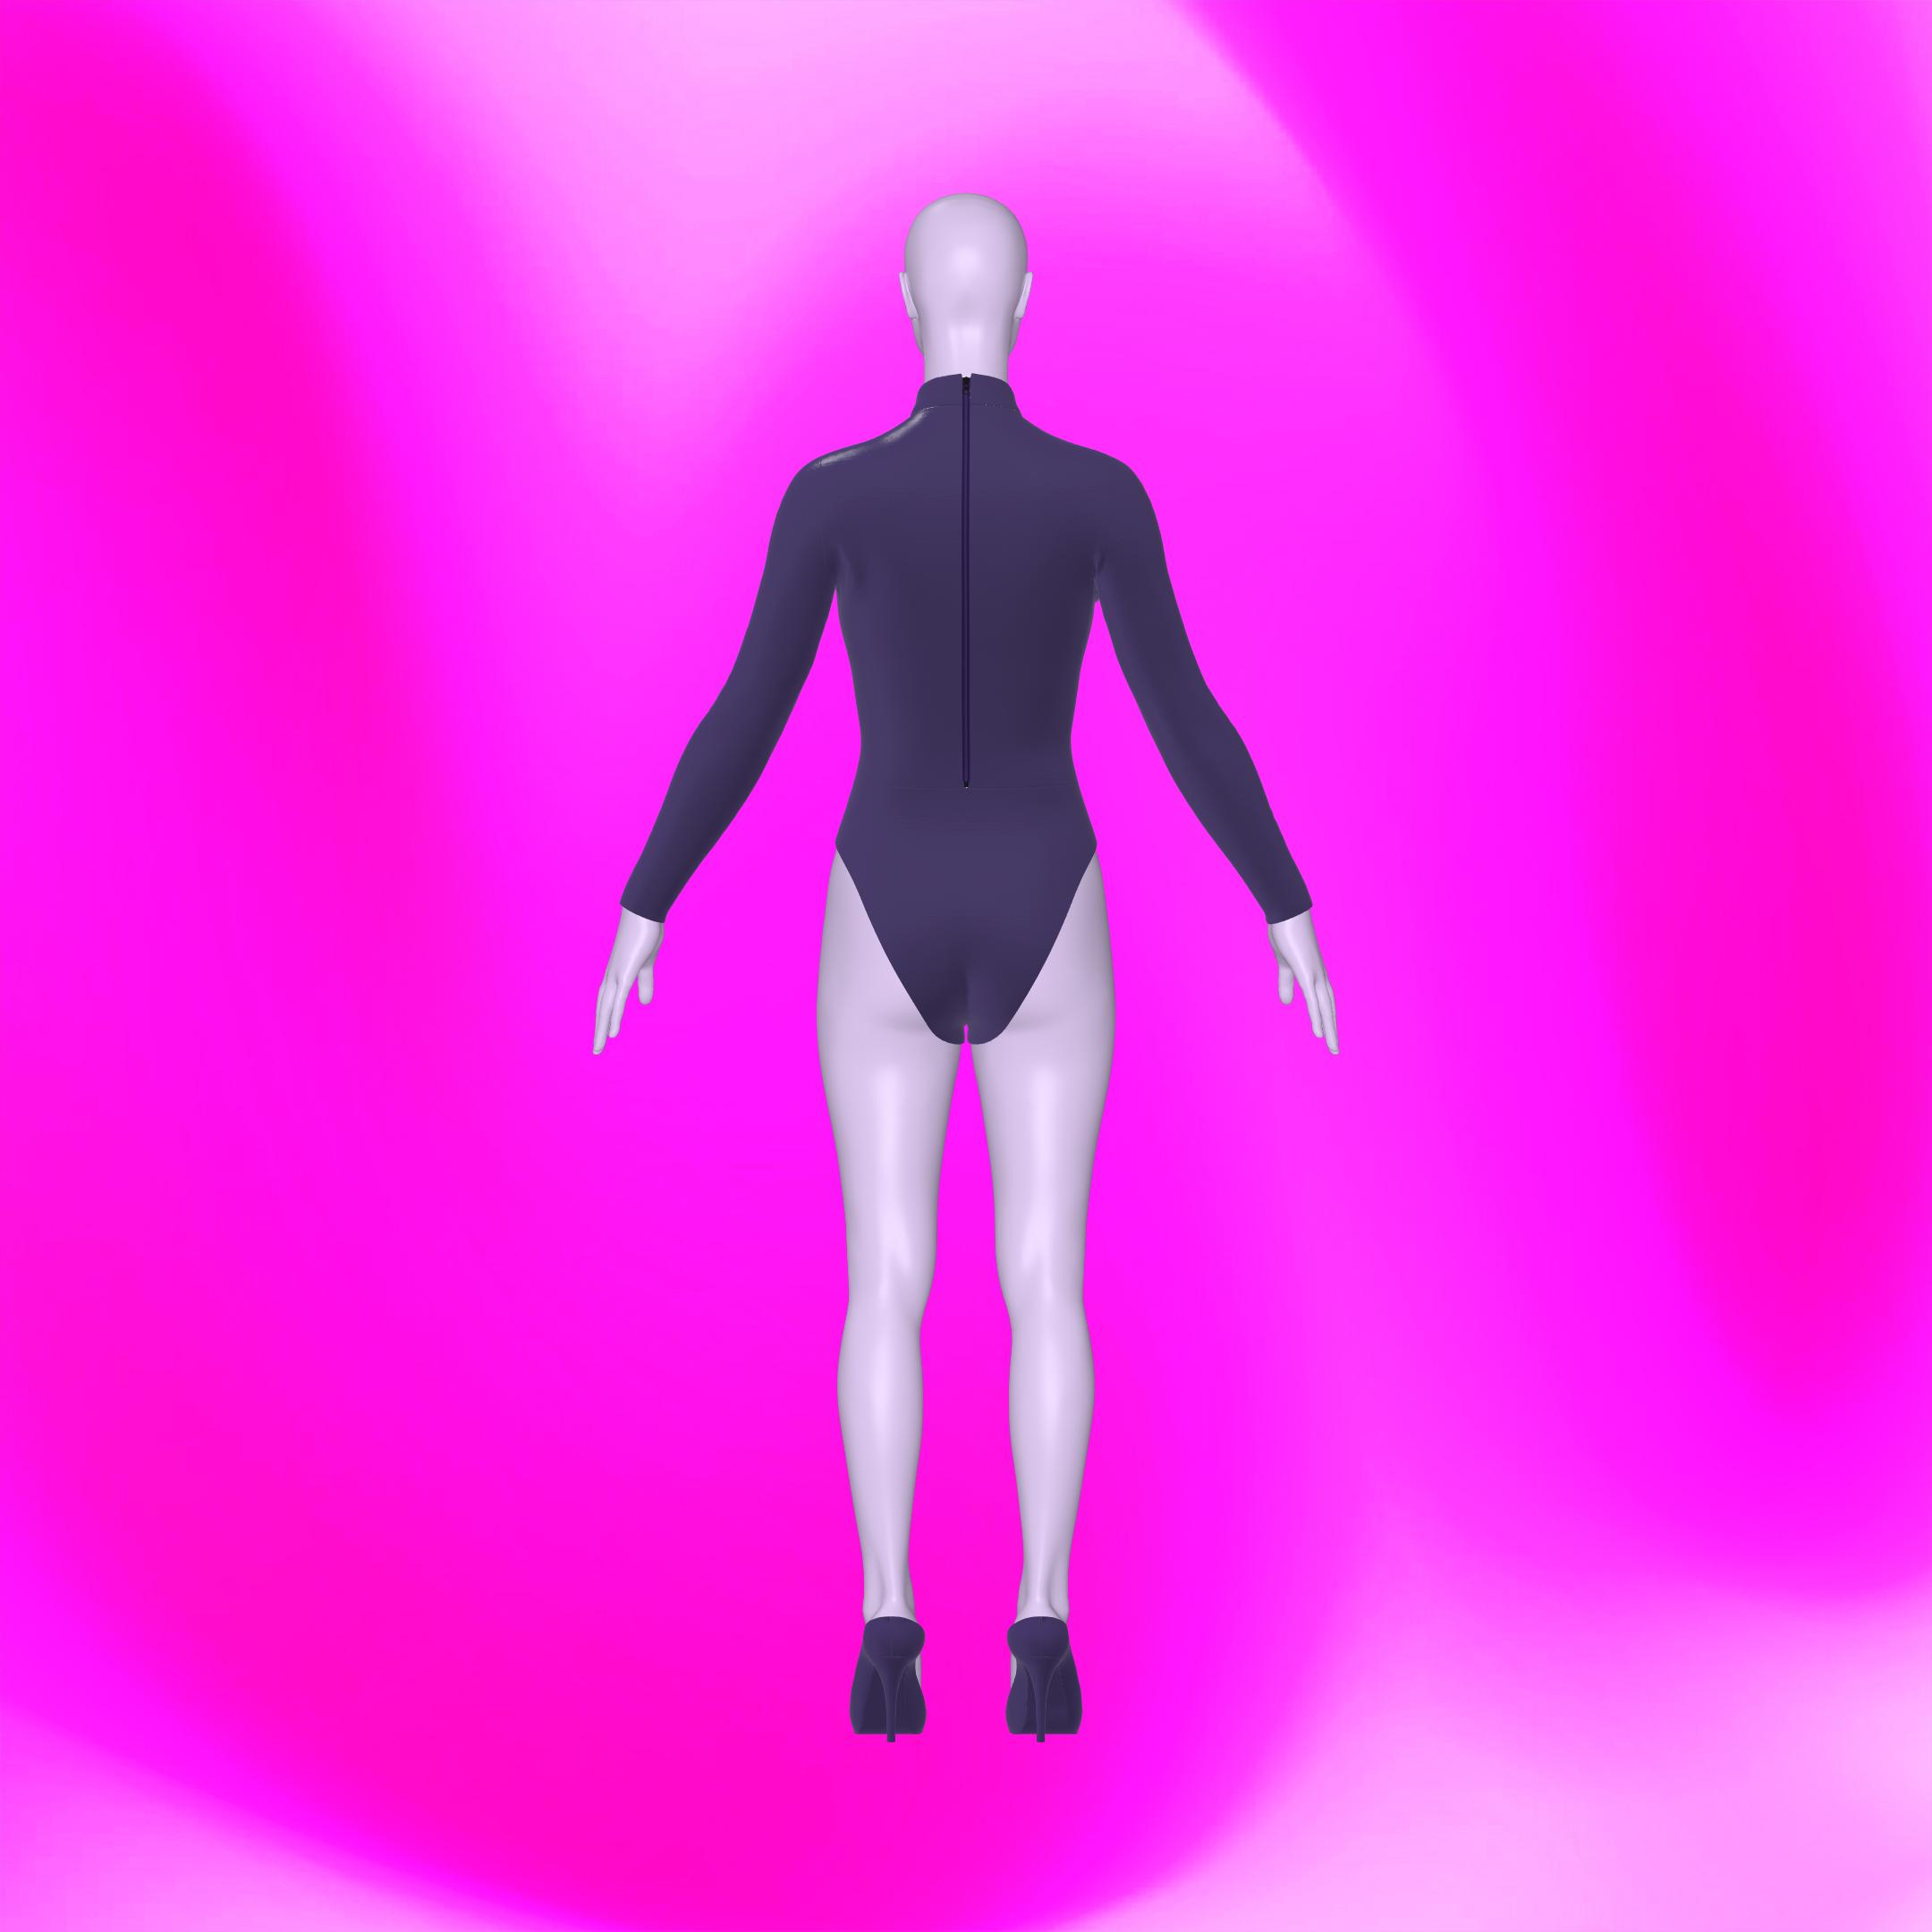
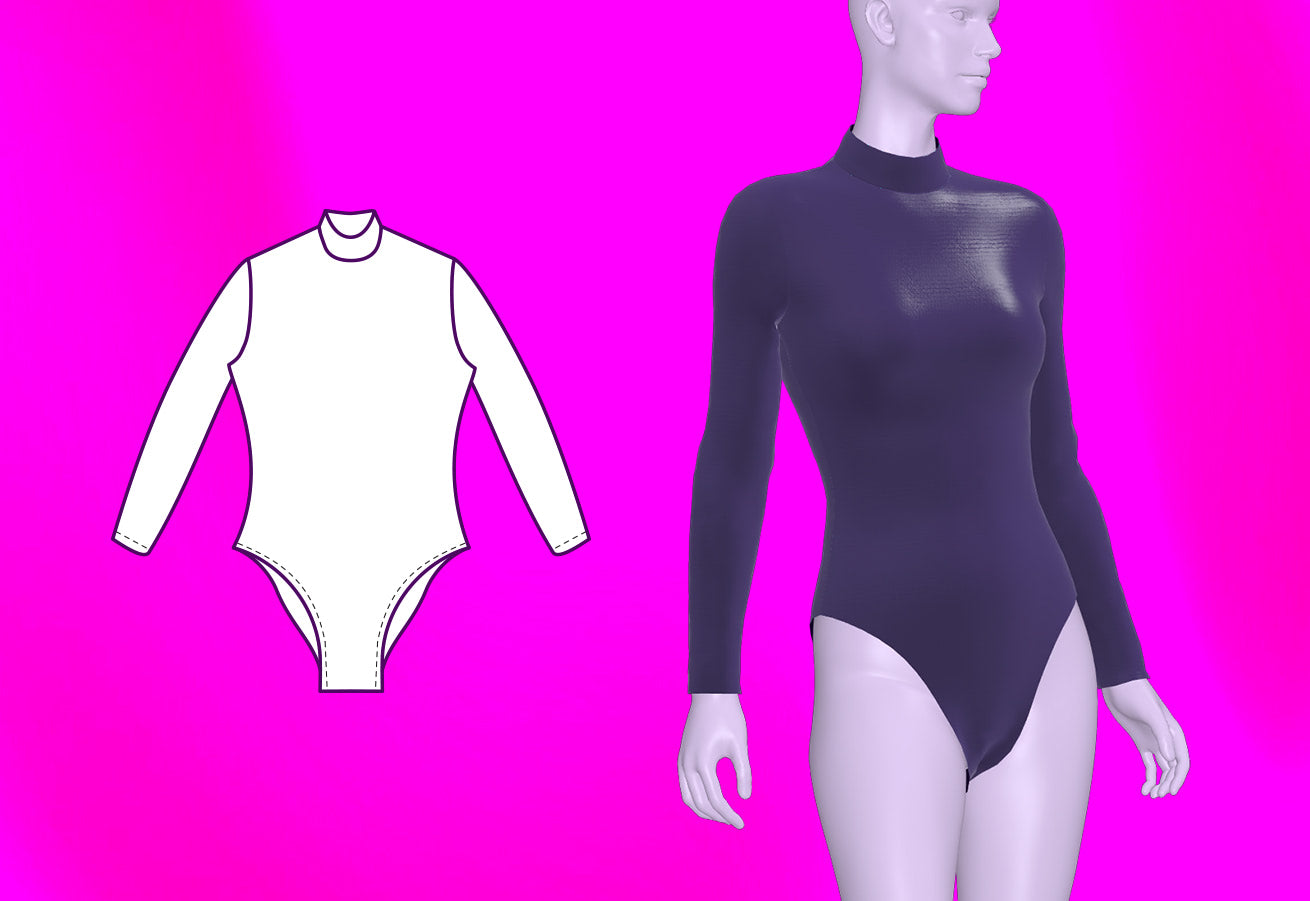
Presentamos nuestro patrón de costura de malla de manga larga Drag Queen Essential. Este diseño versátil presenta una parte delantera sin costuras para una apariencia elegante y pulida, mientras que la parte trasera consta de dos piezas con una cremallera oculta y una pieza inferior sin costuras para un ajuste cómodo y facilidad de movimiento. Perfecto para drag queens de todos los estilos, este patrón está diseñado para satisfacer las necesidades únicas de la comunidad drag. Diseñado para usarse con telas elásticas en 4 direcciones, es una incorporación imprescindible a tu guardarropa, que ofrece infinitas posibilidades para la expresión creativa. Ya sea que lo uses como una pieza independiente o como base para tus conjuntos elaborados, nuestro patrón de malla de manga larga te garantiza que siempre te verás y te sentirás fabulosa.
Este patrón ya está disponible para tallas de mujer (AFAB). Se vende como patrón independiente.
Dificultad del patrón: Para principiantes
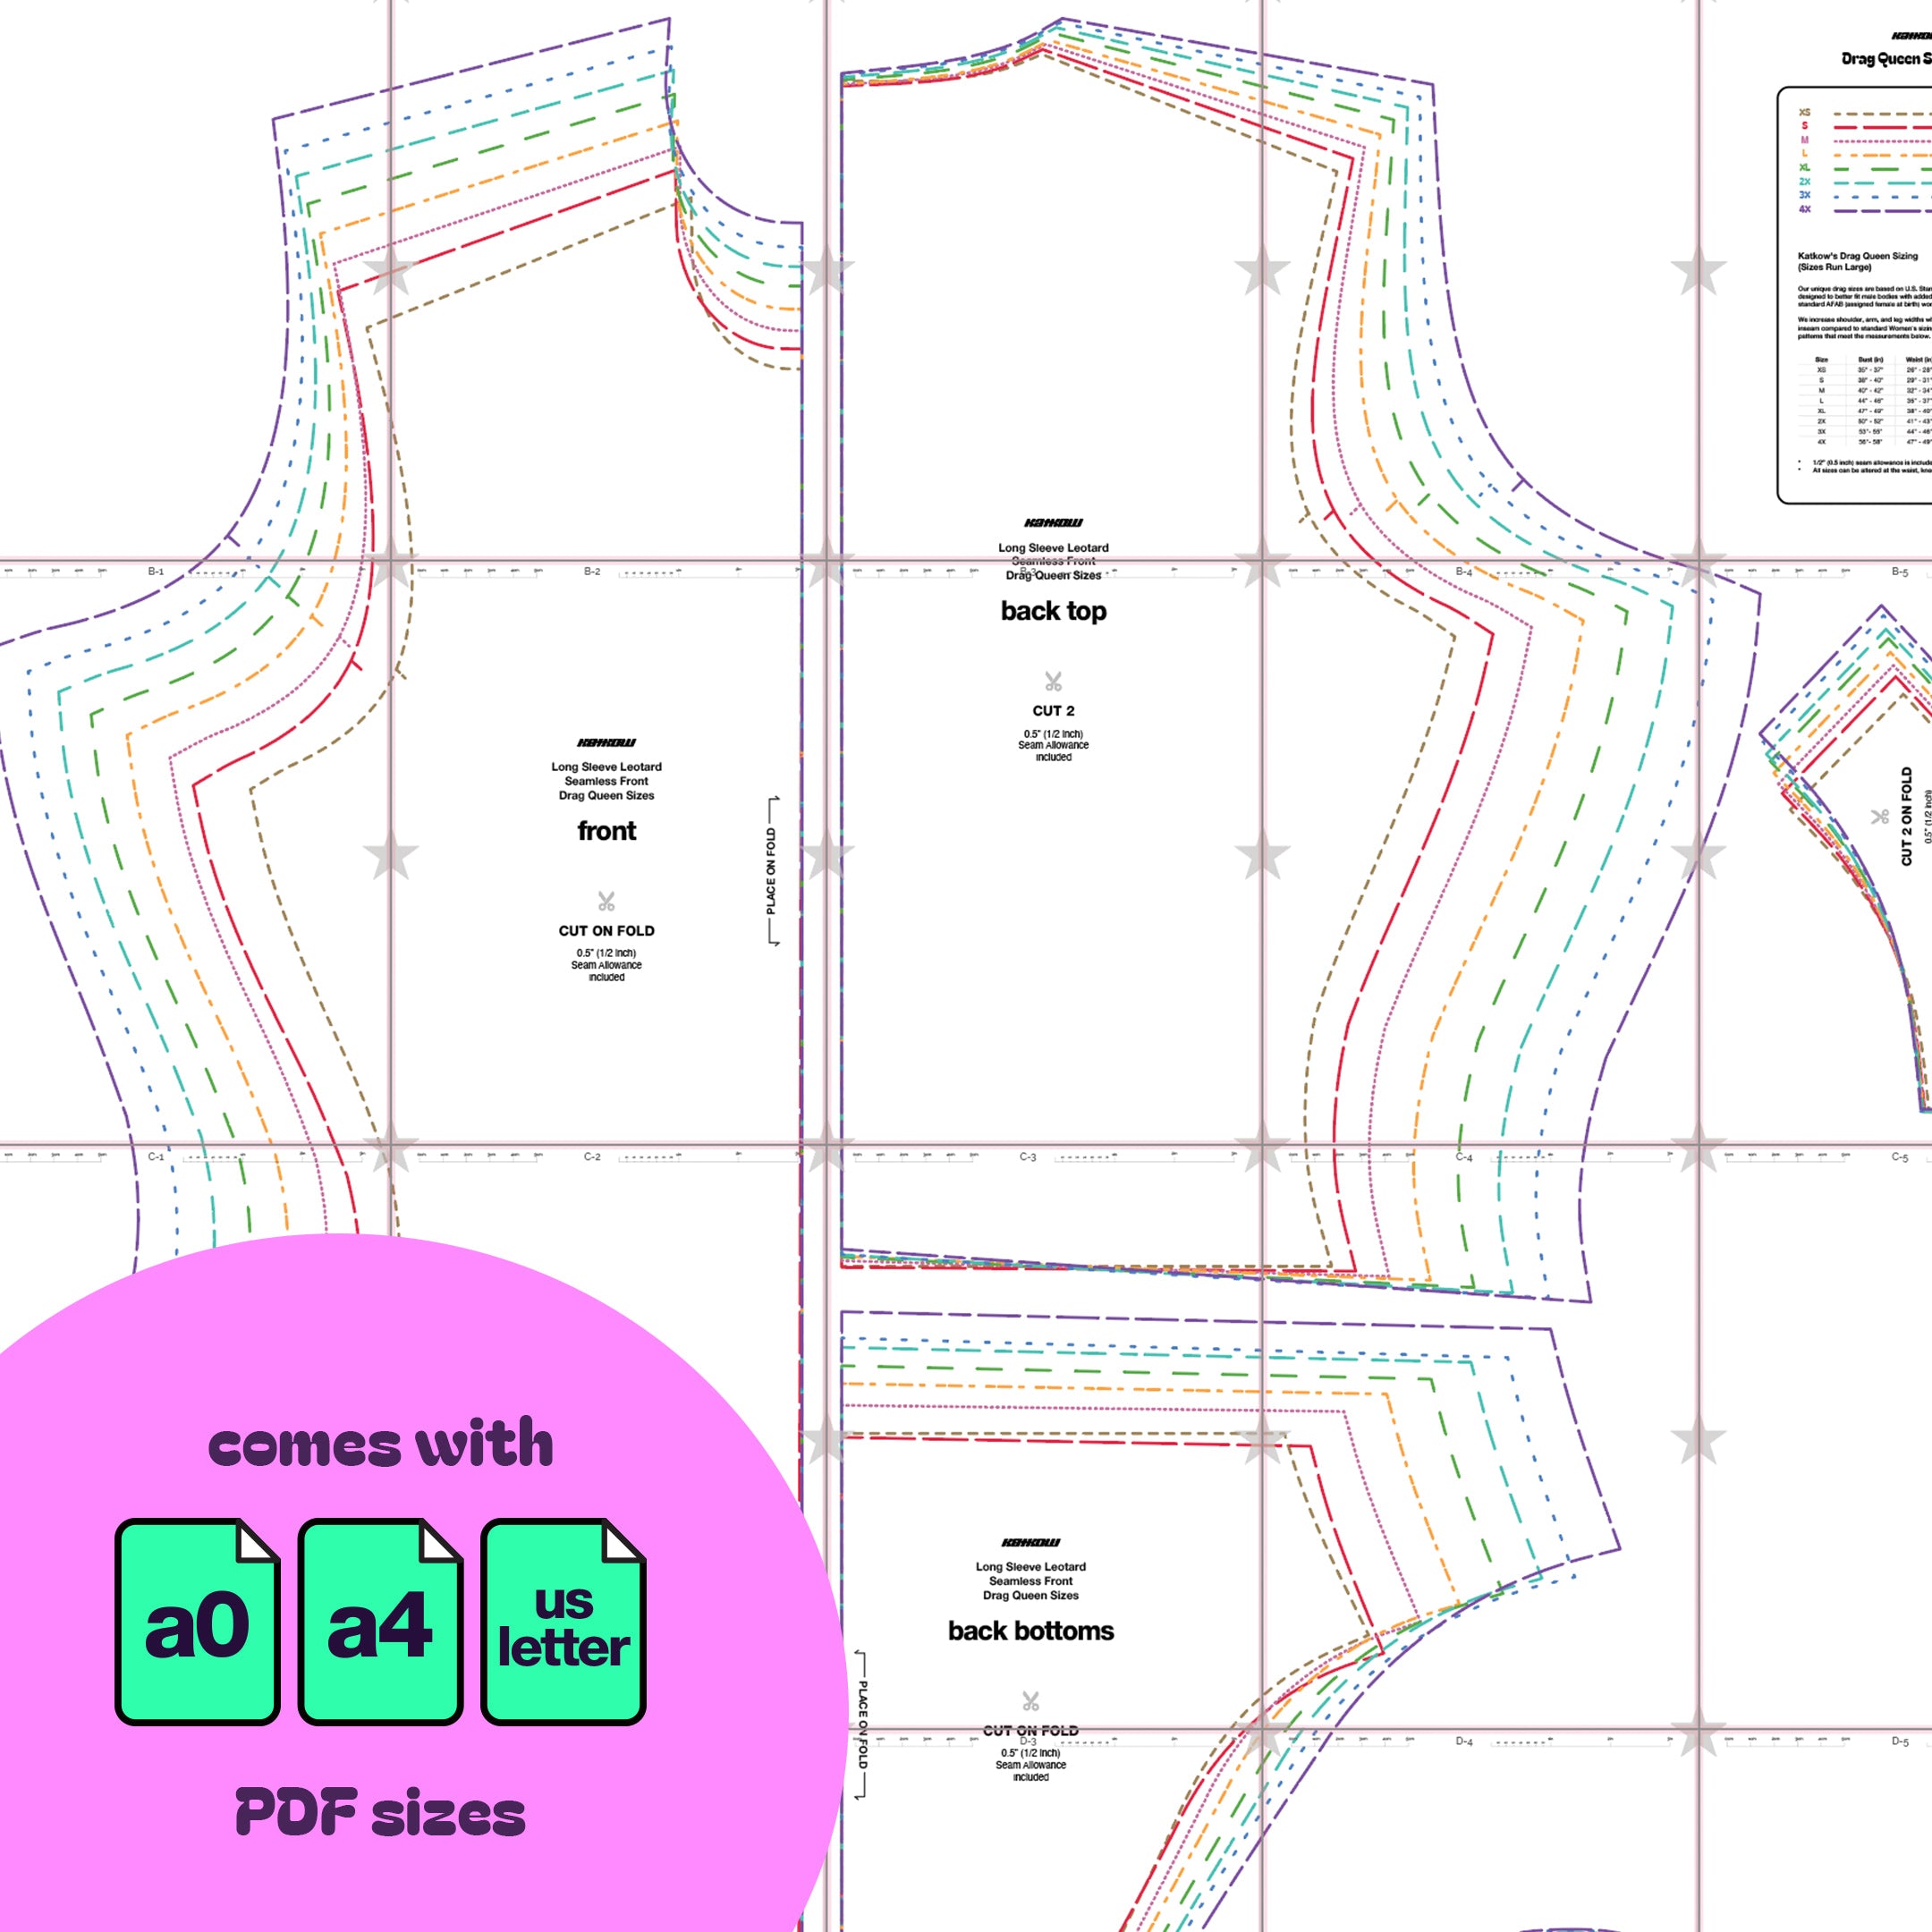
Detalles de tallas
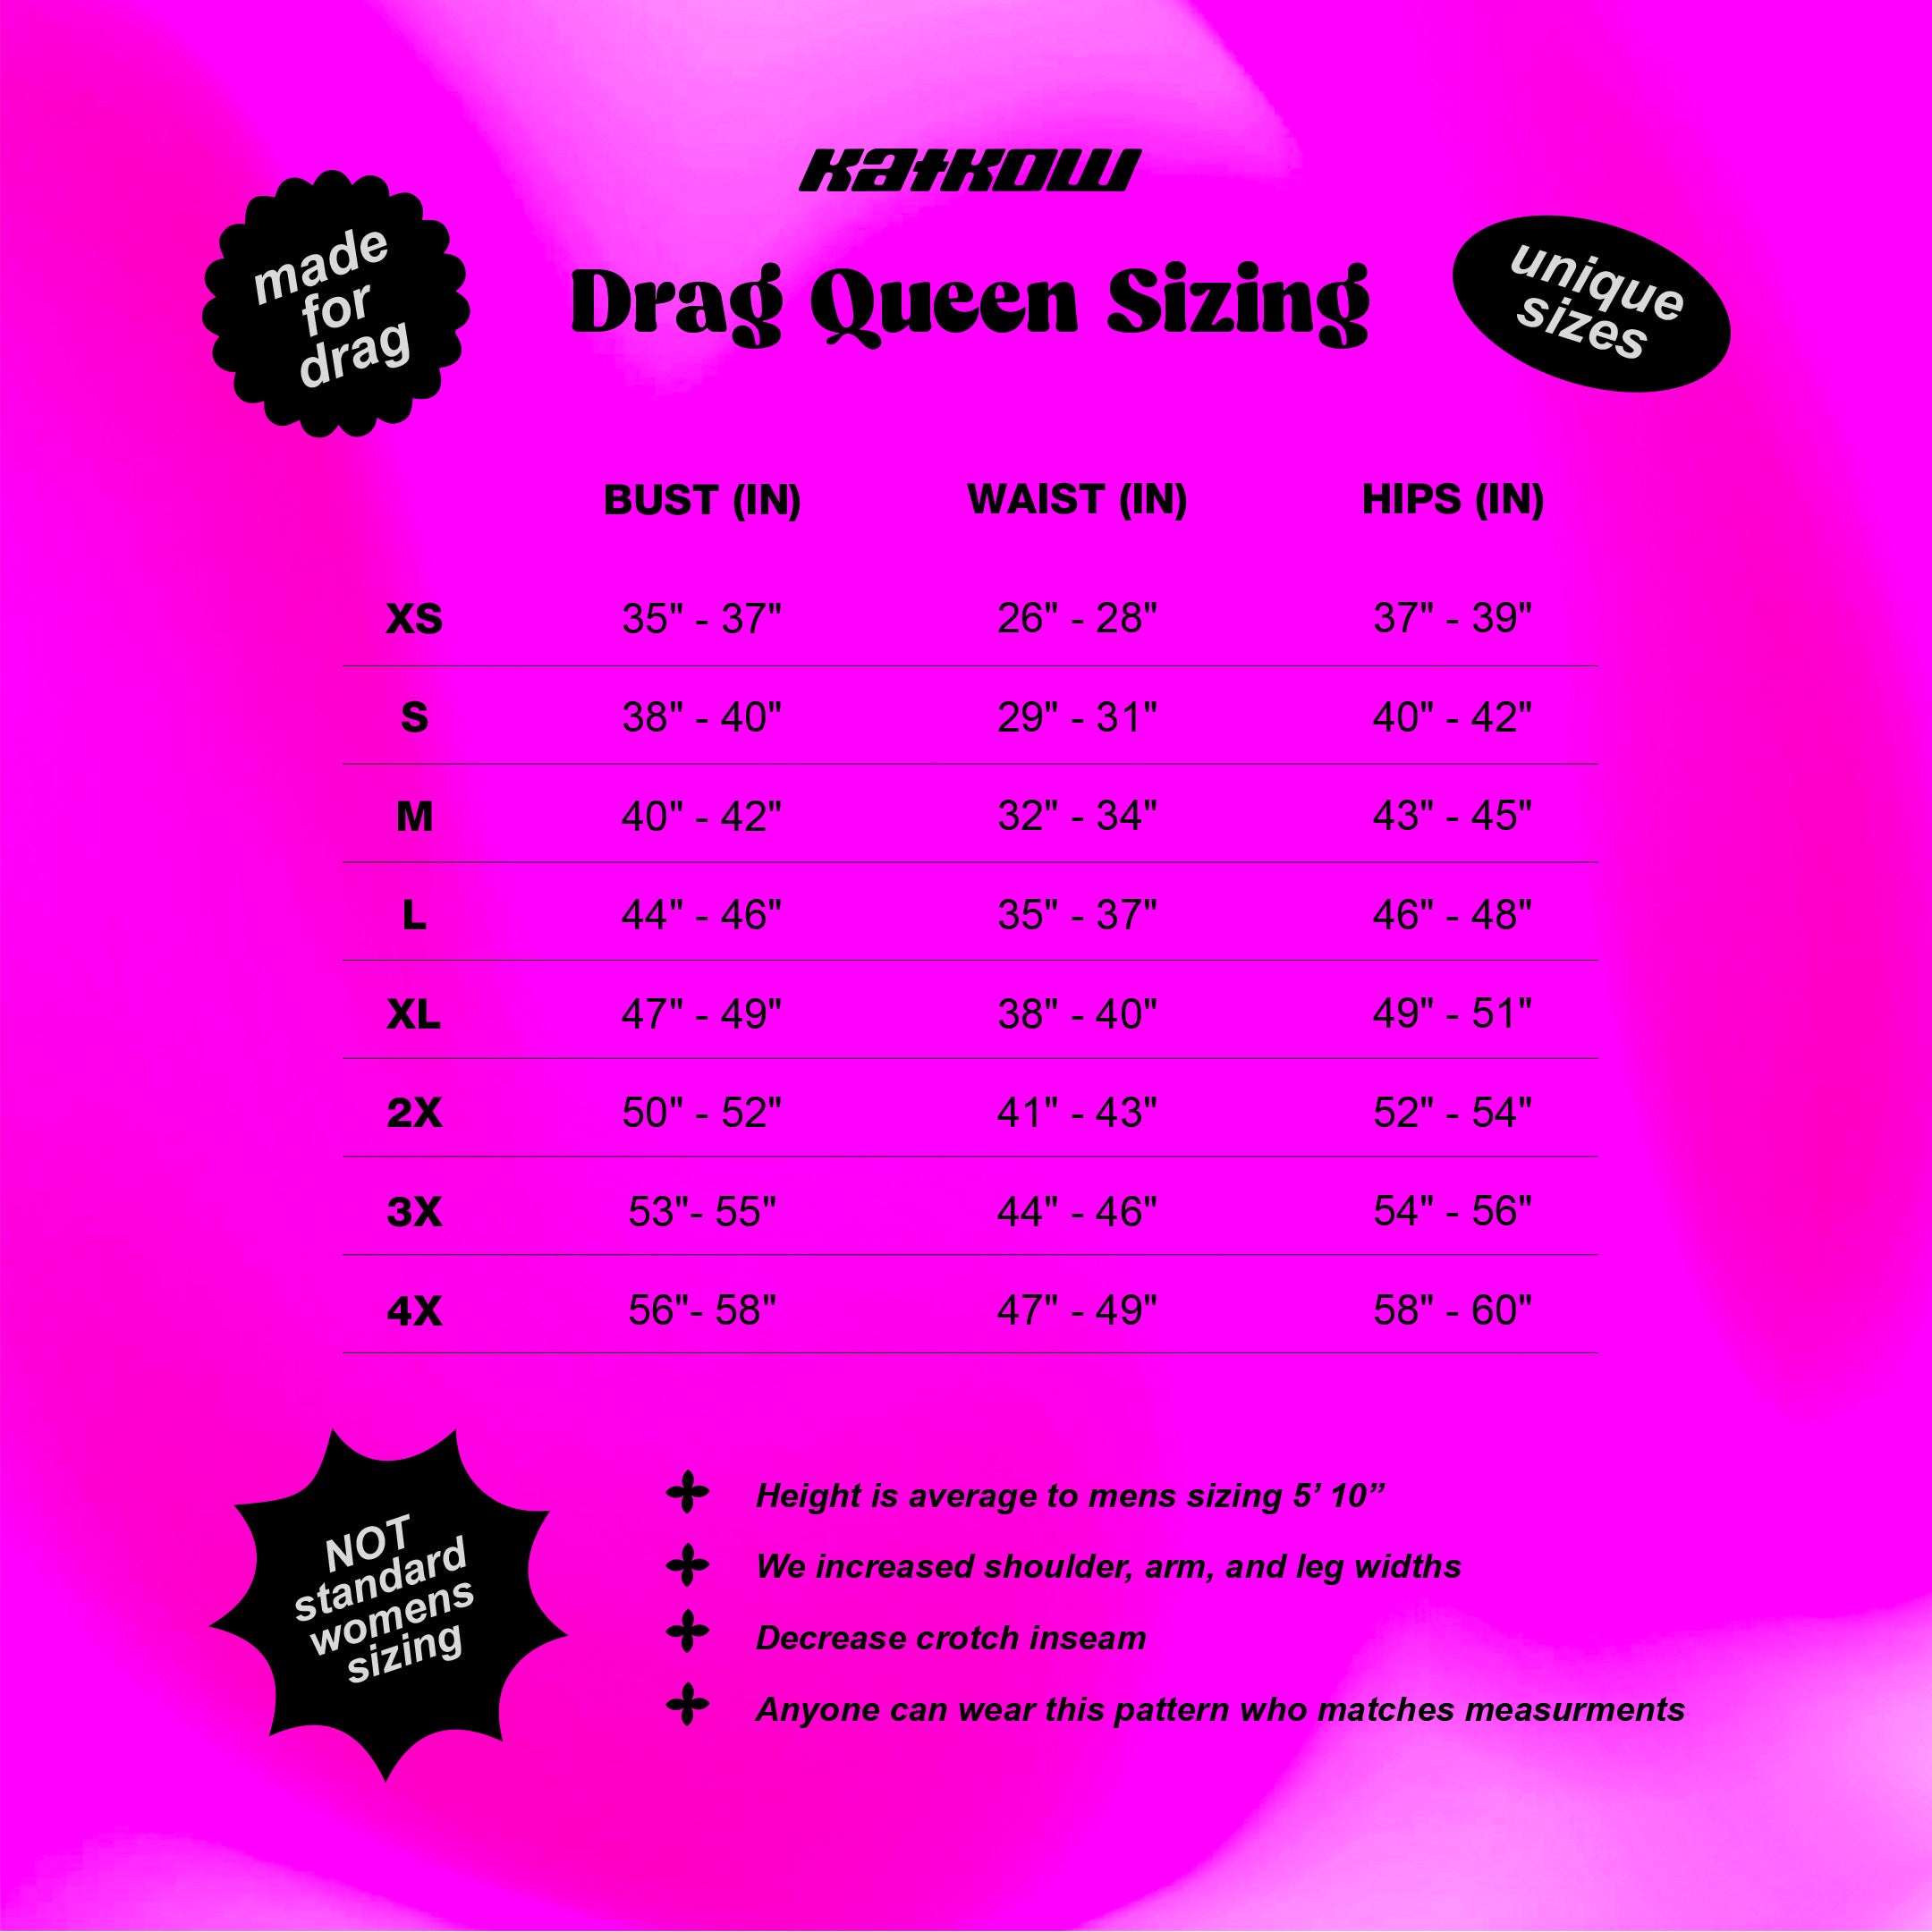
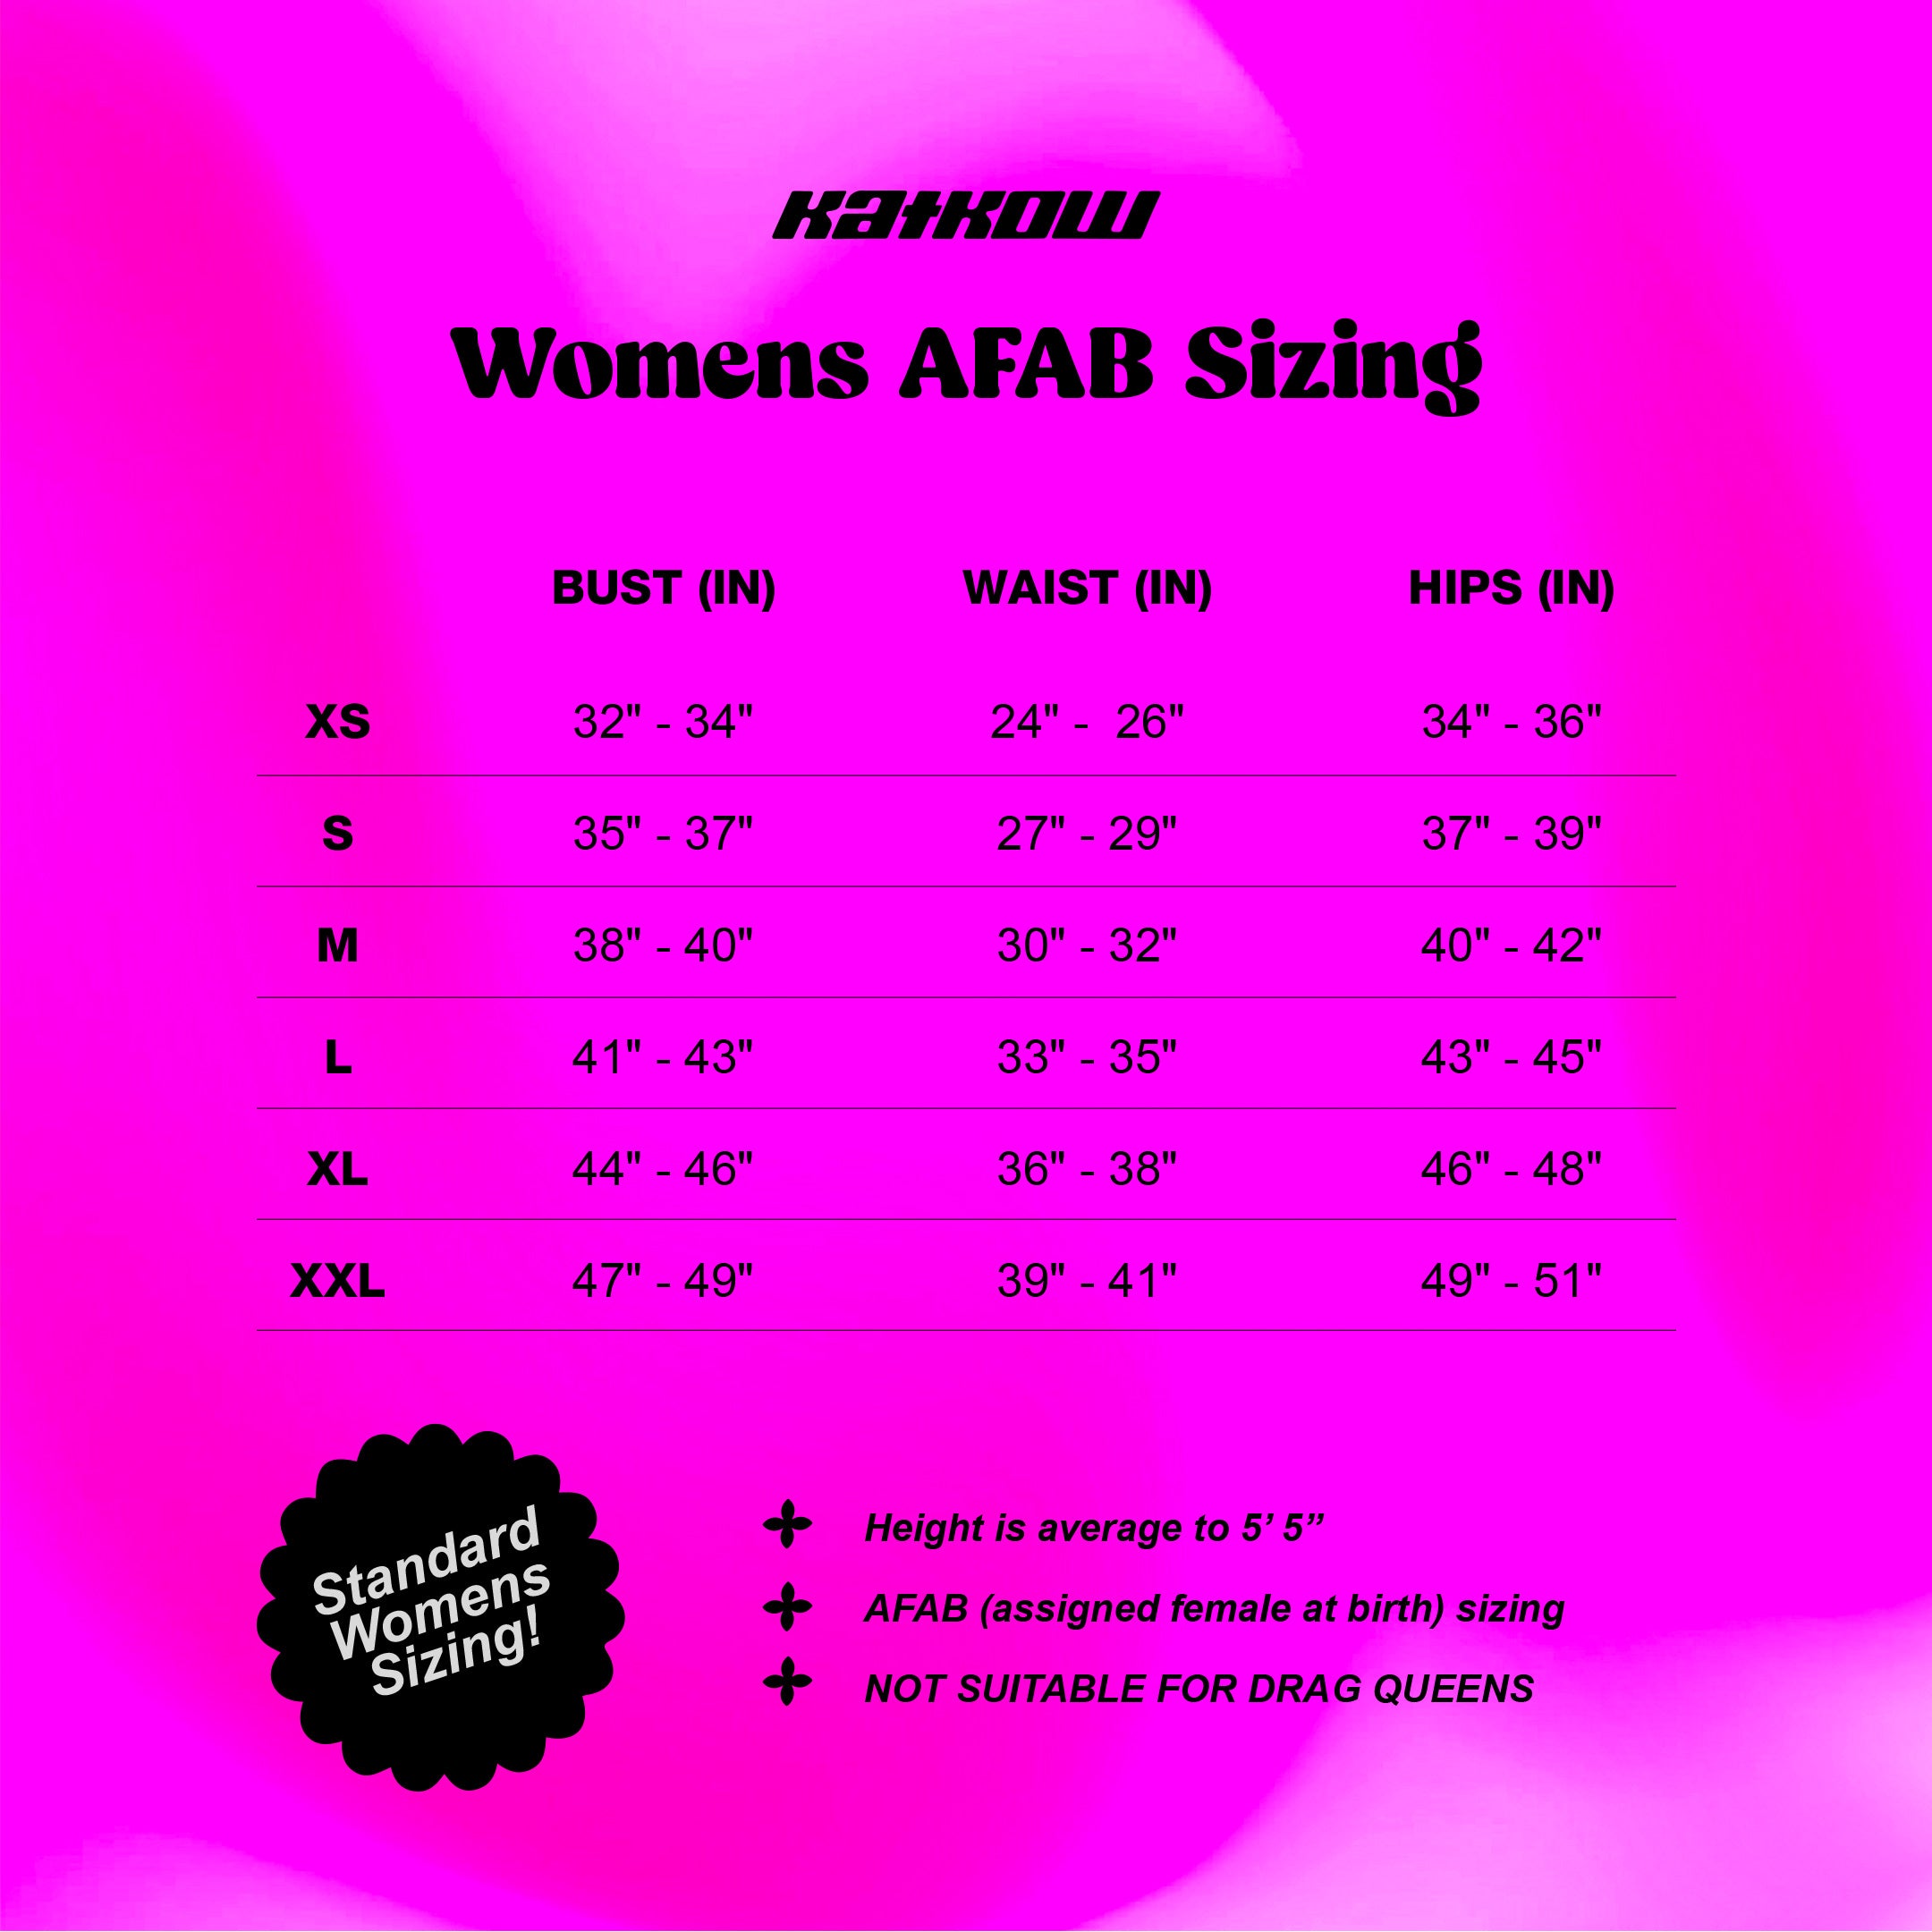
Este patrón está disponible en nuestros exclusivos talles de drag queen, que van desde la XS a la 4X. También está disponible en talles AFAB para mujer, que van desde la XS a la XXL. Ambos tipos de talles de patrones se venden por separado. Consulta nuestra guía de talles para obtener más información sobre nuestras medidas de talles.
Telas y artículos de mercería
Adecuado para tejidos elásticos en 4 direcciones:
- Miliskin
- Spandex
- Licra
- Tejidos de punto elásticos
- Cremallera invisible de 16 a 20 pulgadas
- Estabilizador desprendible opcional para mantener la cremallera plana y evitar que se ondule.
Yardas de tela
Este patrón requiere el uso de tela elástica en cuatro direcciones. A continuación, encontrará la cantidad de yardas necesarias para cada talla.
| Tamaño | Yardas de tela (ancho de 58" a 60") | |
|---|---|---|
| Tallas de Drag Queen | Tallas AFAB para mujer | |
| XS | 1 yard | 1 yard |
| S | 1,25 yardas | 1 yard |
| METRO | 1,25 yardas | 1,25 yardas |
| yo | 1,5 yardas | 1,25 yardas |
| SG | 1,5 yardas | 1,25 yardas |
| 2X | 1,5 yardas | 1,25 yardas |
| 3 veces | 1,5 yardas | -- |
| 4 veces | 1,75 yardas | -- |
Para obtener información sobre la conversión de pulgadas a metros, consulte nuestra guía de conversión.
Instrucciones de costura


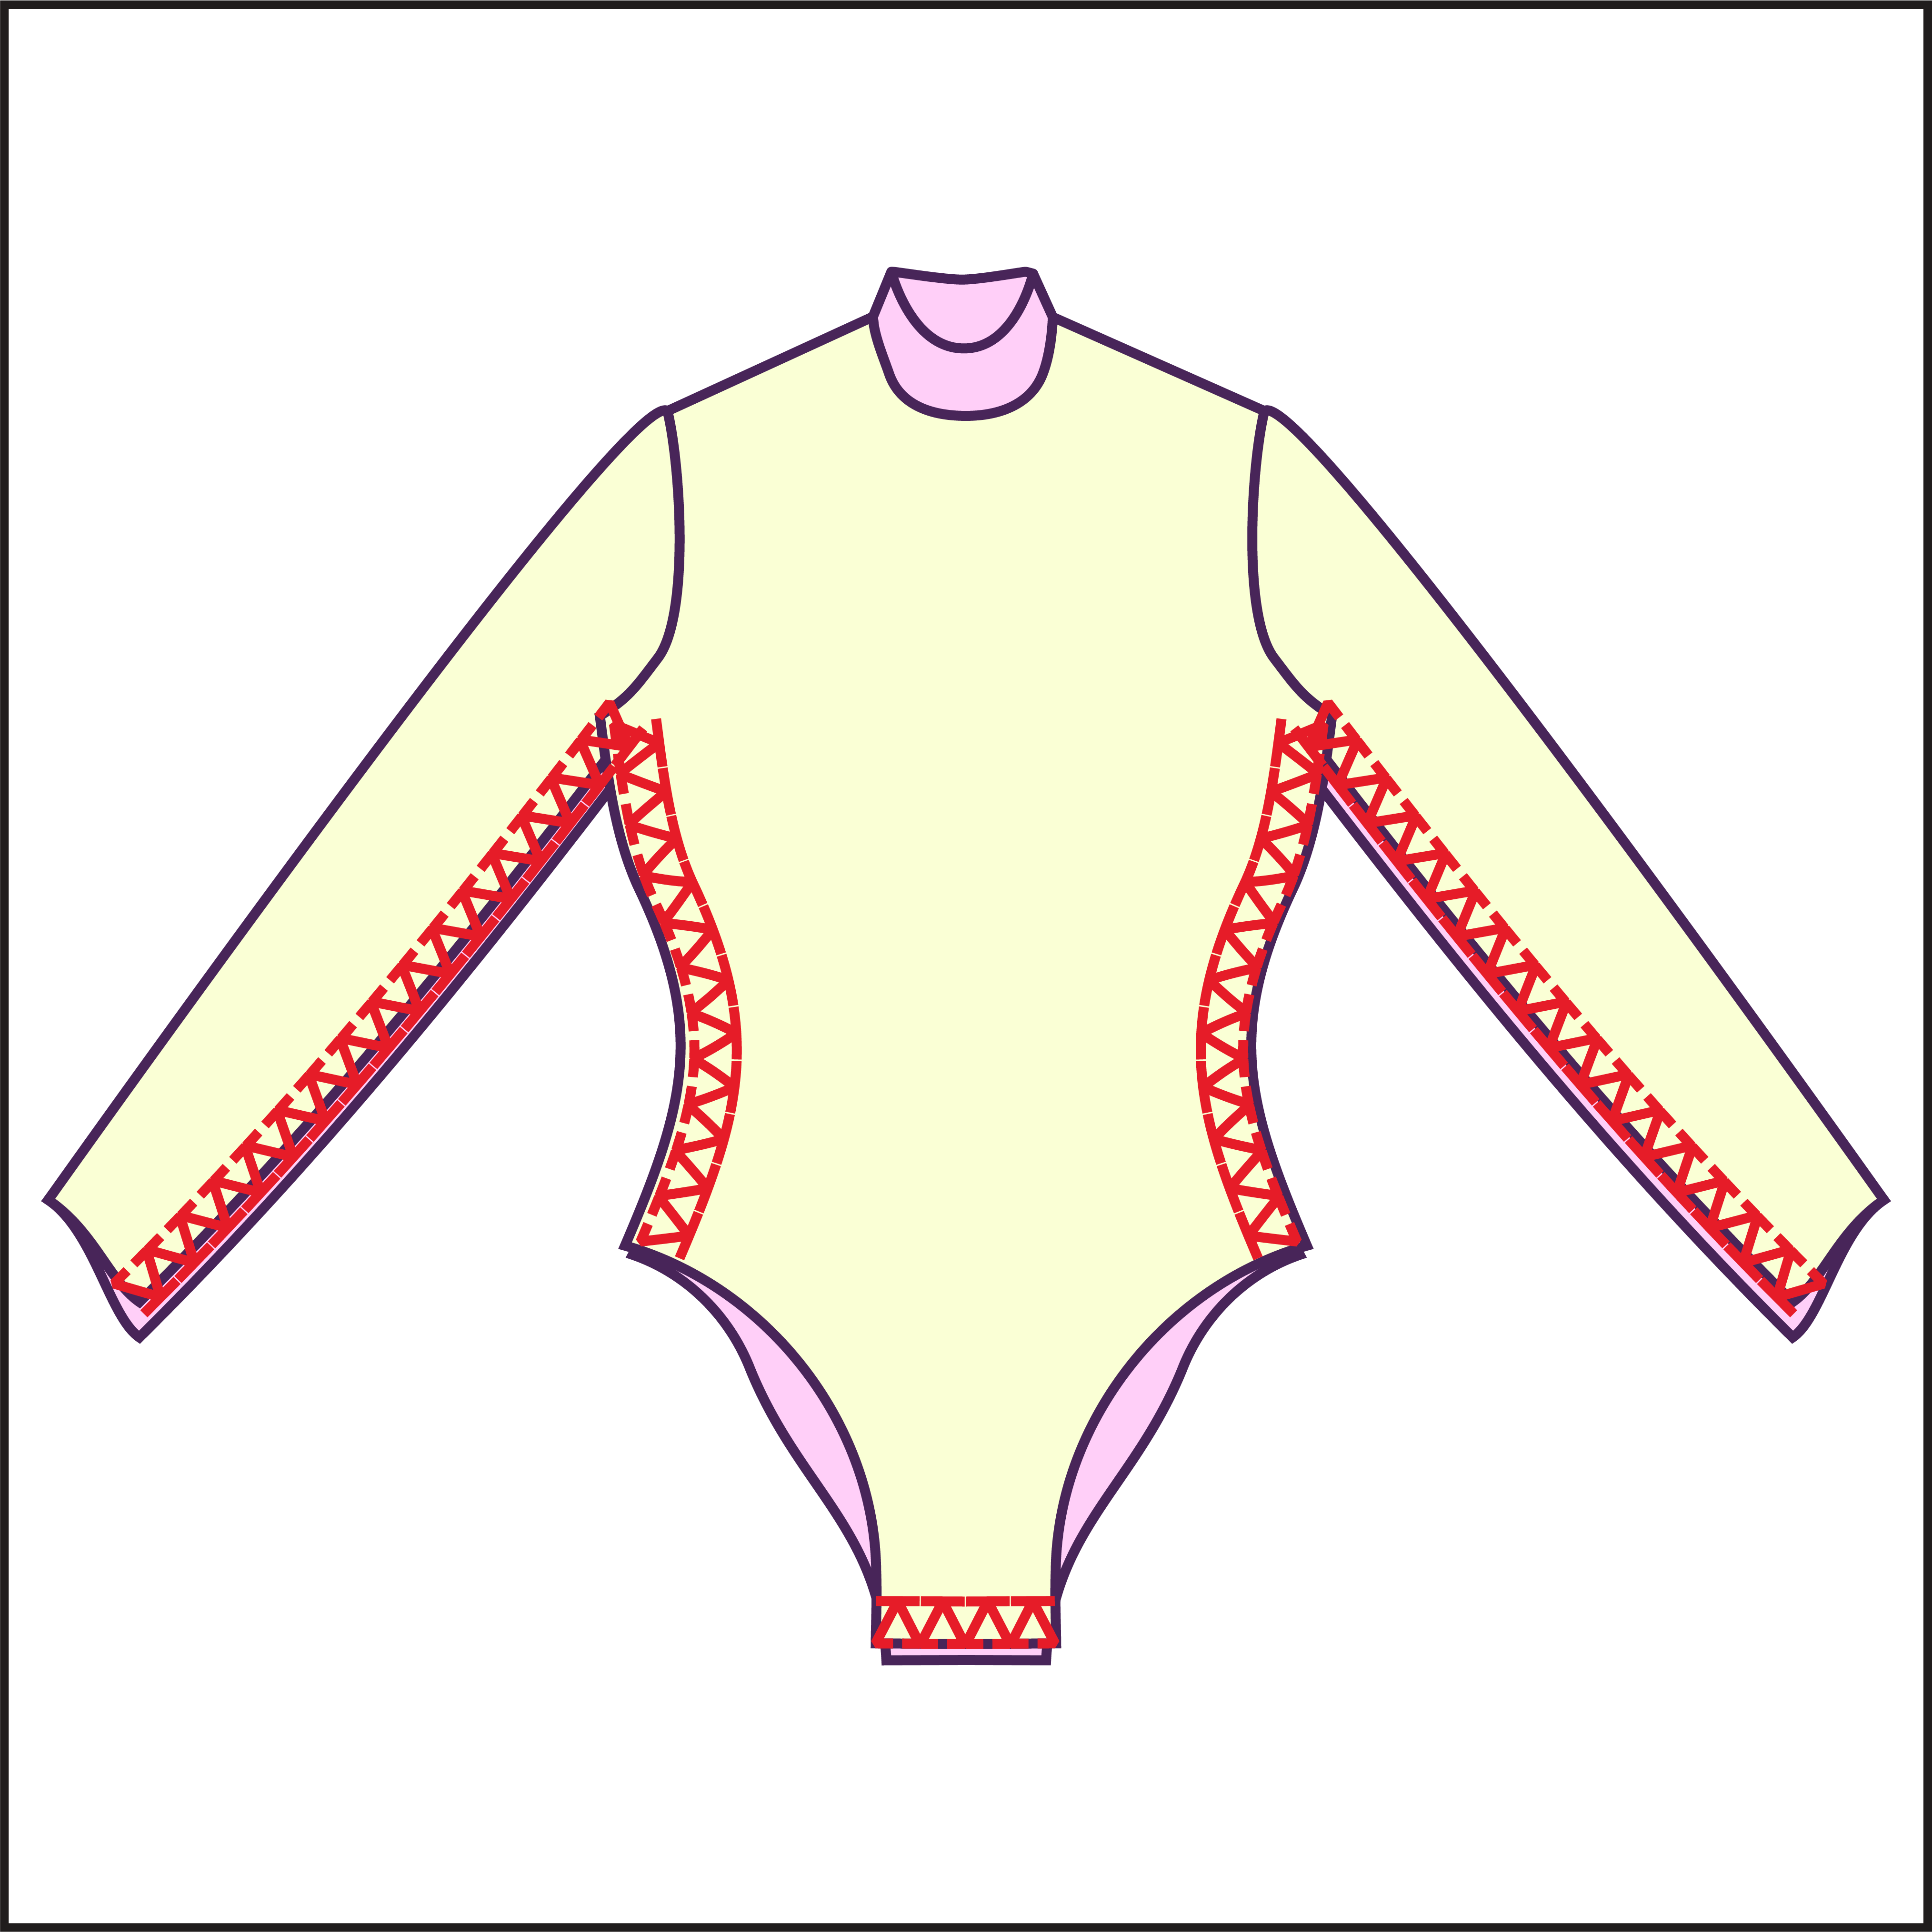
Fabric Pieces
Once your fabric is cut, you should have one seamless front piece, two back pieces, one seamless back bottom piece, two long sleeves, and two collar pieces.

Stitches
For this project, the recommended stitches are a serger overlock stitch, a stretch stitch, or a zigzag stitch. A straight stitch may cause the threads to snap and is not advisable.

STEP 1
Take the front piece and the two back pieces, with right sides facing each other, and pin them together at the shoulder seams. Sew along these seams.

STEP 2
For the collar, place the two pieces right sides together and sew along the top, shorter curve.

STEP 3
Then, turn the collar right side out and place a pin in the center.

STEP 4
Lay the front and back pieces right side up and pin the collar around the neckline with the center pin matching the center front, keeping the collar upside down. Serge or sew in place.

STEP 5
Insert a 16-20 inch invisible zipper along the center back opening starting at the collar. The right side of the zipper should face the right side of the fabric. Use a straight stitch with a zipper foot for sewing. For a flat zipper finish, you may use a tear-away stabilizer between the zipper and the fabric.

STEP 6
After attaching the zipper, fold the excess fabric at the top of the zipper vertically and hand-stitch it down to secure this fold before proceeding.

STEP 7
Next, fold the zipper tape horizontally and pin in place, ready for topstitching. Repeat the same steps on the opposite side.

STEP 8
Topstitch around the zipper sides to reinforce and neatly finish the edges.

STEP 9
Attach the back bottoms to the lower part of the back piece with the zipper, sew them right sides facing each other.

STEP 10
Your 3 back pieces should now be sewn together.

STEP 11
Spread out the front and back right side up and gather your sleeves.

STEP 12
Align and pin the sleeves around the armholes, right side of the sleeve facing the right side of the front and back, using notches as a guide. Each sleeve curve is symmetrical, so there's no designated front or back. Serge or sew the sleeves in place and repeat for the other side.
STEP 13
Turn the garment wrong side out and sew the inner sleeve seams closed, continuing down the sides of the garment and the crotch.

STEP 14
Hem with leg holes using a zig zag stitch or fold over twice for a rolled hem effect with a stretch stitch.

STEP 15
Finally, hem the ends of the sleeves with a rolled hem, stretch stitch, or zigzag stitch.