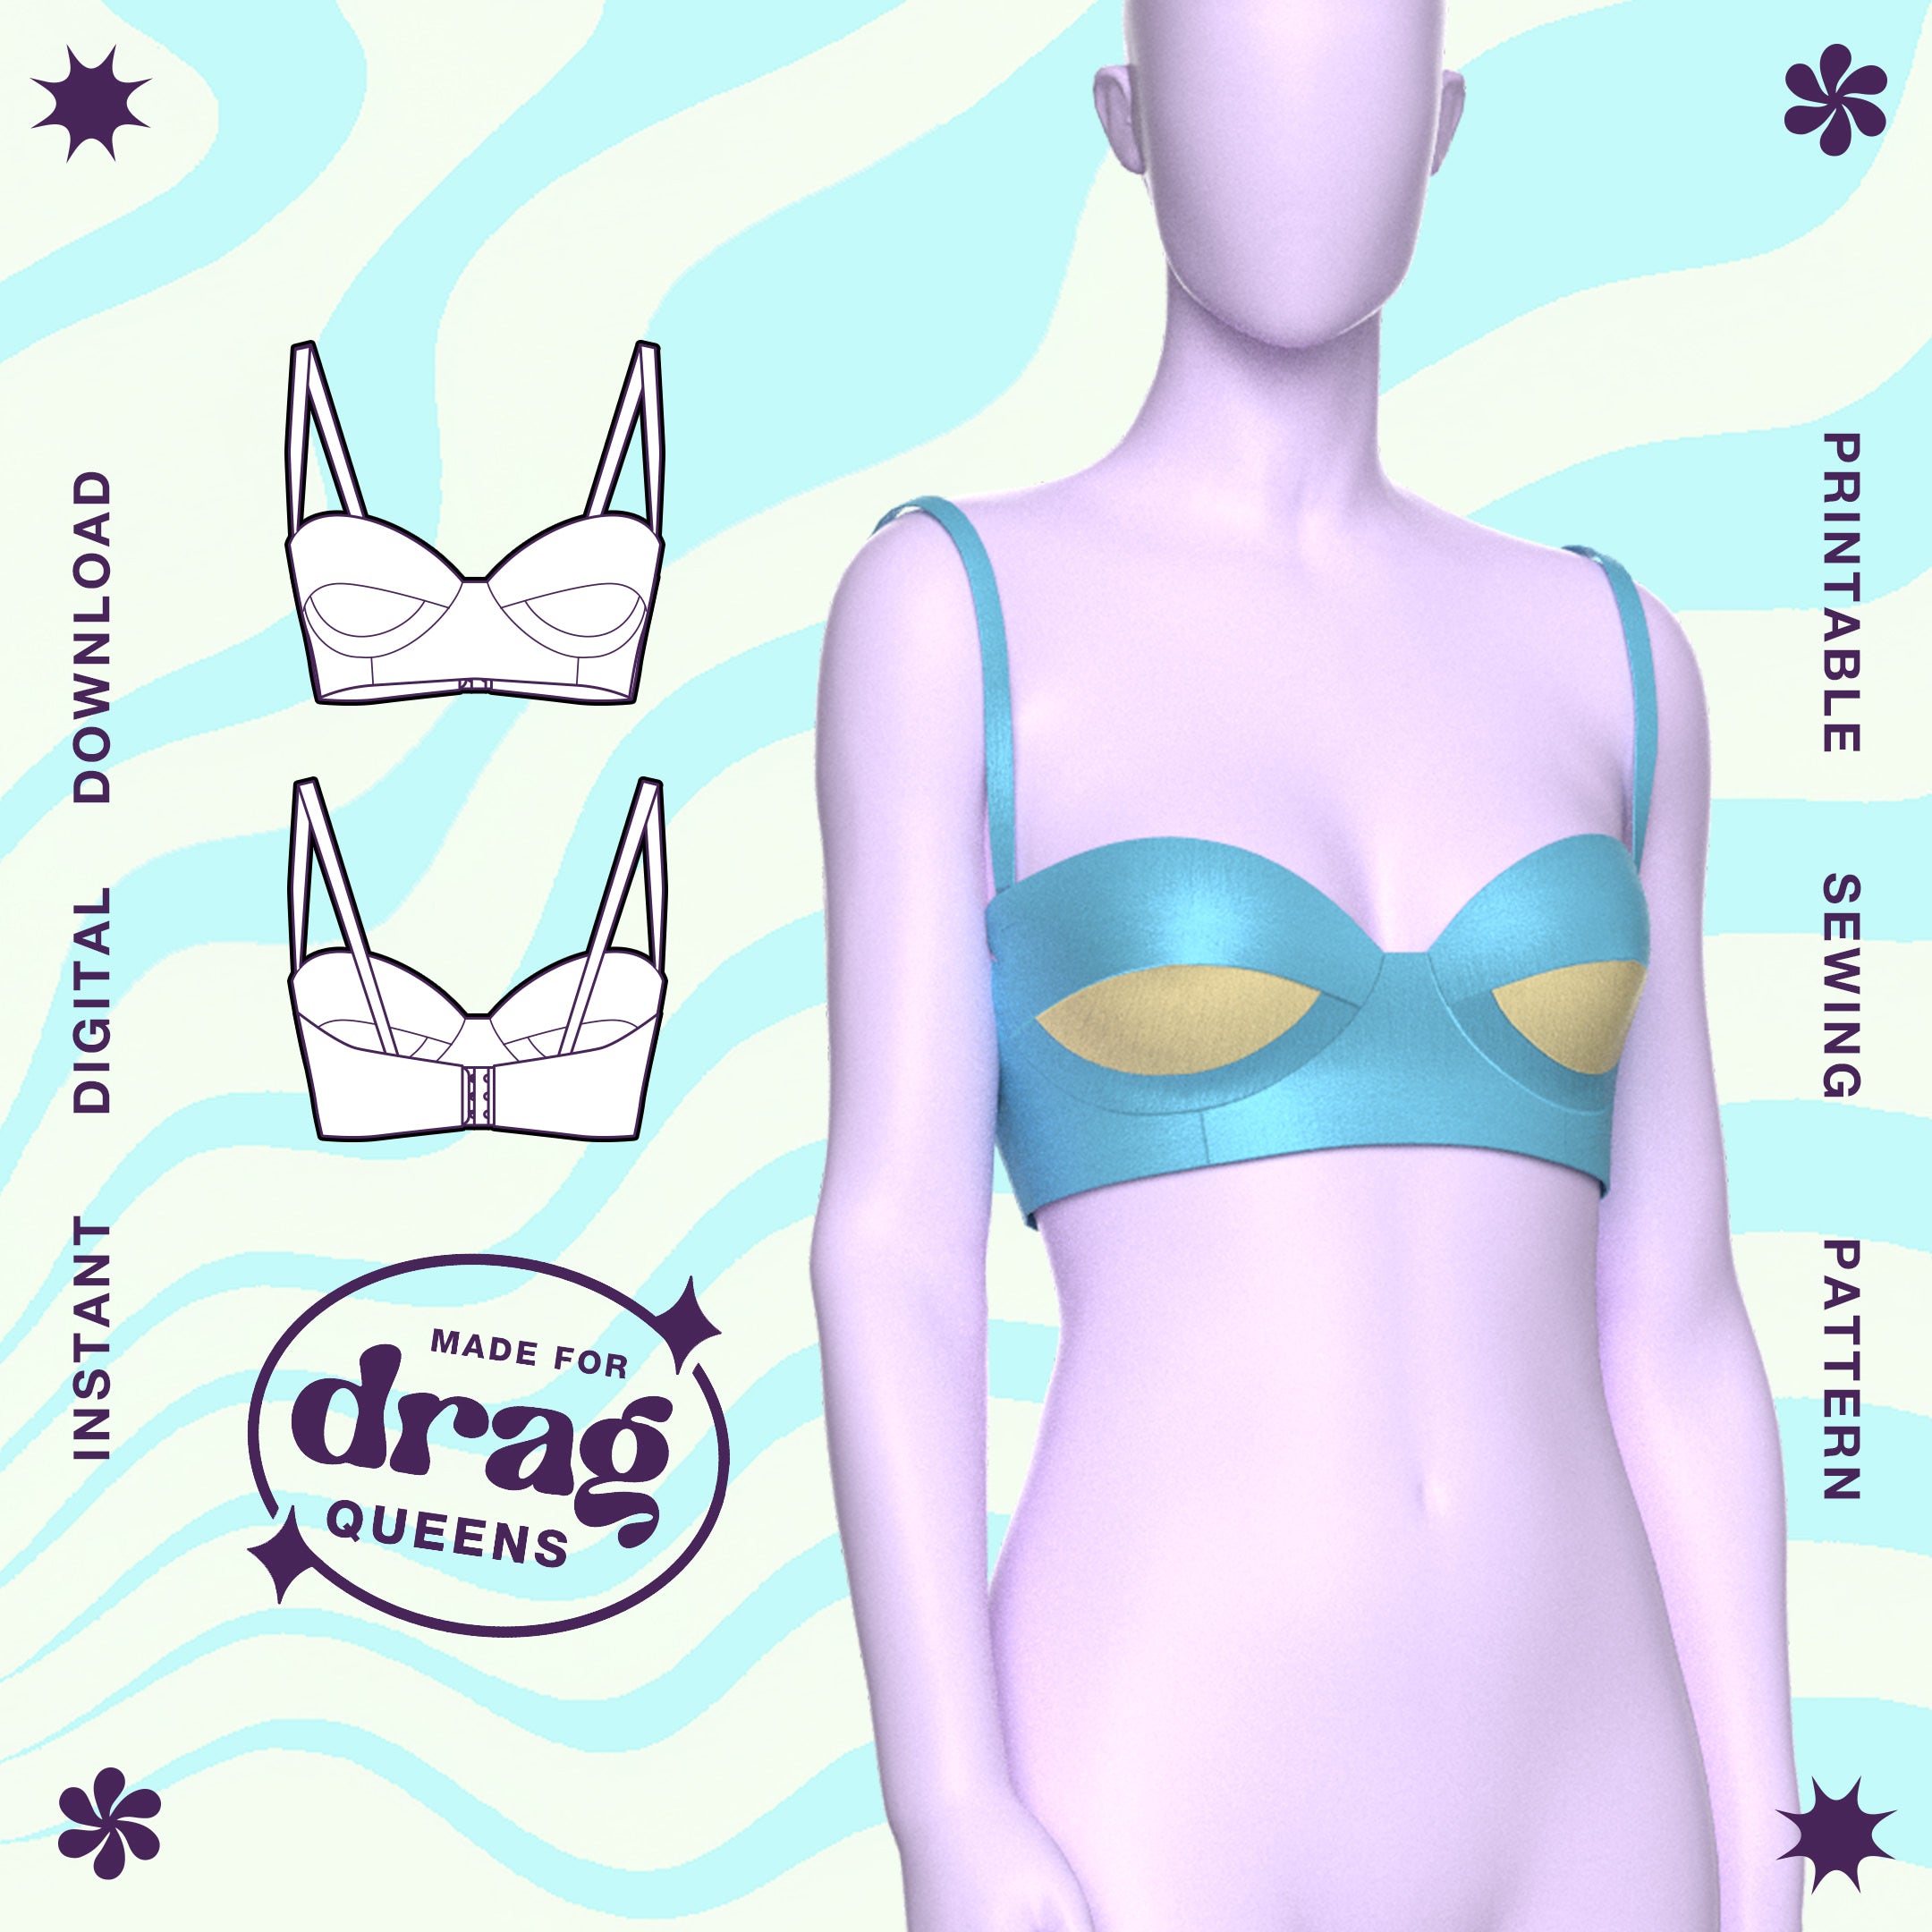
Cómo coser un sujetador elástico con recortes
Saltar a instrucciones
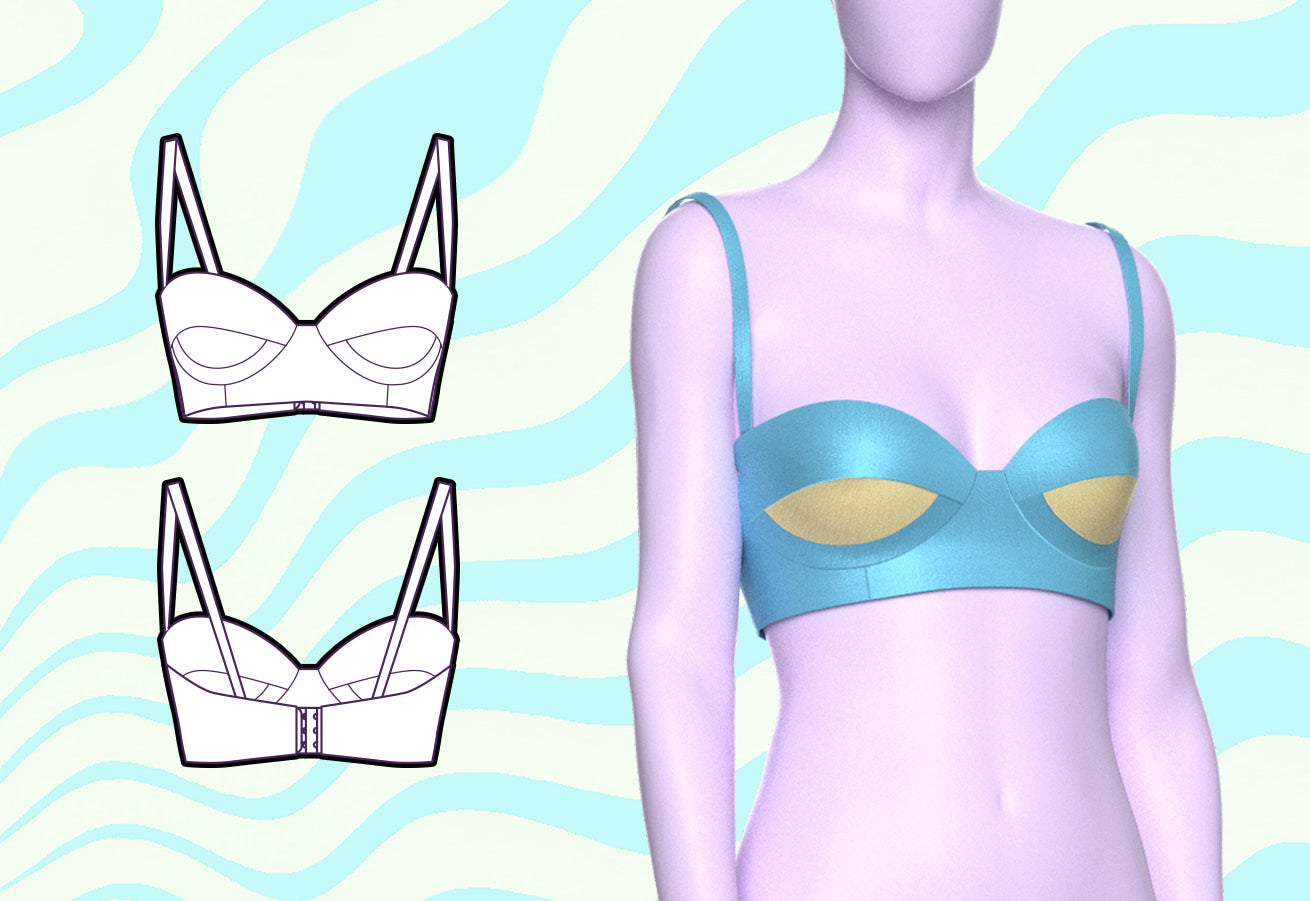
Descripción general
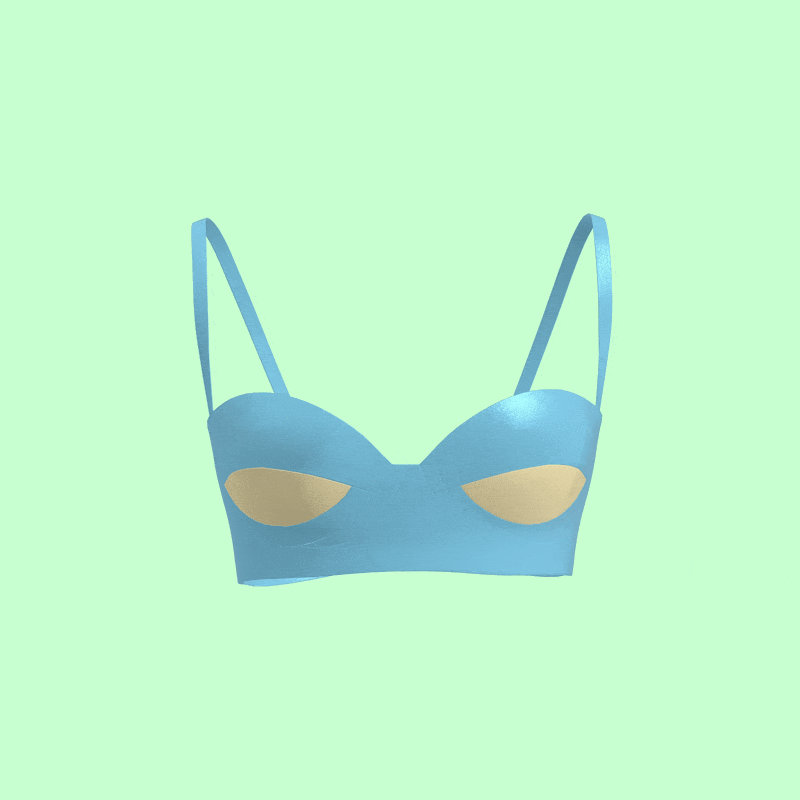
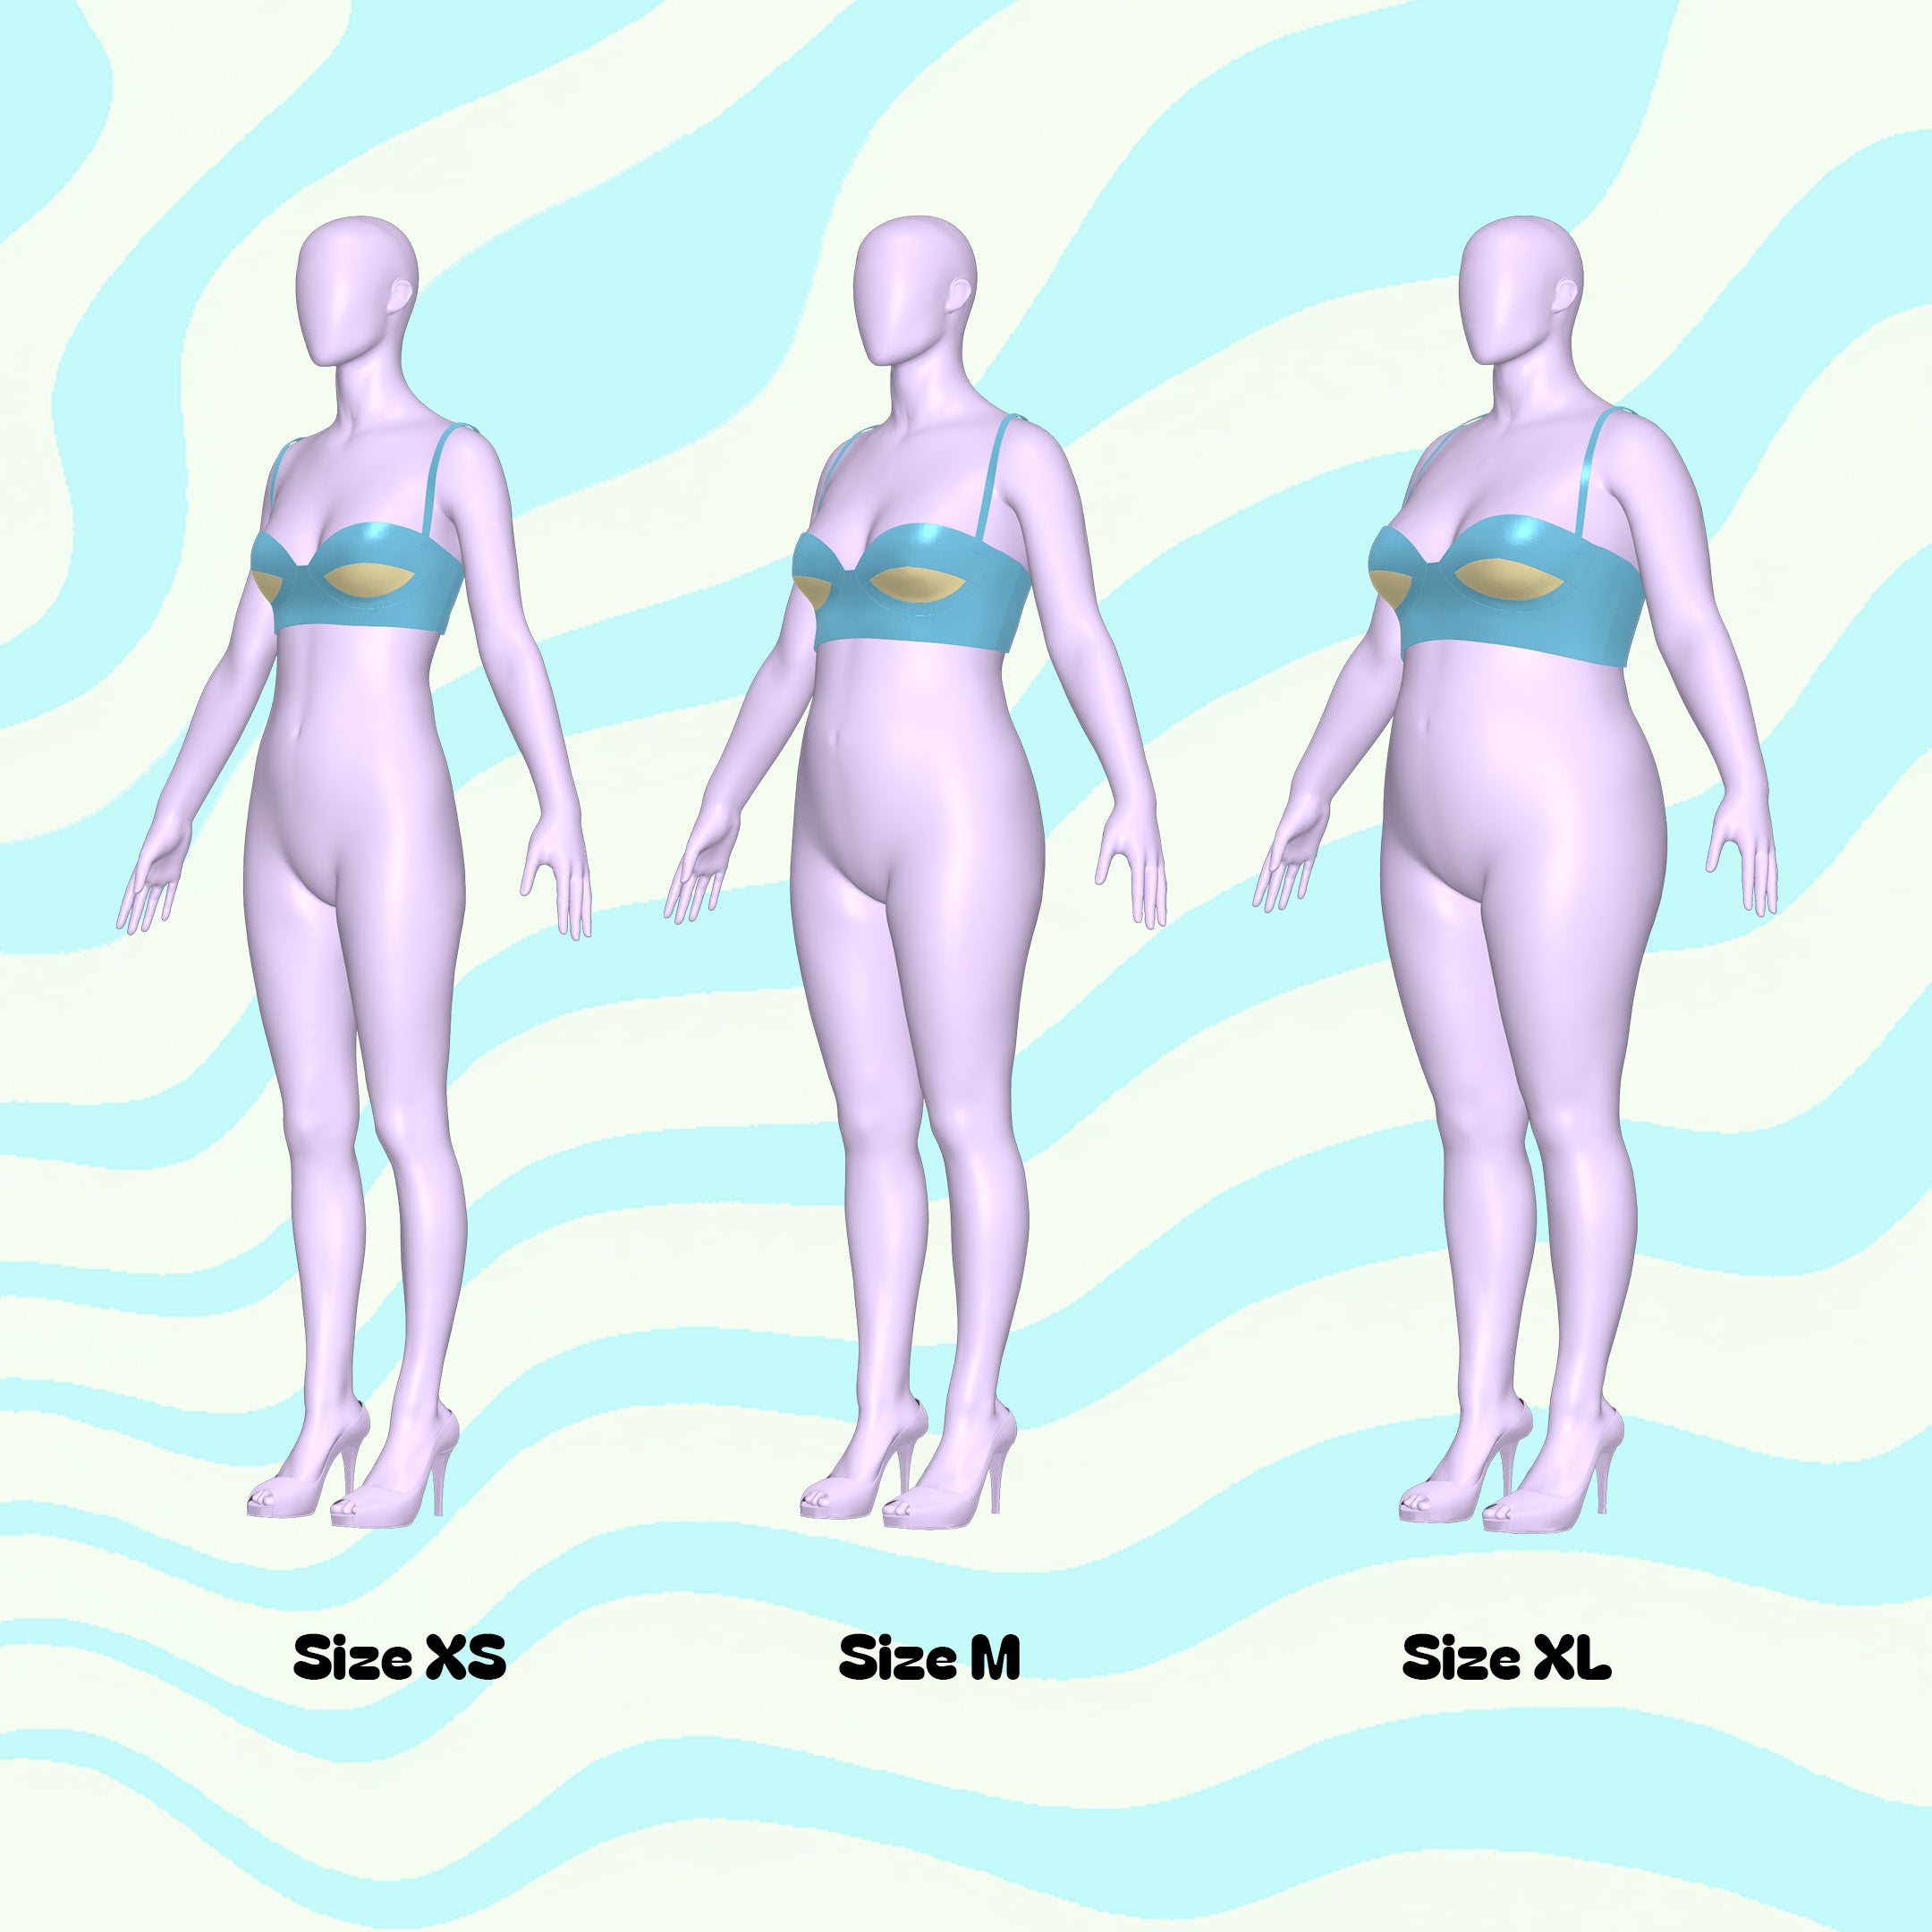
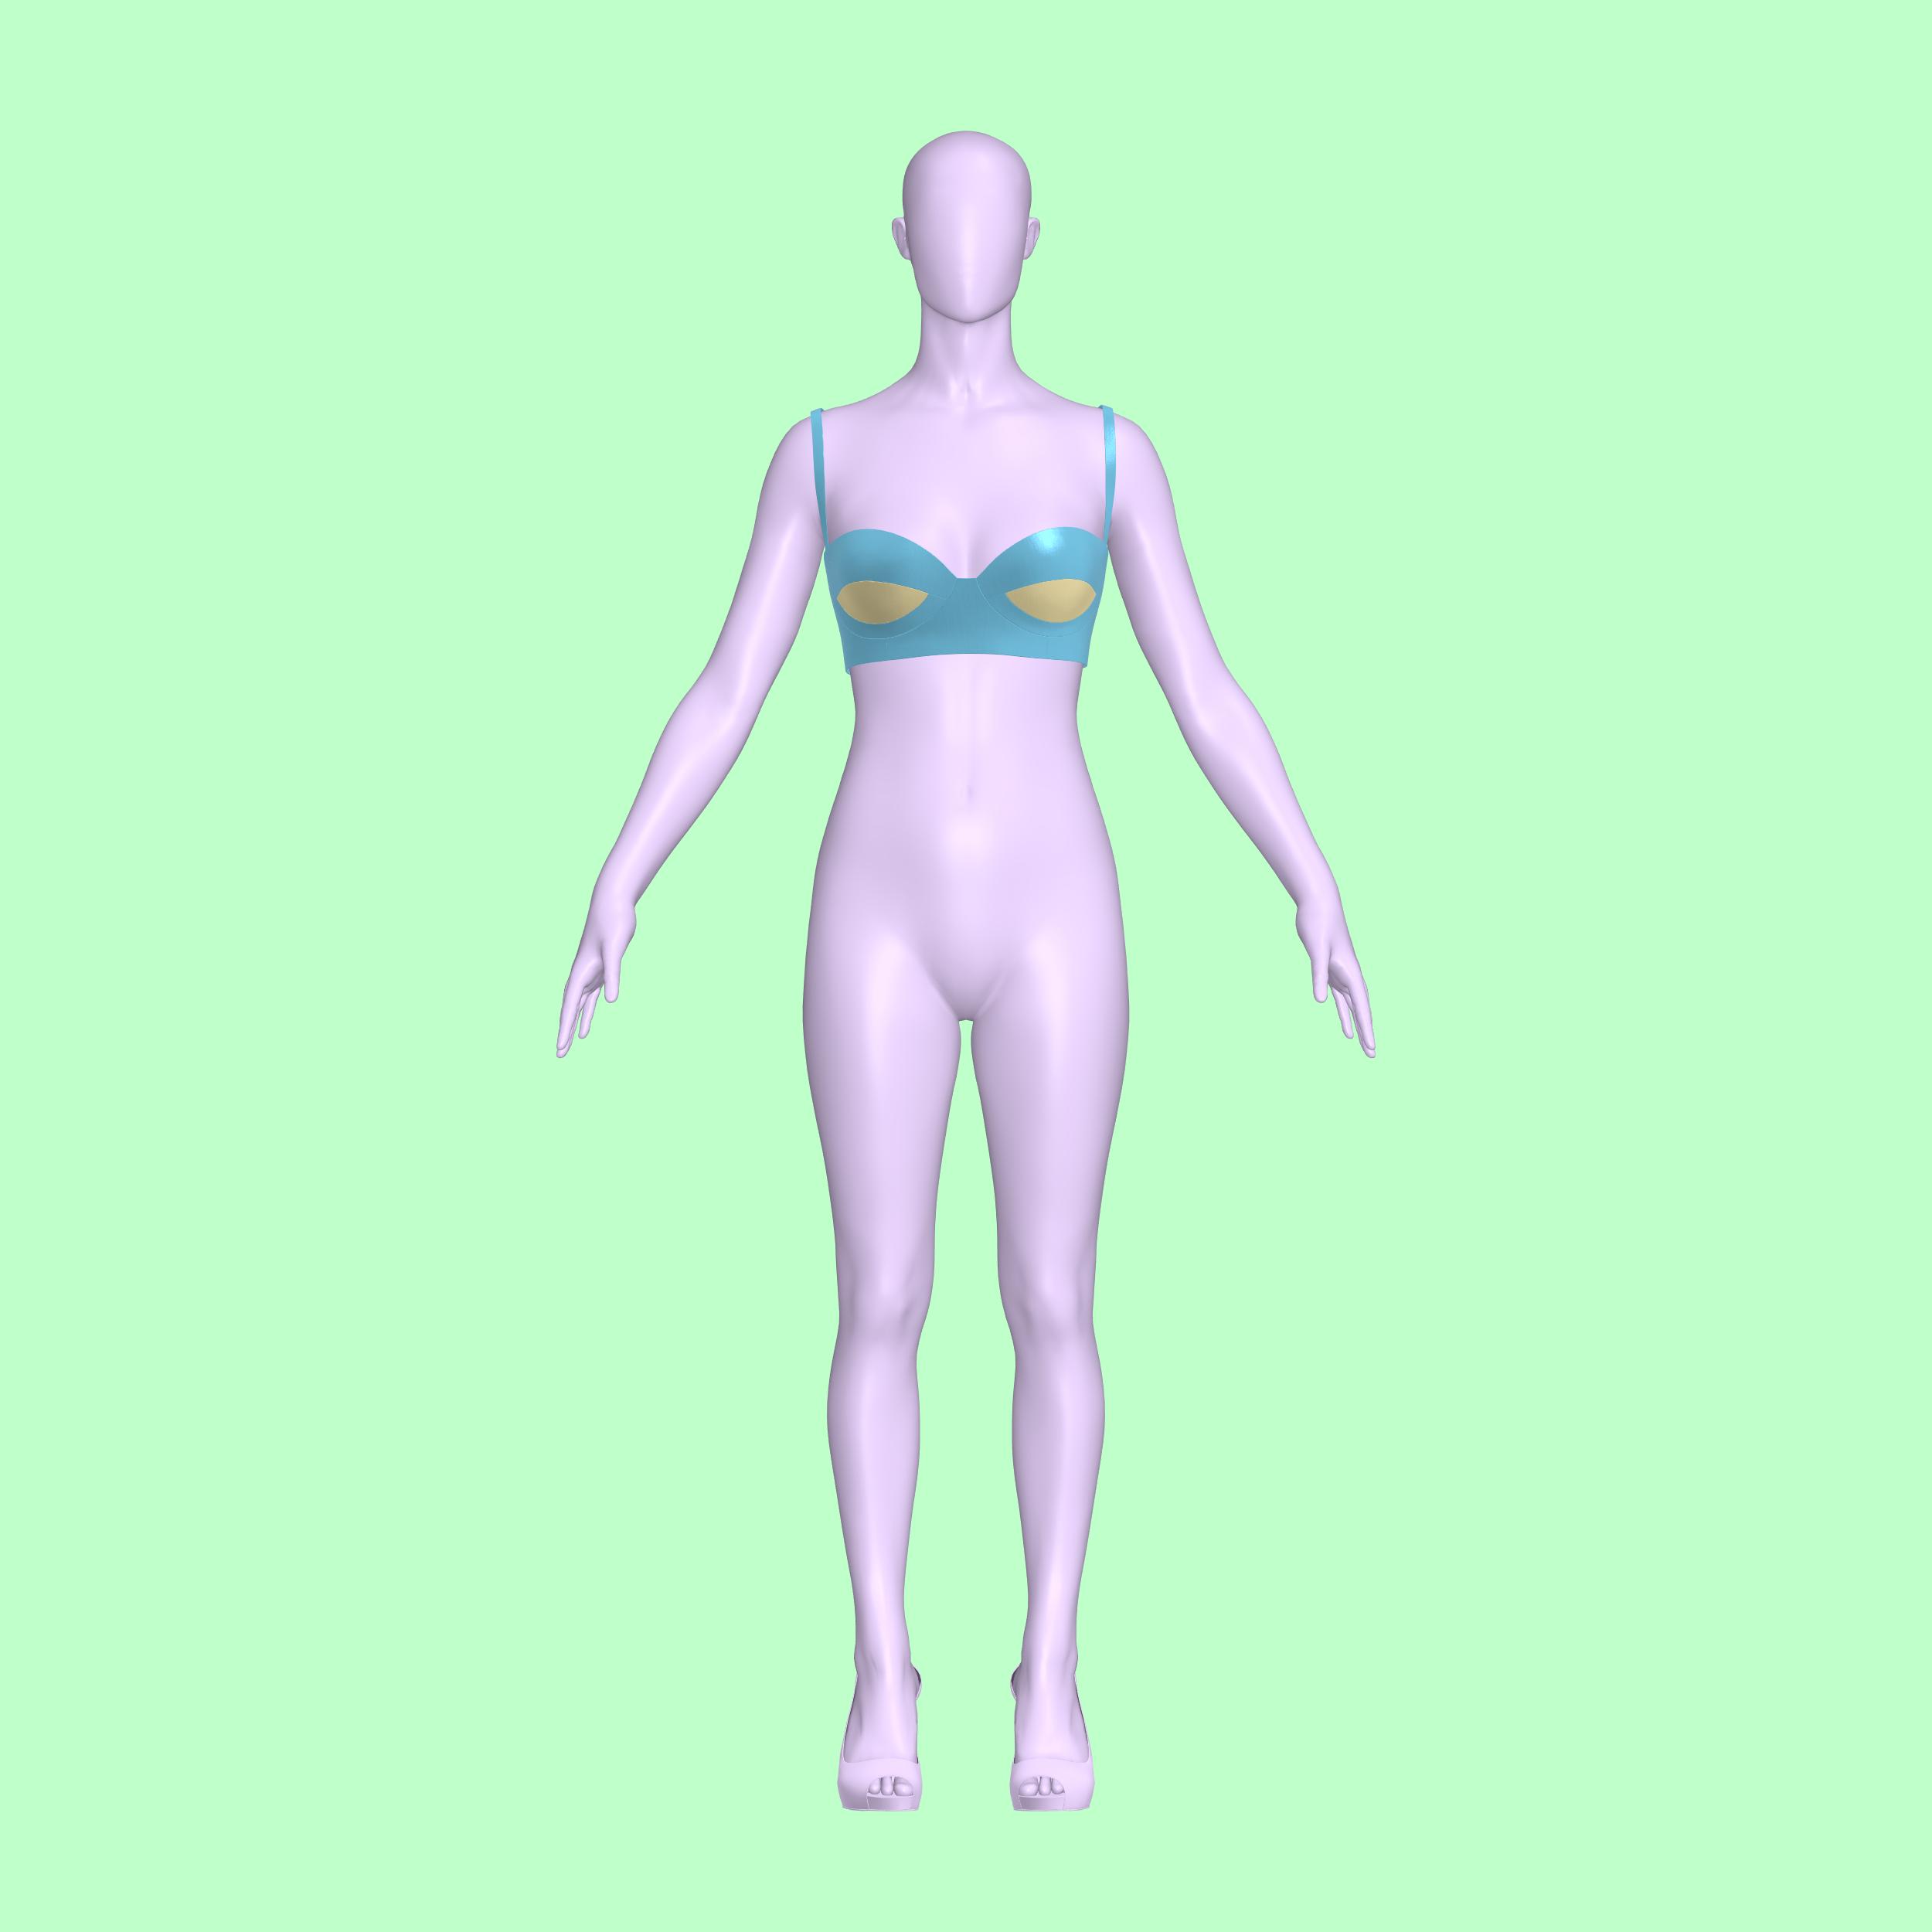
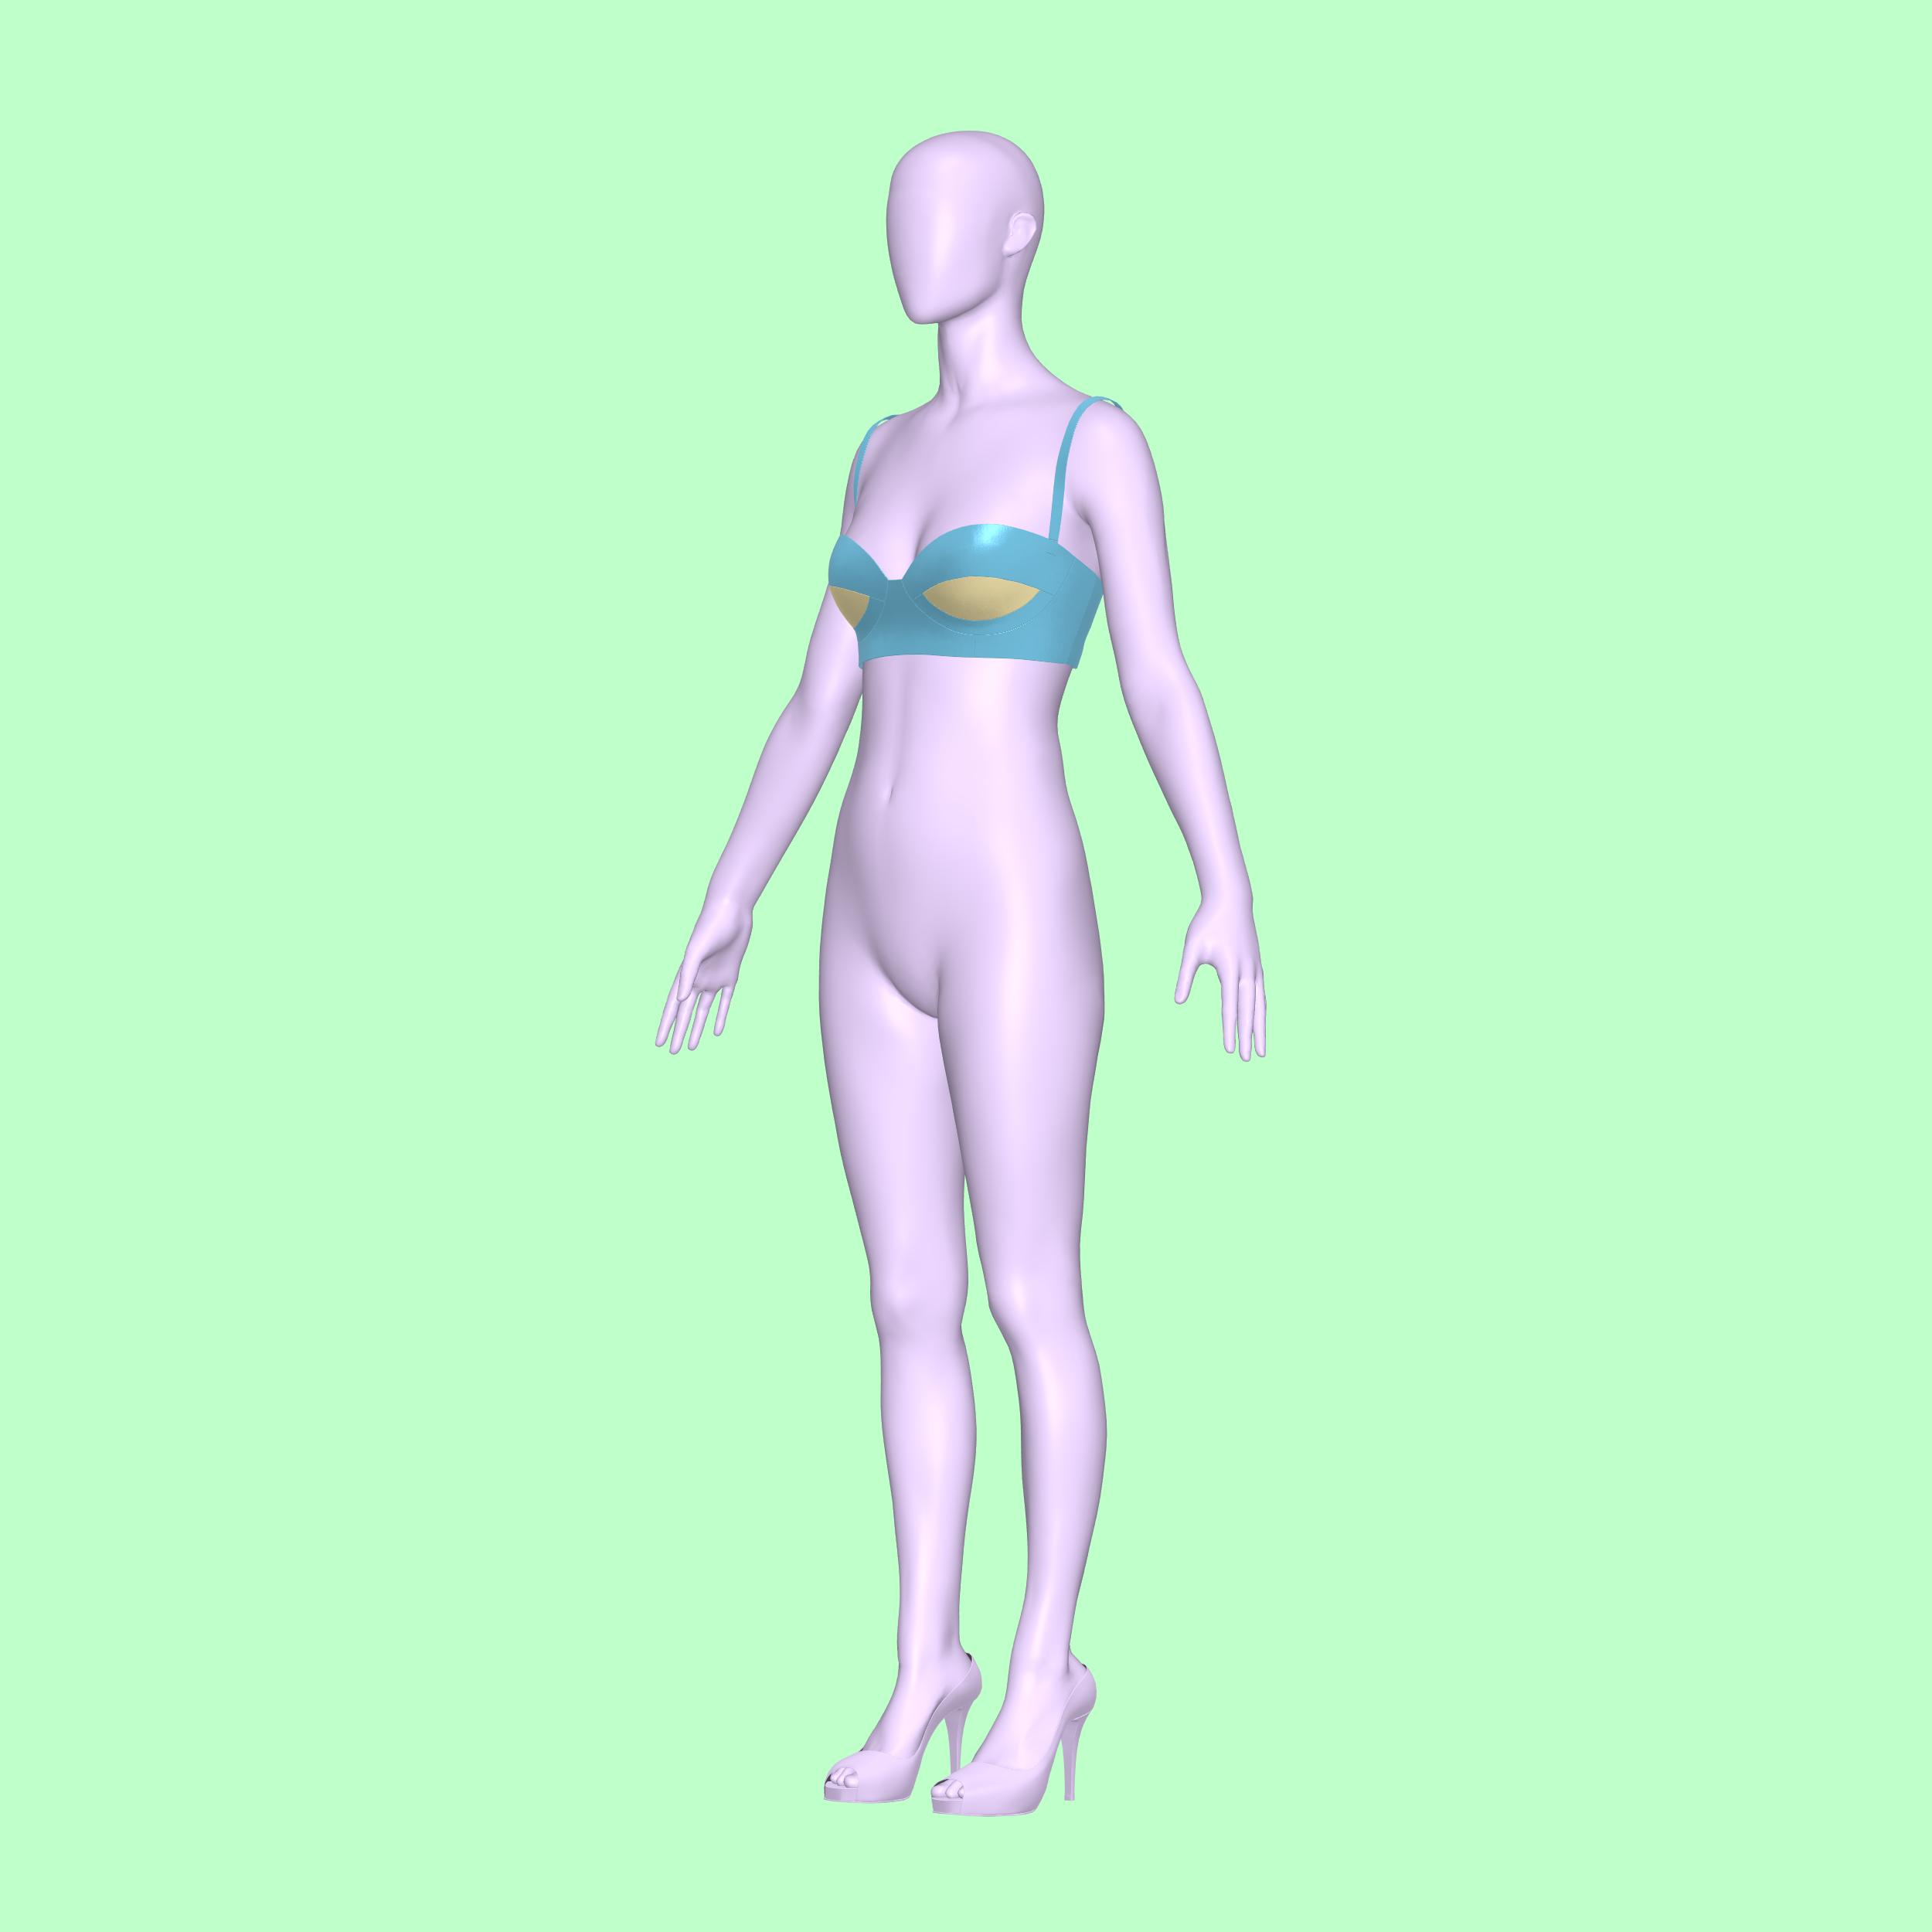
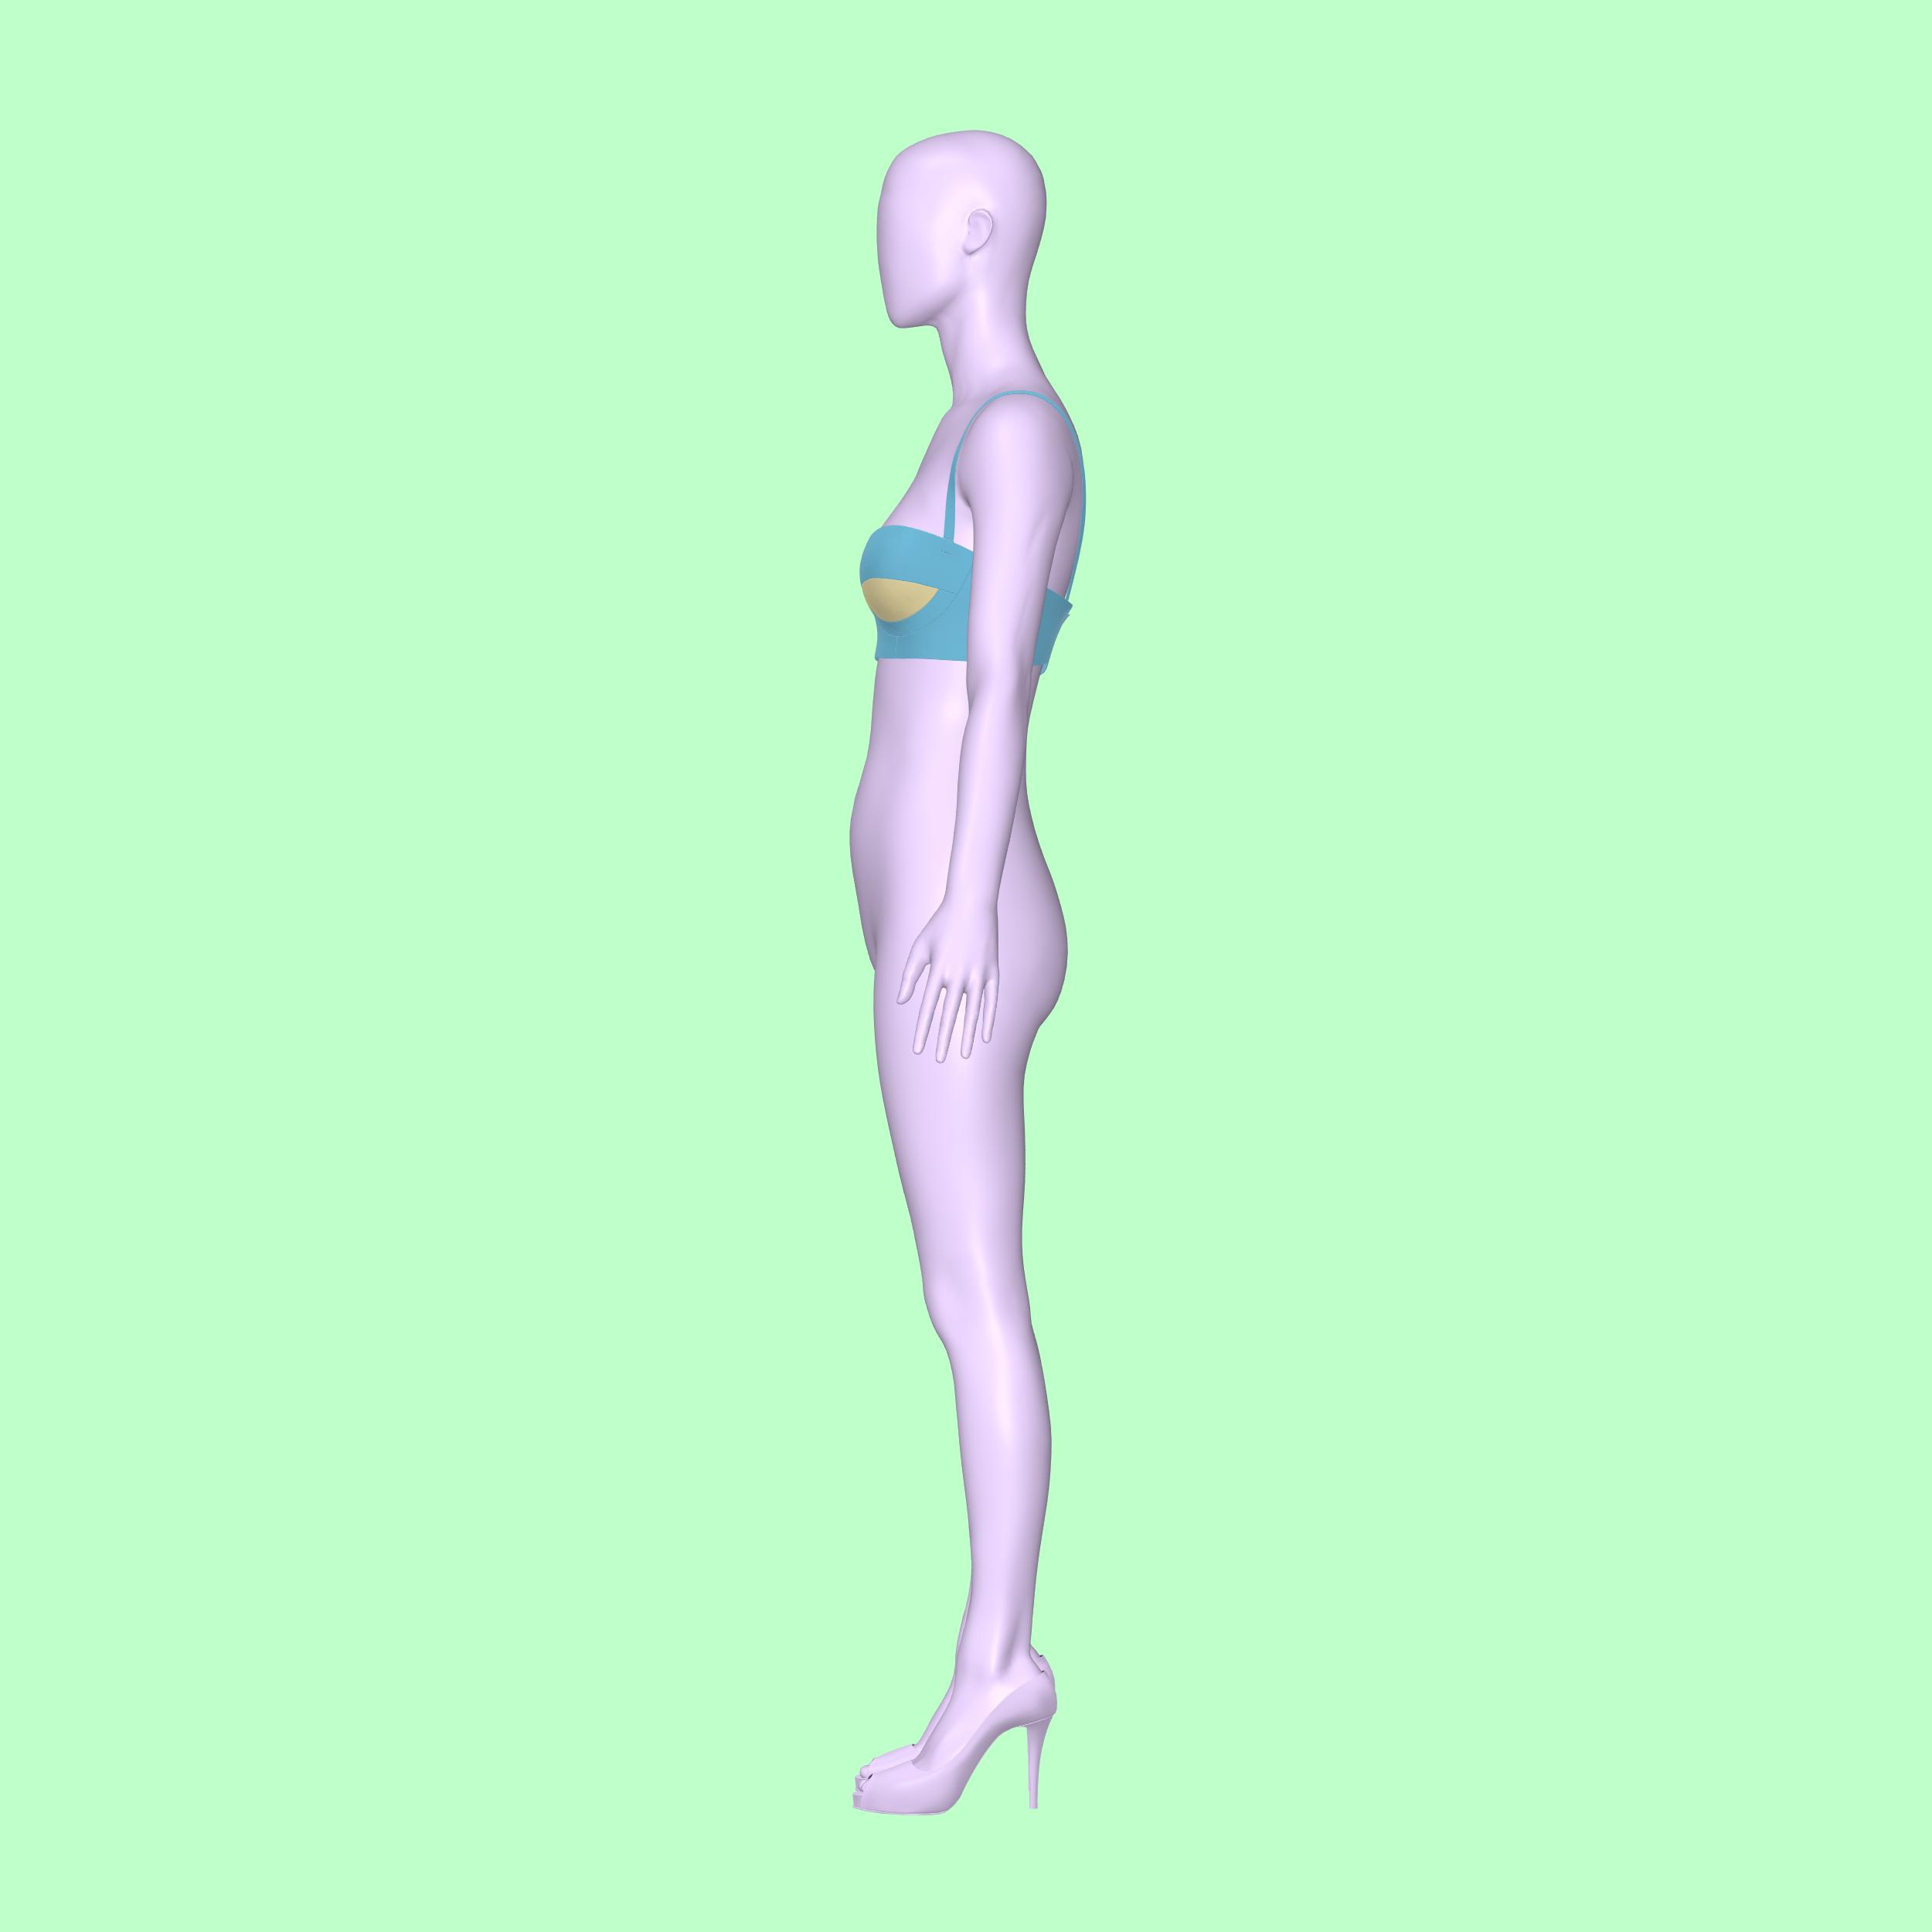
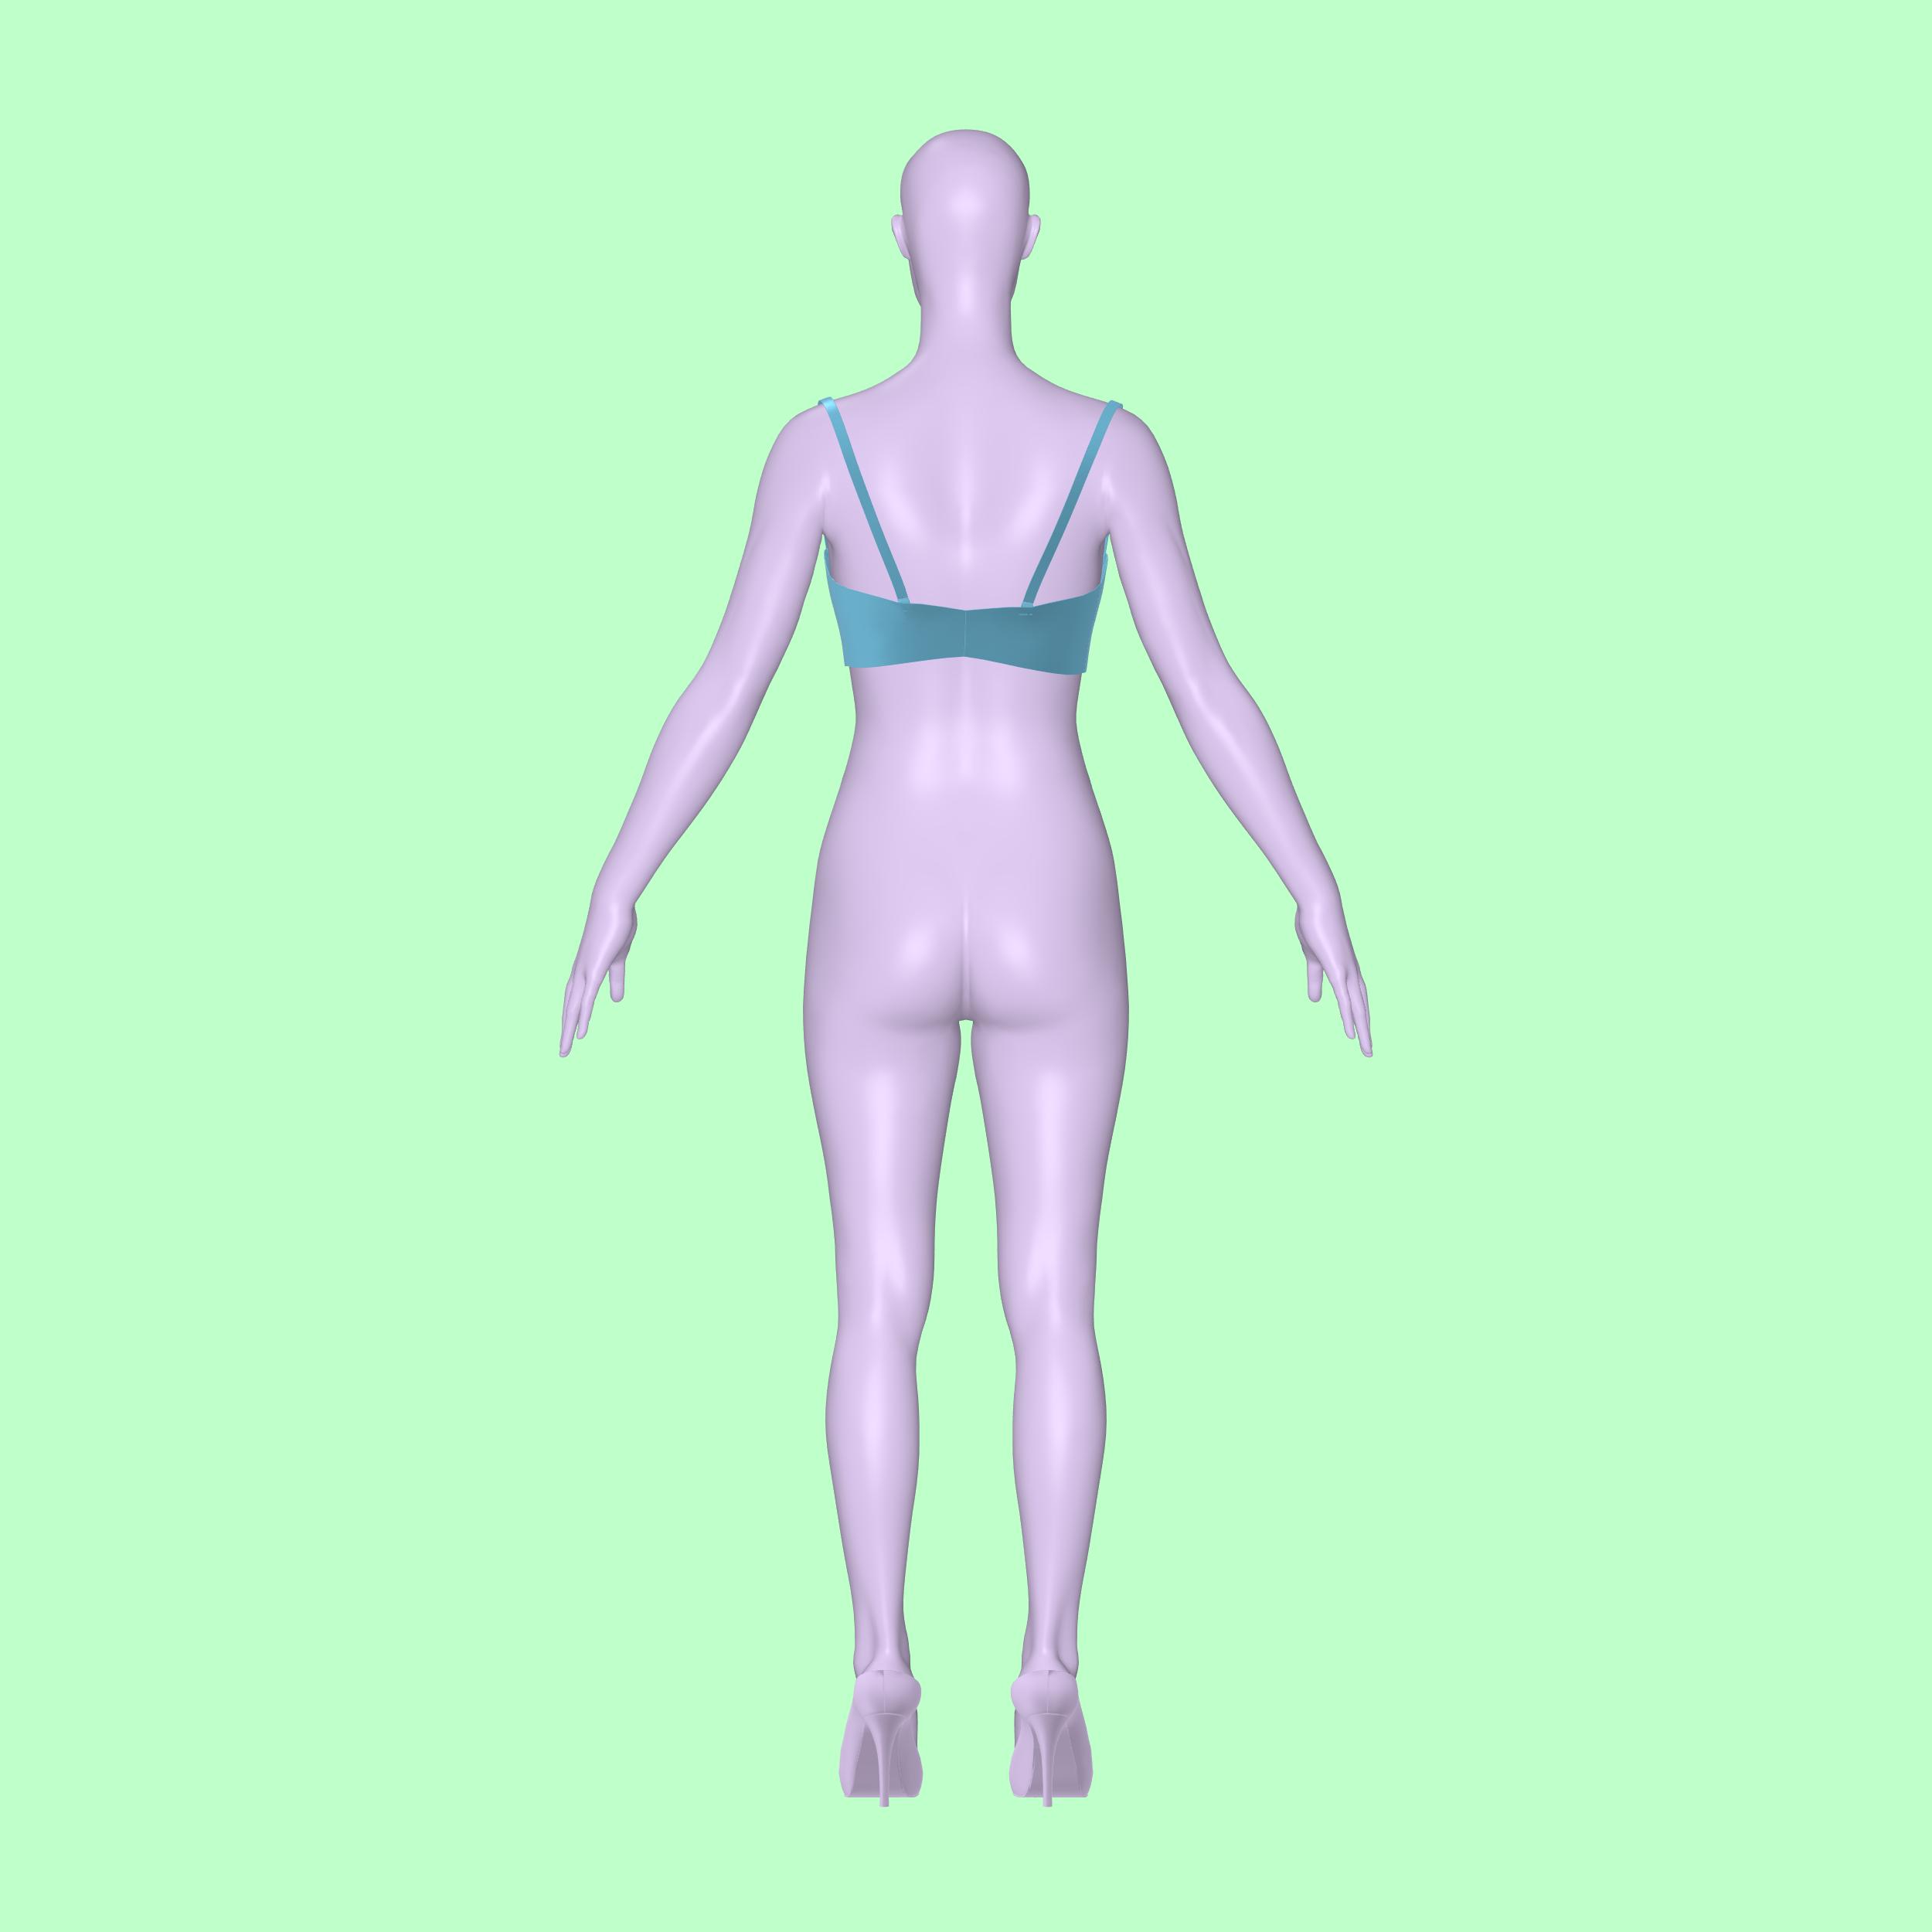
¡Aprenda a coser nuestro fabuloso patrón de costura de sujetador elástico con aberturas! Este patrón de costura en PDF de nivel intermedio está diseñado para drag queens que aman hacer una declaración. Con atrevidos cortes debajo del busto, este sujetador ofrece un escote sexy que es perfecto para cualquier tocador o actuación en el escenario. Disponible en nuestros exclusivos tamaños de drag queen XS a XL, diseñados para realzar su silueta con precisión y estilo. Combínelo con nuestra “prenda interior moldeadora de cintura alta con aberturas” para un conjunto completo e impresionante.
Dificultad del patrón: Intermedio
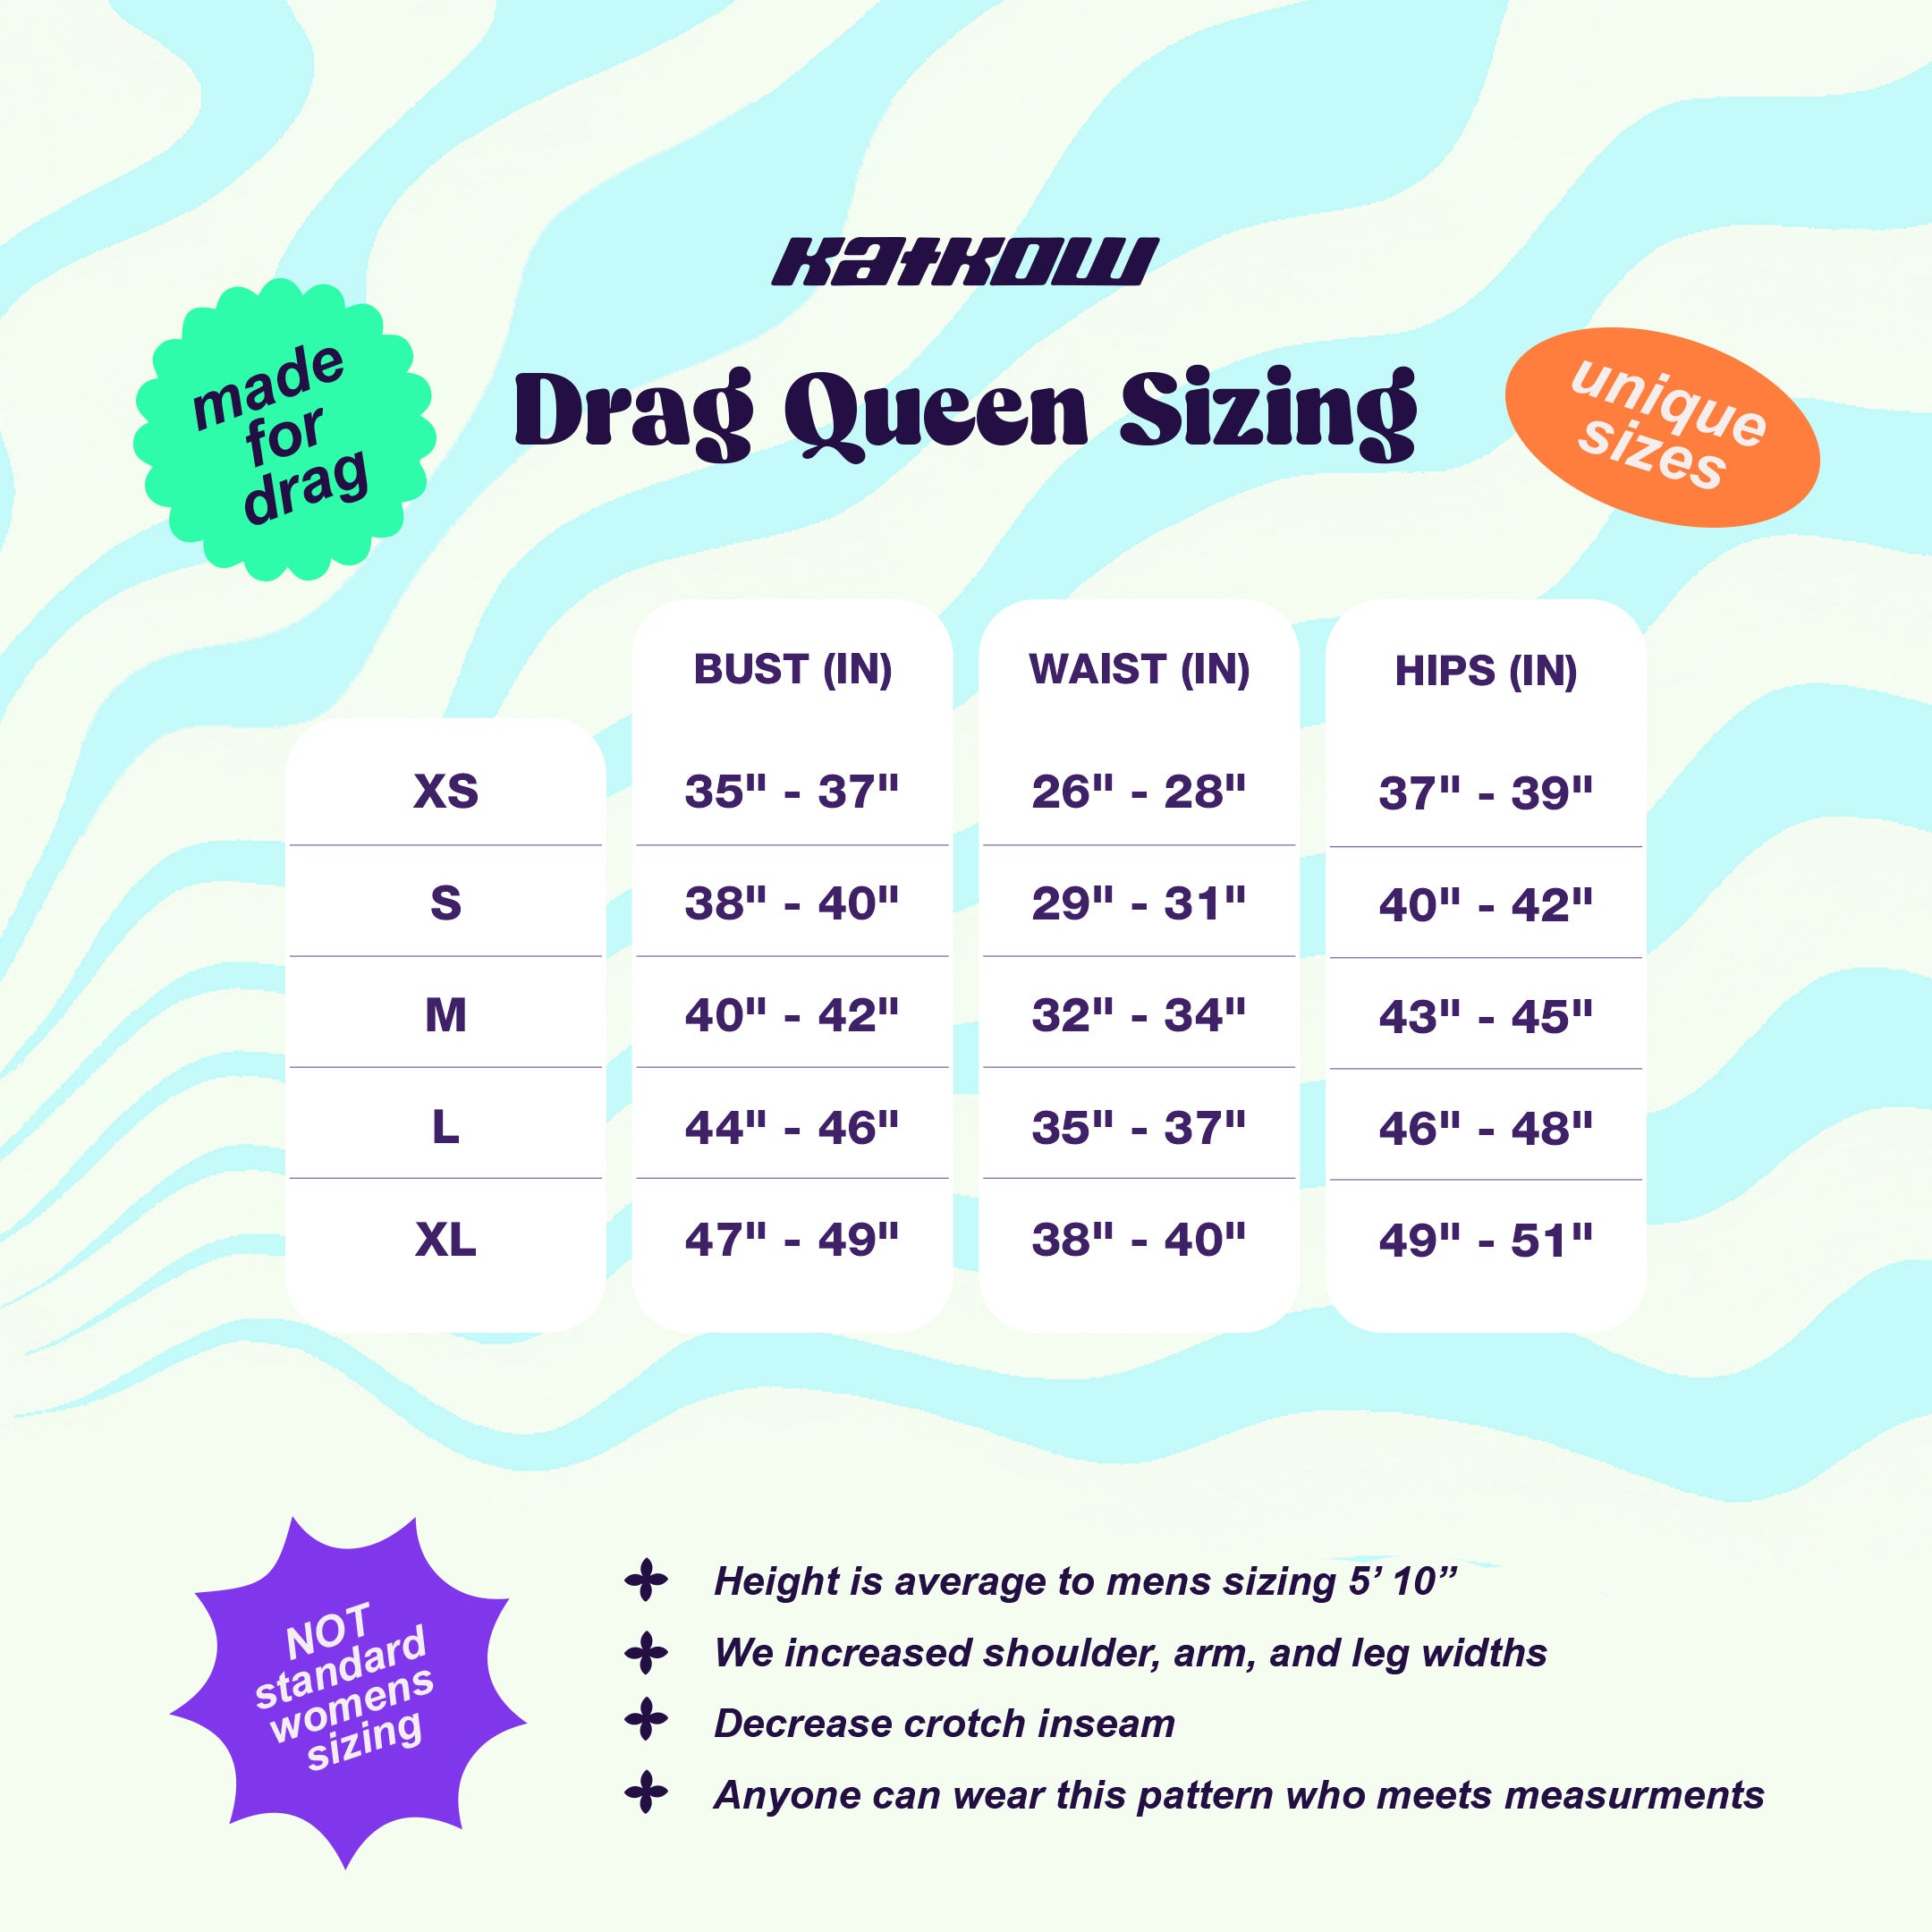
Detalles de tallas
Este patrón está disponible en nuestros exclusivos talles Drag Queen (XS-XL). Consulta nuestra guía de talles para obtener más información sobre nuestras medidas de talle.
Telas y artículos de mercería
Adecuado para tejidos elásticos en 4 direcciones:
- Spandex
- Miliskin
- Licra
- Vinilo elástico
- Tejidos de punto elásticos
- Copa de sujetador de espuma para ilusión de busto
- Varillas flexibles de Rigilene para estructura
- 4 ganchos deslizantes para correas de sujetador
- Cierre de sujetador 3x3 (ganchos y ojales) para una sujeción segura
- Elástico de silicona para un ajuste seguro.
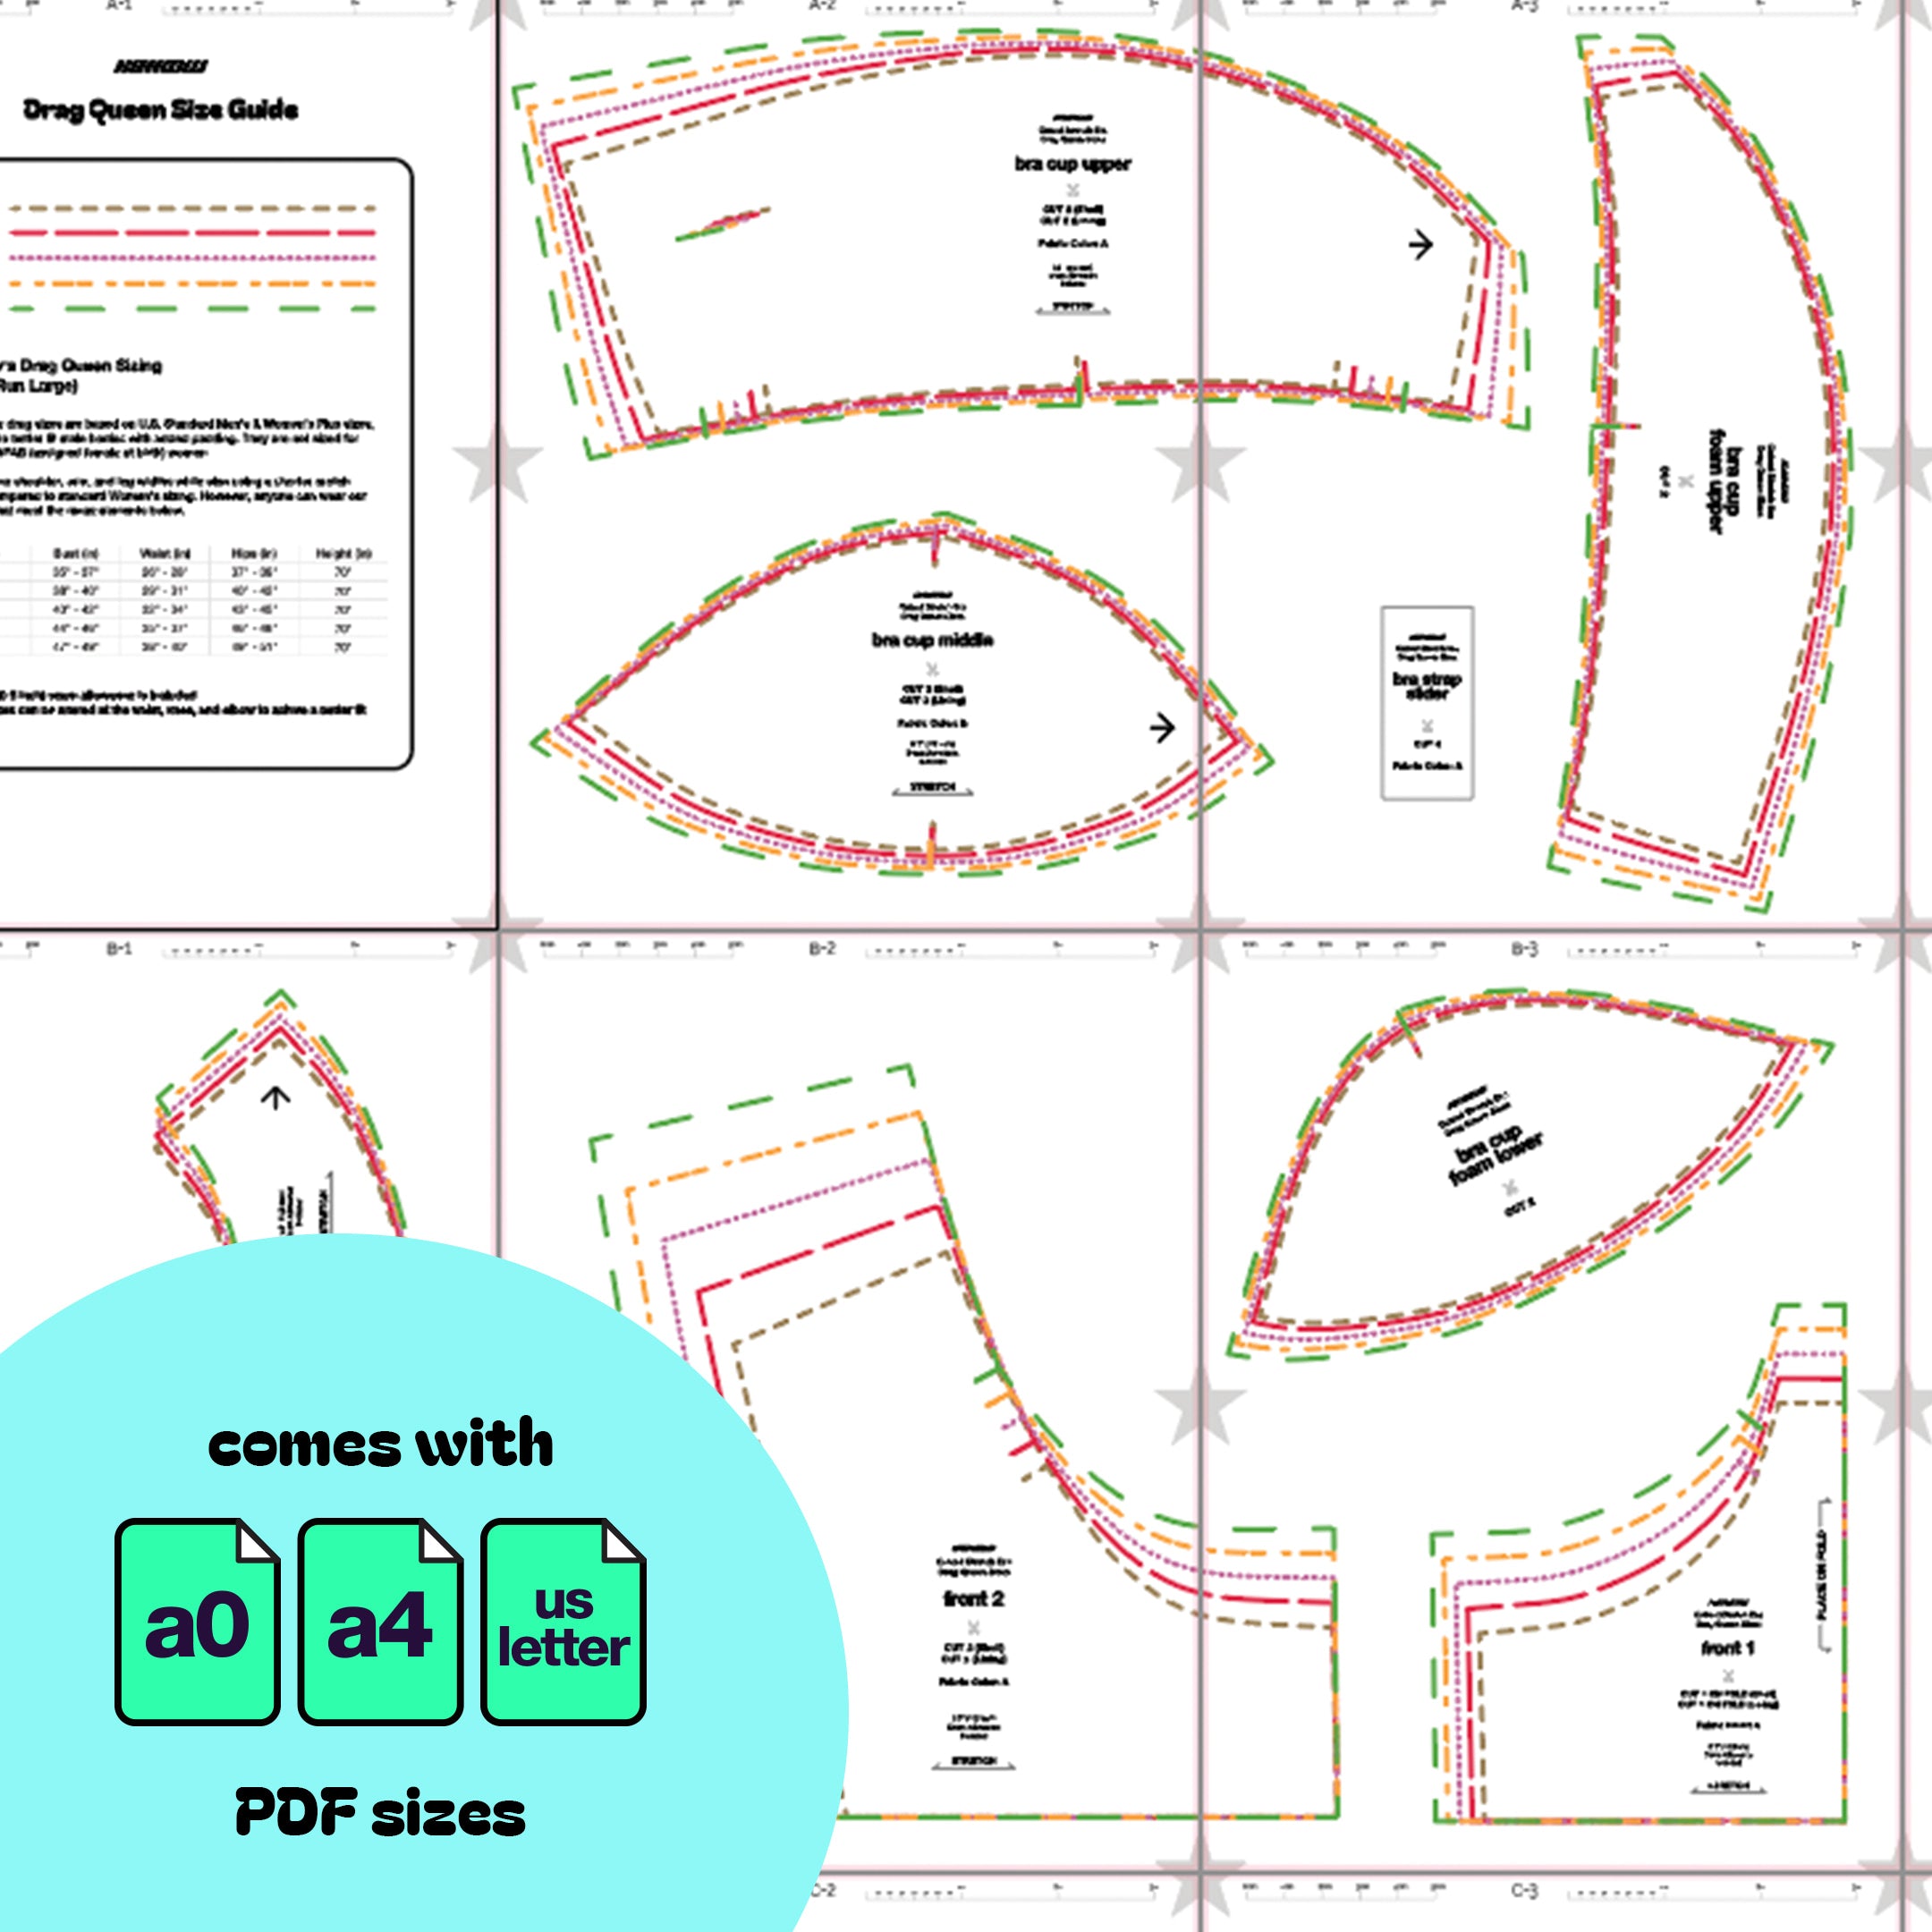
Yardas de tela
Este patrón incluye tanto la capa exterior como el forro. Las piezas de la capa exterior y del forro se incluyen juntas en cada uno de los tamaños que se indican a continuación. El metraje se basa en un ancho de tela de 58 pulgadas.
| Tamaño | Tela A | Tela B | Espuma de sujetador |
|---|---|---|---|
| XS | 0,5 años | 0,25 años | 0,25 años |
| S | 0,5 años | 0,25 años | 0,25 años |
| METRO | 0,5 años | 0,25 años | 0,25 años |
| yo | 0,75 años | 0,25 años | 0,25 años |
| SG | 0,75 años | 0,25 años | 0,25 años |
Para obtener información sobre la conversión de pulgadas a metros, consulte nuestra guía de conversión.
Instrucciones de costura


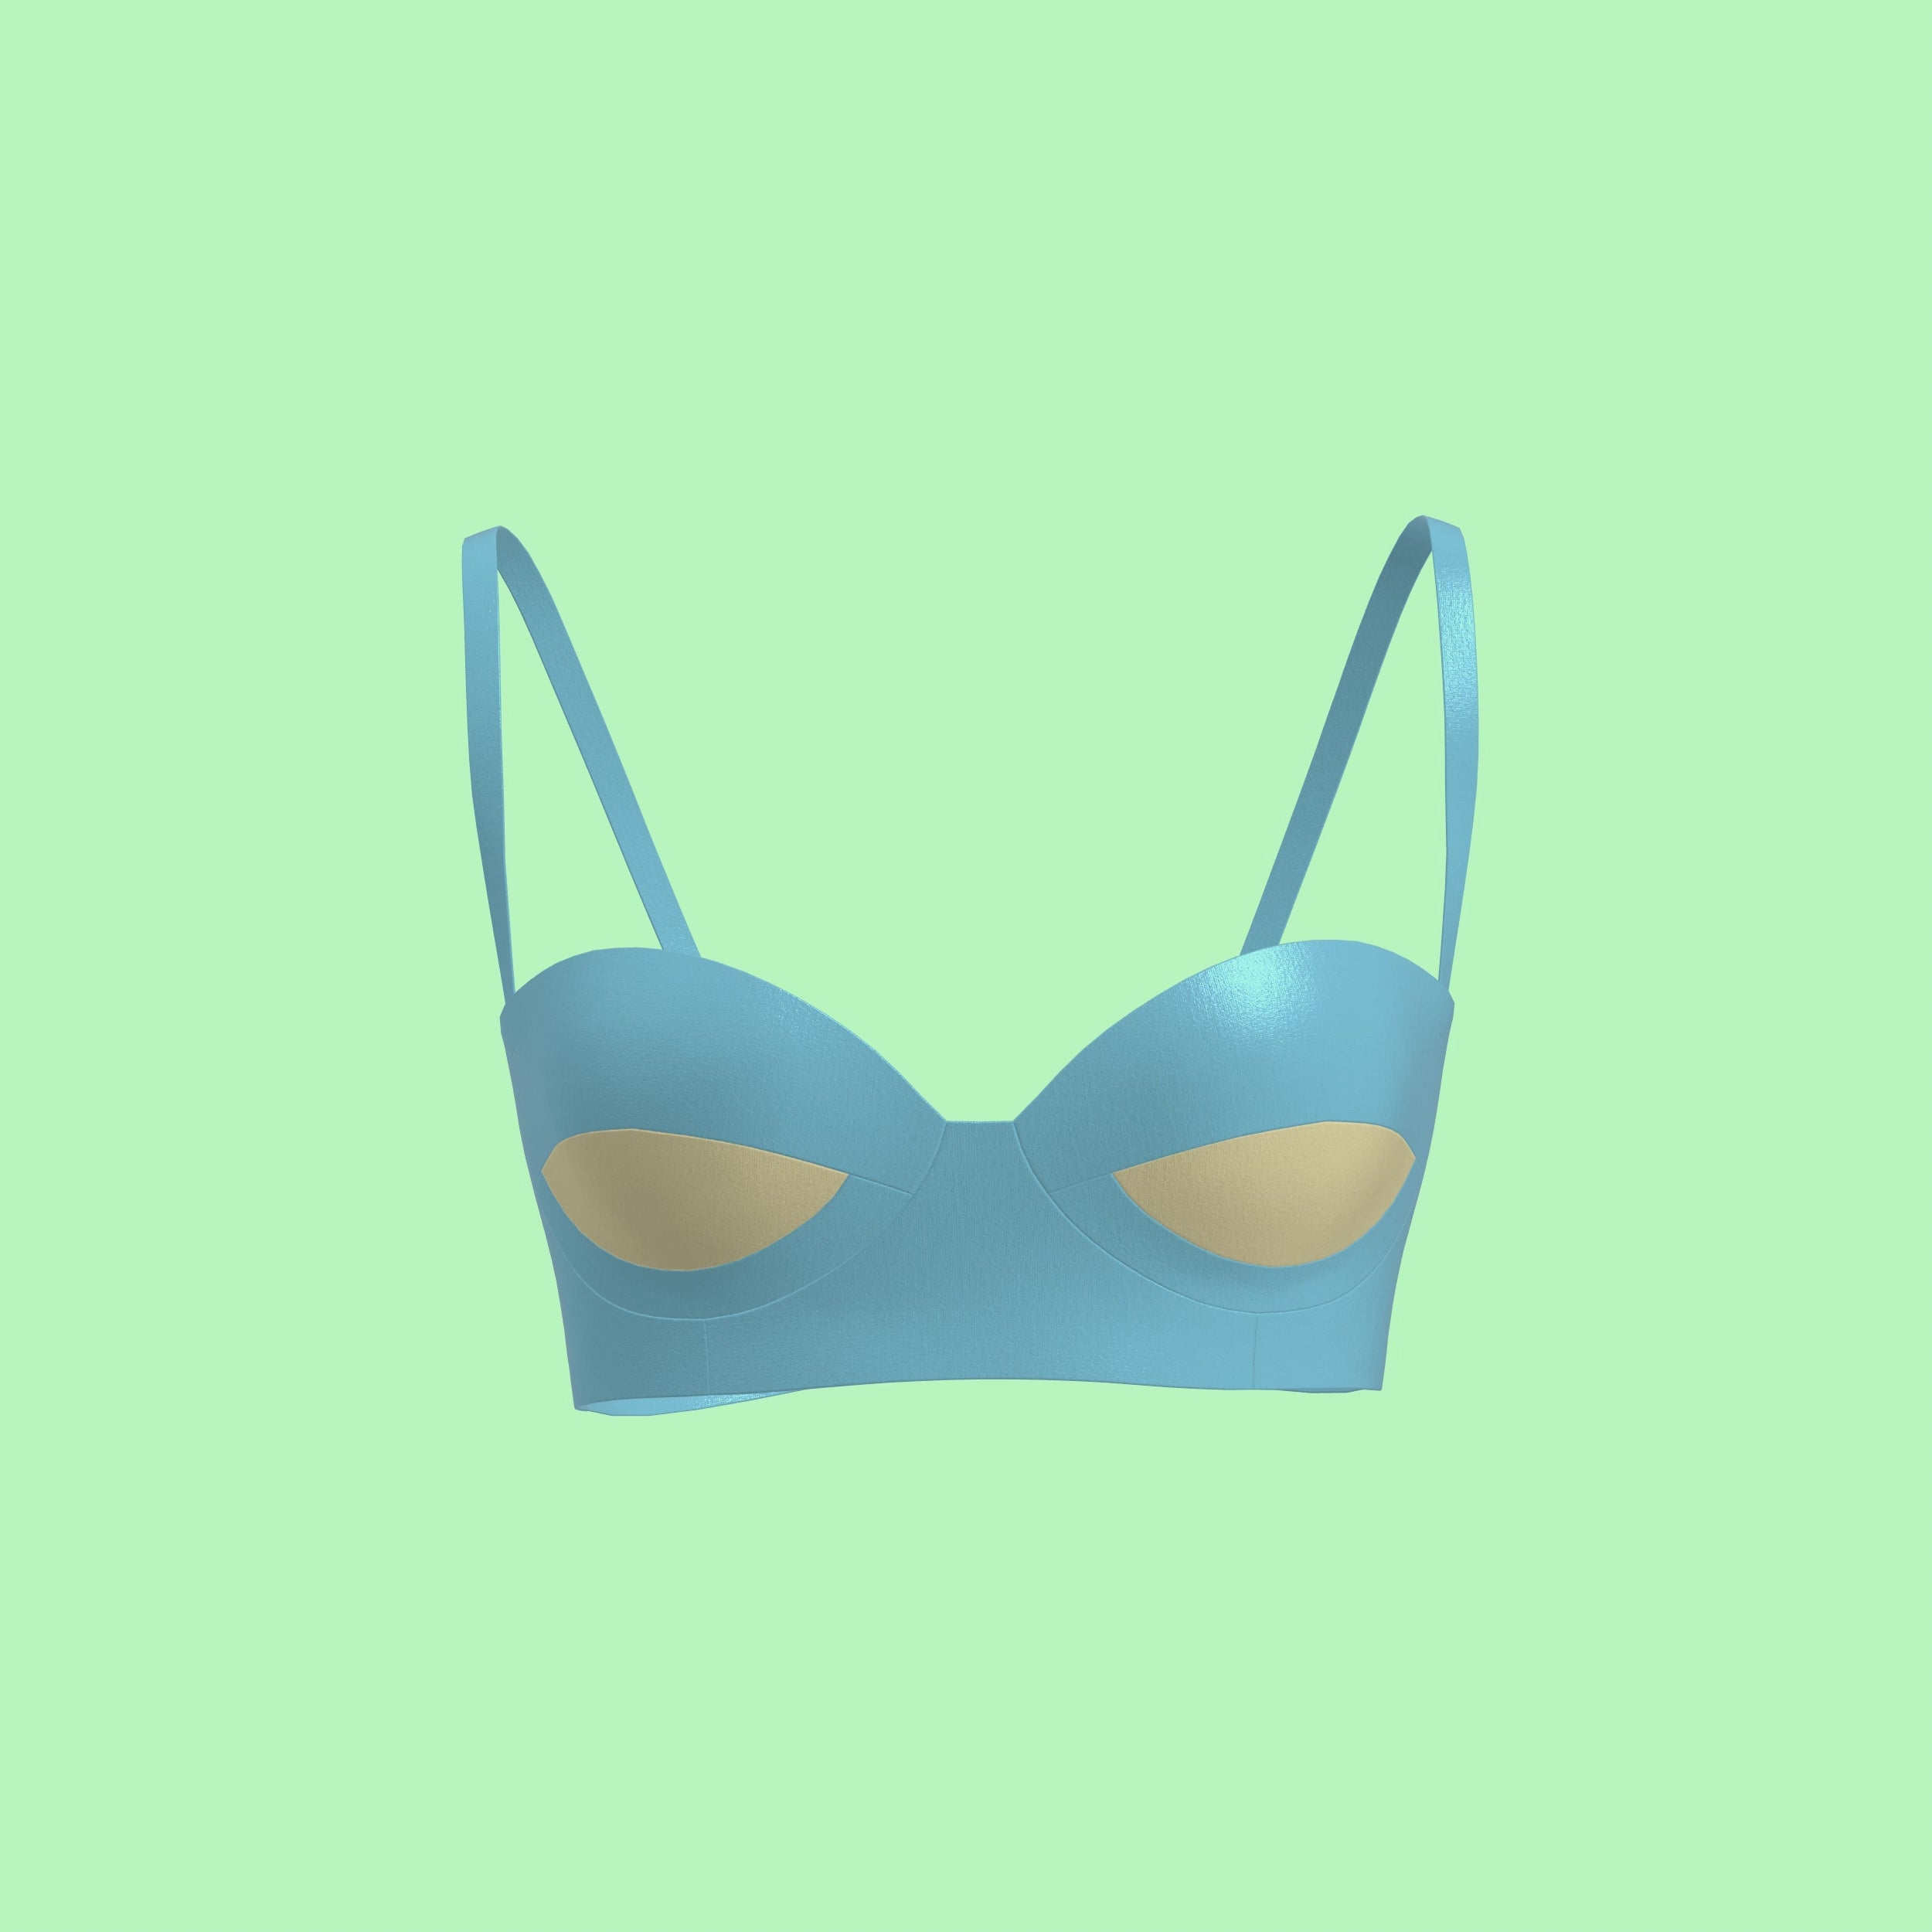
Fabric Pieces
After cutting your fabric, you should have the following pieces:
- 2 bra straps
- 4 bra strap sliders
- 4 upper bra cups (2 shell, 2 lining)
- 4 middle bra cups (2 shell, 2 lining)
- 4 lower bra cups (2 shell, 2 lining)
- 2 front pieces cut on a fold (1 shell, 1 lining)
- 4 front 2 pieces (2 shell, 2 lining)
- 4 back pieces (2 shell, 2 lining)
- 2 upper bra foam cups
- 2 lower bra foam cups

Stitches
Preferred stitches: Stretch stitch, zigzag stitch, or serger overlock stitch. You can use a straight stitch only on non-stretch areas.

STEP 1
Gather the shell middle bra cup and the shell lower bra cup fabric. Position them so the notches and arrows match up. Sew them together with the right sides facing each other. You can use a straight stitch, stretch stitch, zigzag stitch, or serger.

STEP 2
Gather the shell upper bra cup fabric and sew it to the middle and lower piece, matching notches and arrows, with right sides facing each other.

STEP 3
Repeat for the opposite bra cup and the lining fabric pieces.

STEP 4
Gather your foam upper and lower bra cups. Sew them together along the center seam side-by-side with a zigzag stitch.

STEP 5
Gather your bra strap slider pieces. Serge the vertical sides or use a zigzag stitch to prevent the fabric edge from fraying.

STEP 6
Fold the sides inward evenly with the right side of the fabric facing out, and press with an iron. Then fold and press vertically in half. Serge or cut off the seam allowance (0.25 - 0.5 inches). These will be the loops that your bra straps hook into.

STEP 7
Gather your lining bra cups. Position the bra slider over the notch line on the right side of the lining fabric. Sew it down, making sure you do not sew the slider in the 0.5” seam allowance edge.

STEP 8
Gather your shell and lining bra cups. Stack them with right sides facing each other, and sew them along the top edge of the bra cup. Flip the slider inward between the shell and lining so you do not sew over it.

STEP 9
Flip the bra cup so the right side is showing for both the shell and lining. Insert the bra foam cup between the layers. Then sew all layers together along the bottom edge using a zigzag stitch or serger. Do not cut off or trim the bottom seam allowance here.

STEP 10
Gather the shell front and back pieces. Sew them together with right sides facing each other using a stretch stitch.

STEP 11
Repeat for the lining front and back pieces.

STEP 12
If you wish to wear the bra without straps, you may need boning to help keep it in place.
On the wrong side of the shell fabric, fold and press the seam allowance outward facing the sides of the bra. Sew flexible rigilene boning over the seam allowance or create tunnels to insert the boning into.
Ensure the edges of the boning are smooth to prevent fabric tears. The boning should be 1 inch less than the total height of each seam to allow for hemming around the seam allowance.

STEP 13
On the right side of the lining fabric, sew non-slip silicone elastic to the top and bottom edges of the back pieces. The elastic should be placed away from the 0.5-inch seam allowance and should be 1-2 inches shorter than the width of the edges. The height of the elastic can be between 0.5-1 inch. Sew with a zigzag stitch with the silicone facing up.

STEP 14
Position the bra slider over the back notch line on the right side of the lining fabric. Sew it down over the elastic, making sure you do not sew the slider in the 0.5” seam allowance edge.

STEP 15
Stack the shell and lining pieces with right sides facing each other. Sew along the top and bottom edges with a zigzag stitch. Do not sew the bra cup edges or the center back edges.

STEP 16
Flip the bra right side out.

STEP 17
Flip the bra over so the right side of the shell is facing up. Stack the bra cup on top with the right side of the lining facing up. Sew the bra cup around the curve, matching notches with a stretch or zig zag stitch.

STEP 18
Once the bra cups are sewn on, flip it over to the lining side. You can cover the raw edges of the bra cup with bias tape or extra shell fabric, or you can serge and cut off the excess.

STEP 19
Insert the 3x3 bra closure pieces in the center back edges. Flip the seam allowance inwards and top stitch the closures down. Sew multiple lines to secure the closures.

STEP 20
Gather your strap pieces. With the right side up, flip them over vertically in half. Sew the open ends together with a stretch stitch, small zigzag stitch, or serger. Trim off excess seam allowance. You can then flip the strap inside out using a loop turner or safety pin. Your straps should be a little less than 0.5 inches wide.

STEP 21
Measure your strap height to your liking, then sew on G slider hooks to the ends of your straps.